
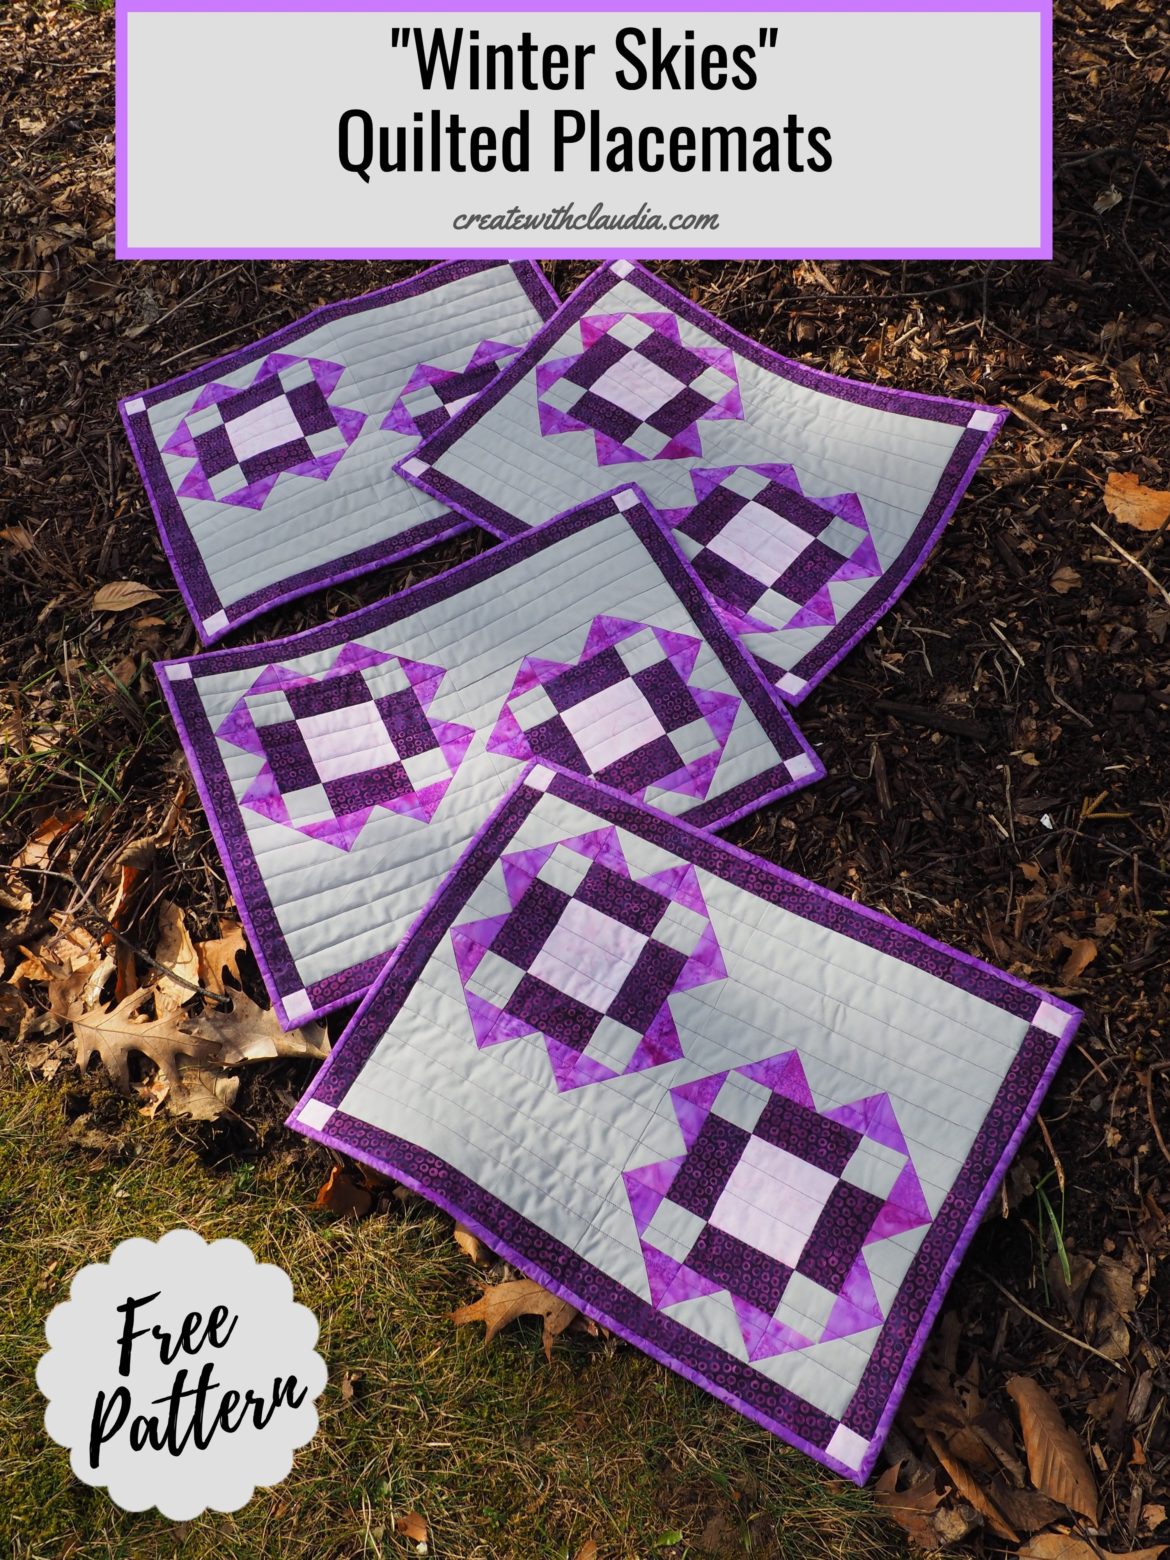
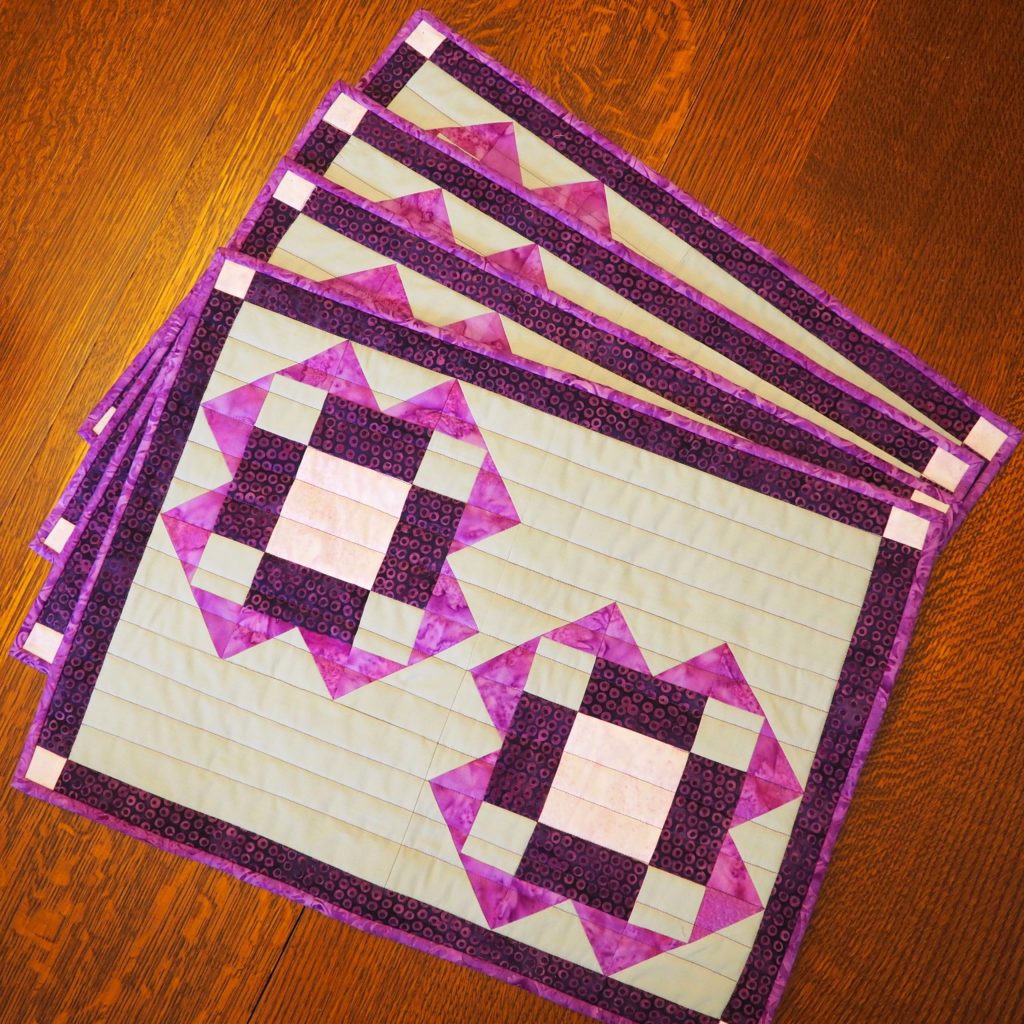
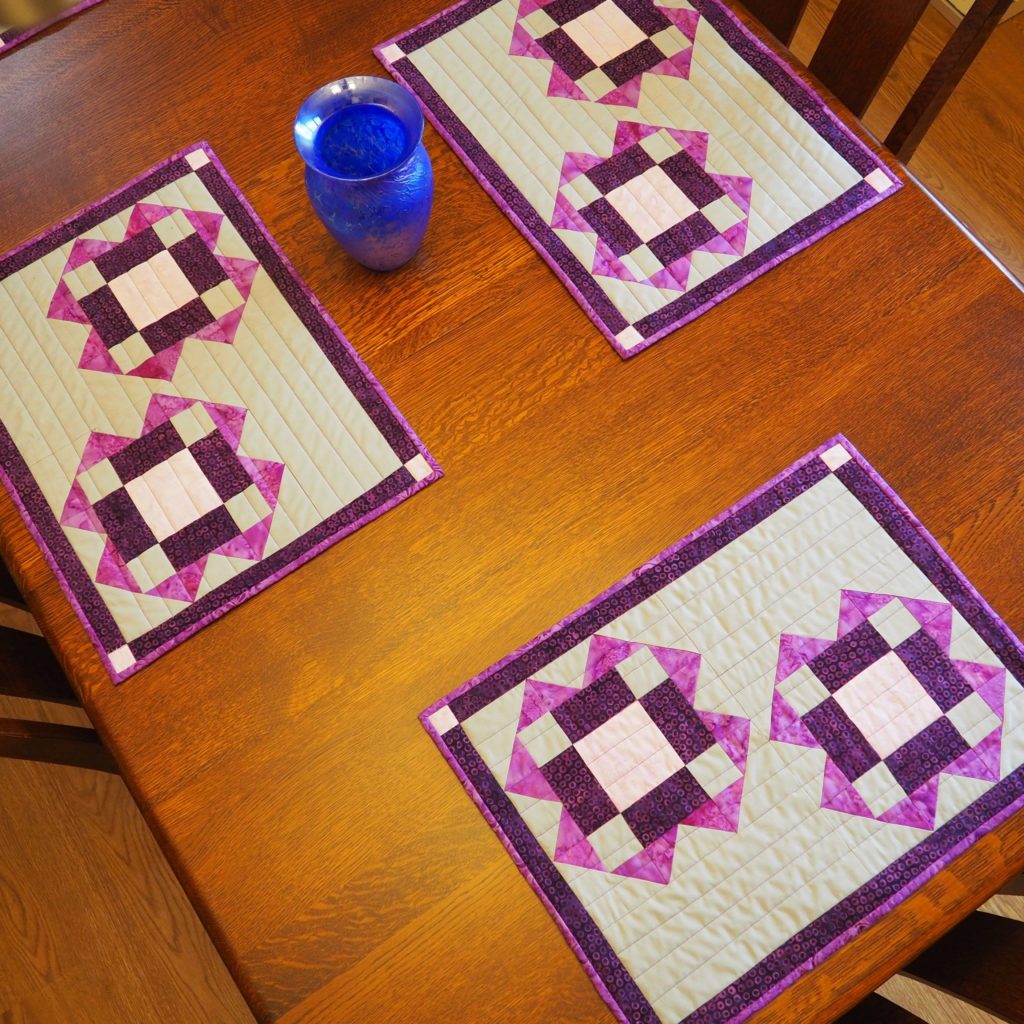
Quilted Batik Placemats Pattern – Winter Skies
I live in an area that can be very gray in the winter, and if the light is just right at dawn or dusk, there is a purple hue to the clouds. I’ve always wanted to capture that look in a quilt design. That is why, when I saw these batiks that I got in my Island Batik Ambassador box, I knew I wanted to combine them for a project. The perfect opportunity came along with my very first challenge as an ambassador…placemats. I came up with this quilted batik placemats pattern.
I’m so pleased with the way they turned out. To be honest I’m kind of nervous to put them out because I don’t want anything to get spilled on them and, knowing me, something probably will.
Island Batik Program
I was honored to be chosen as one of the Island Batik Ambassadors for 2021 and cannot wait to bring you all sorts of beautiful projects using their fabrics and the sponsor products that were so generously provided to us.

Disclosure: The materials used to create this pattern were provided by Island Batik, Aurifil Thread, and Hobbs Batting.
Please read through all of the instructions carefully before beginning.
Pattern Specifications
- Use a ¼ inch seam allowance
- Each placemat measures 20” x 15”
Get the Look

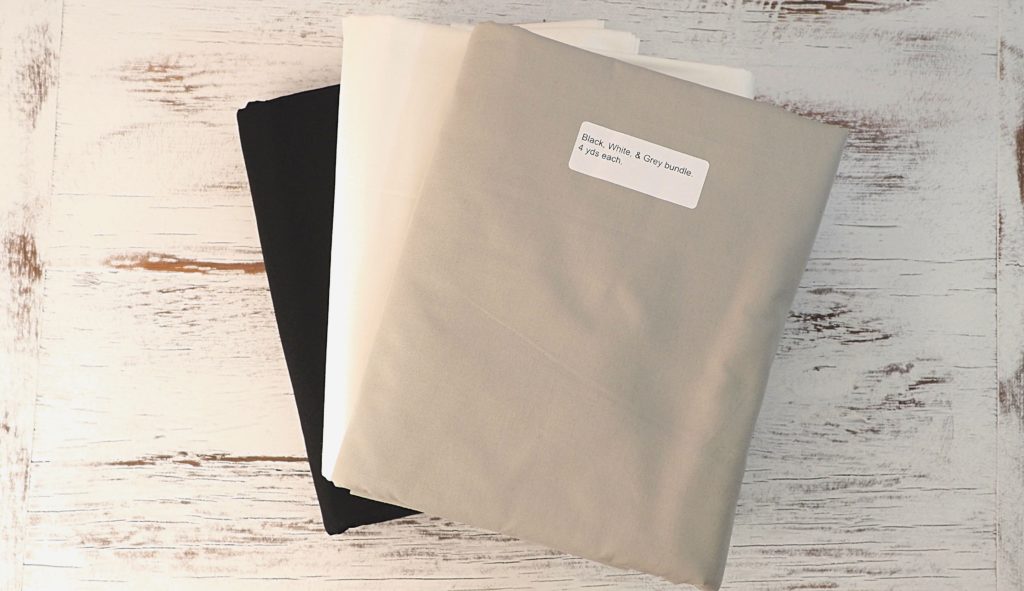
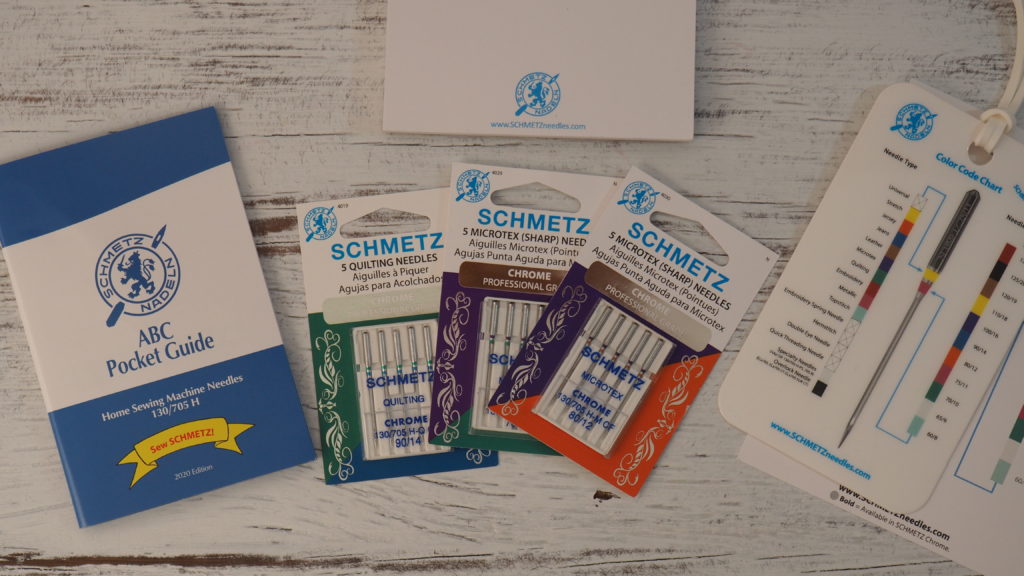
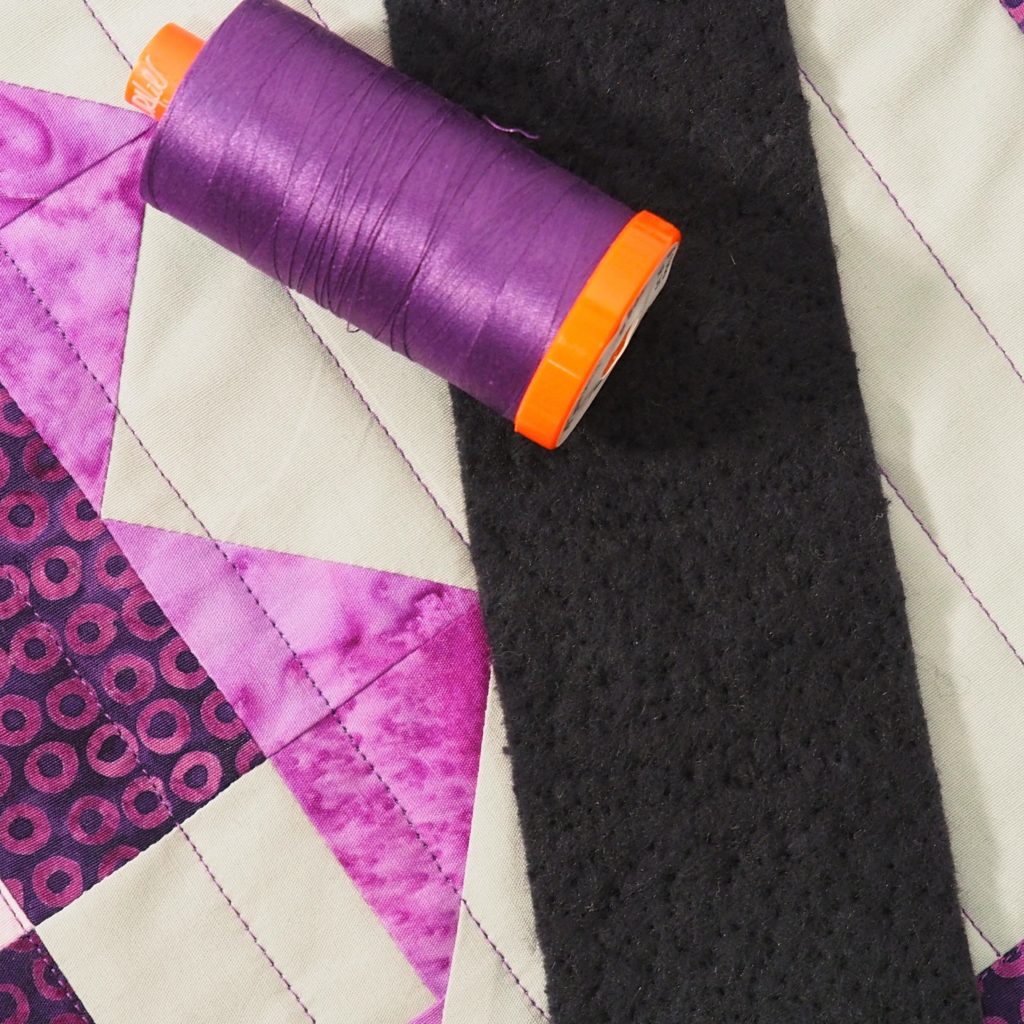
For this project I used Island batik solid gray and a packet of purple stash builders. To finish off the placemats I used Aurifil “Eggplant” #4225 thread and Hobbs 80/20 black batting. For sewing I used Schmetz needles.
You can find many of the items that I used to make this project in my Amazon Store.
As an Amazon Associate I earn from qualifying purchases.
Winter Skies Quilted Batik Placemats Pattern
Note that the fabric requirements and cutting instructions are for 4 placemats. Adjust as desired.
*Download the Winter Skies Placemats Pattern Here*
Prefer Watch a Video? Here’s My Tutorial for the Quilted Batik Placemats Pattern on YouTube
Fabric Needed (for 4 placemats)
- Fabric A: ¾ yard, Fabric B: 1/8 yard, Fabric C: ¼ yard, Fabric D: ¼ yard
- Backing ¾ yard
Cutting (for 4 placemats)
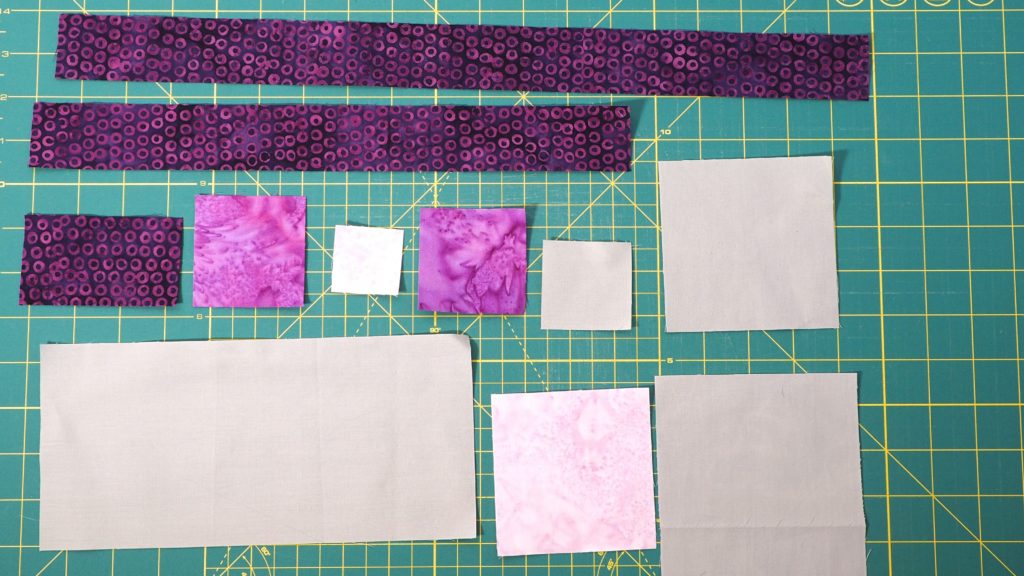
Fabric A:
- 8 rectangles – 4 ½” x 9 ½”, 32 squares – 2” x 2”, 8 squares – 4 ½” x 4 ½”, 16 squares – 3 7/8” x 3 7/8”
Fabric B:
- 8 squares – 3 ½” x 3 ½”, 16 squares – 1 ½” x 1 ½”
Fabric C
- 32 rectangles – 2” x 3 ½”, 8 strips – 1 ½” x 13 ½”, 8 strips – 1 ½” x 18 ½”
Fabric D
- 32 squares – 2 ½” x 2 ½”, 32 squares – 2 3/8” x 2 3/8”
Placemat Assembly (Instructions for 1 placemat)
Step 1 – Make the Flying Geese
You will need 2 of the 4 ½ inch Fabric A squares and 8 of the 2 ½ inch Fabric D squares.)
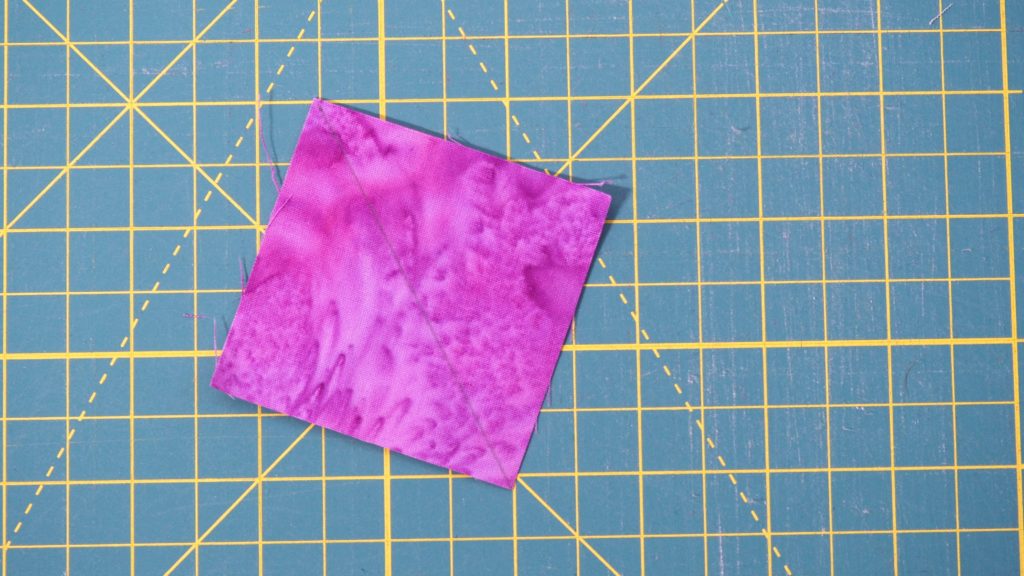
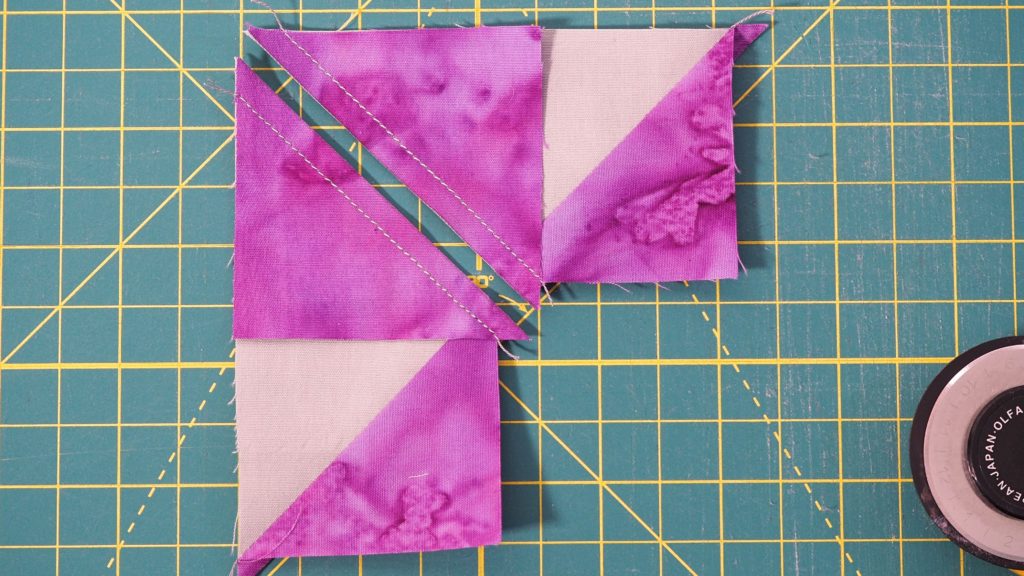
1 Draw a diagonal line on the back (wrong) side of the small squares.
2. Line up one of the small squares on top of one of the large squares with right (front) sides facing. Line up another small square on the opposite corner.
Using a ¼ inch seam allowance, sew down each side of the line drawn.
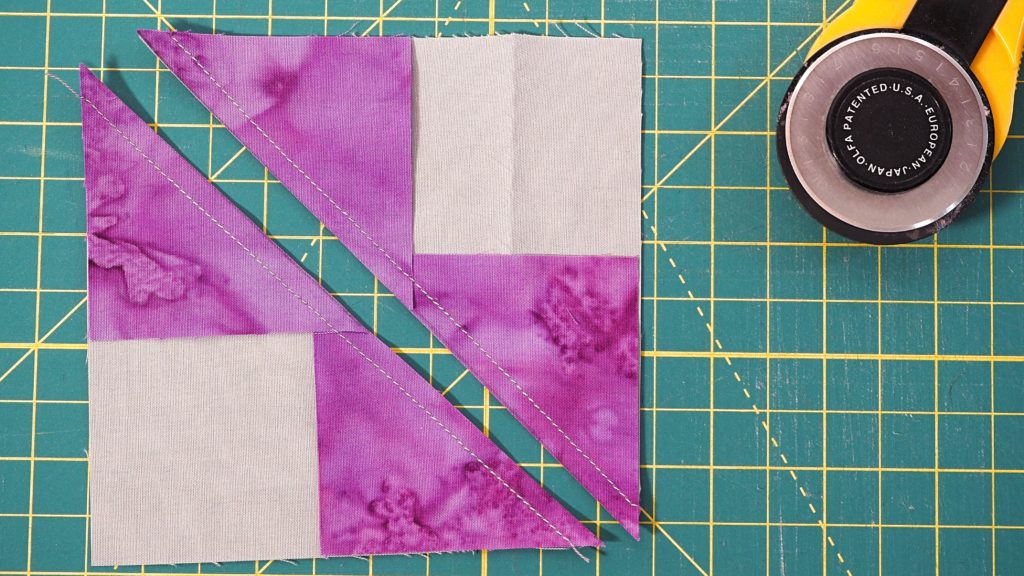
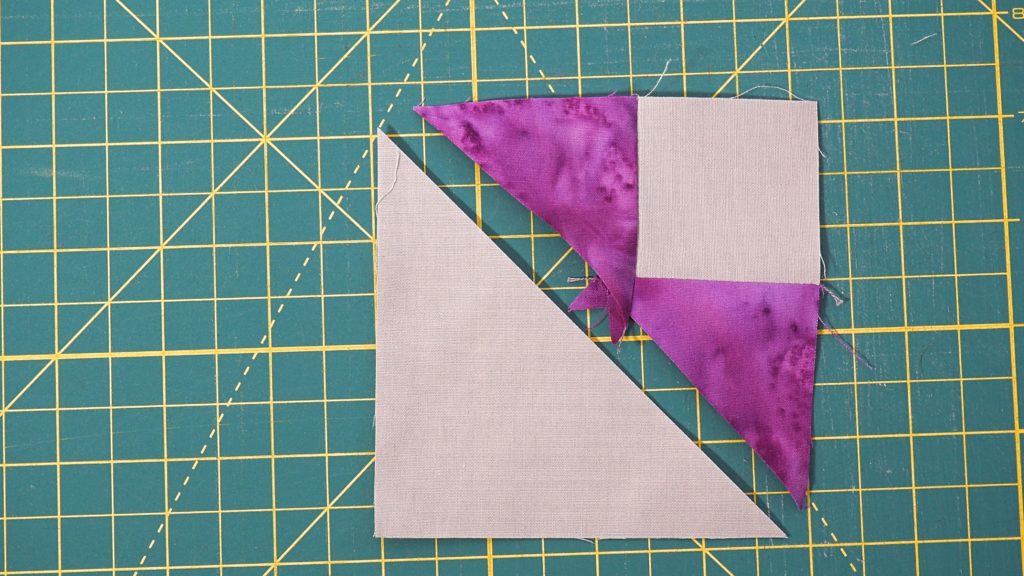
3. Then cut in half along the drawn line.
Press towards the small triangles so that you have two units like this.
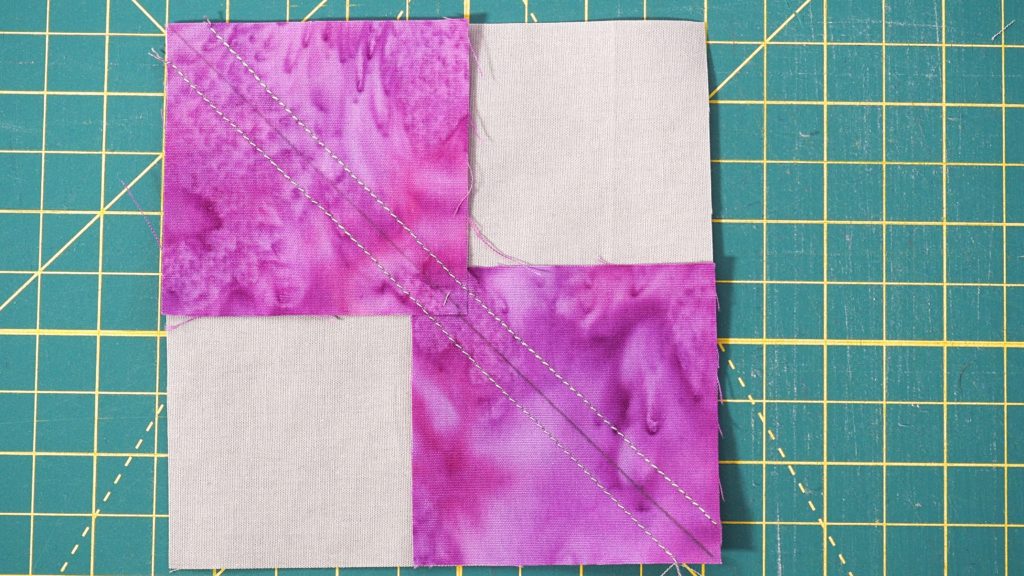
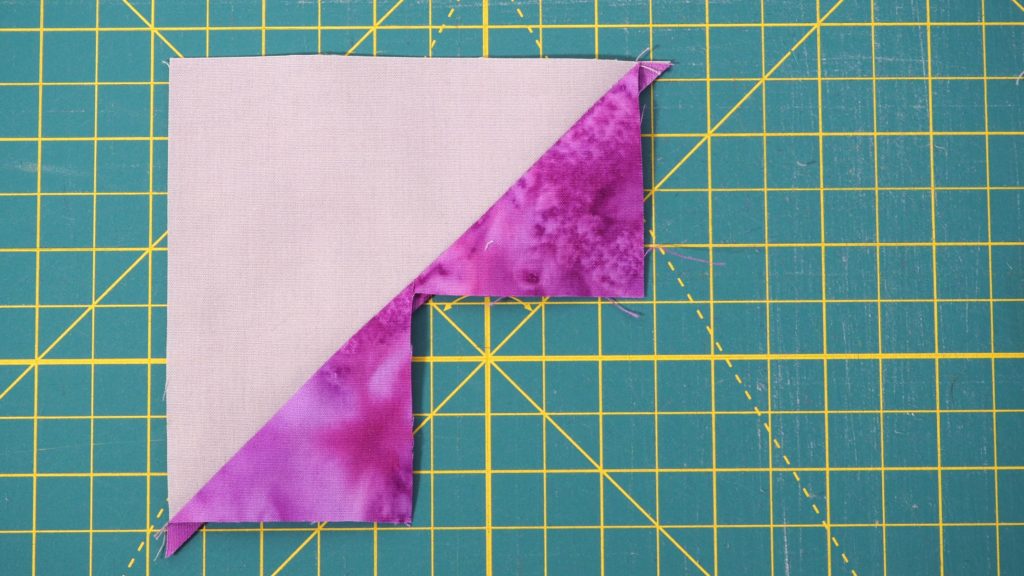
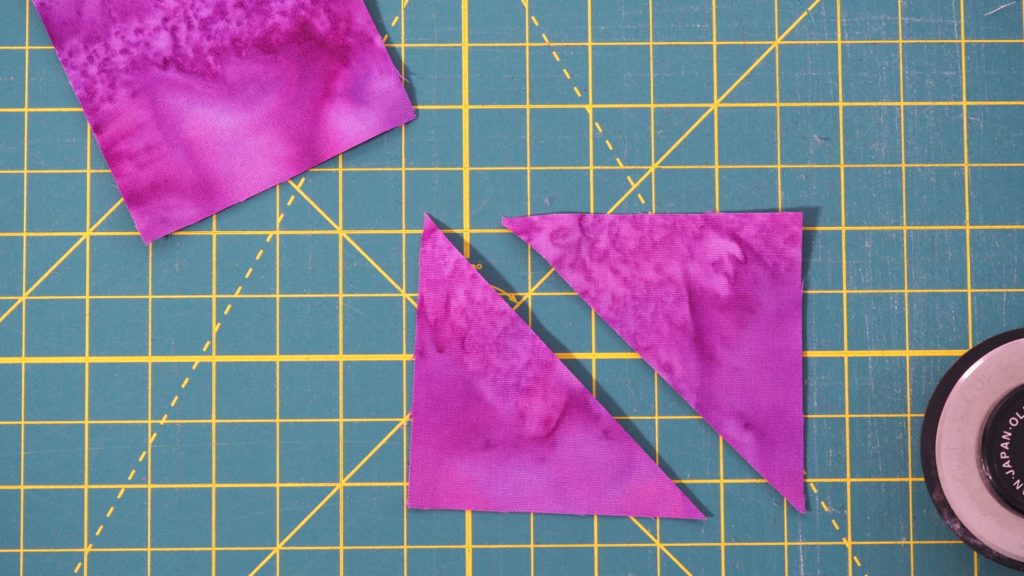
4. Using one of these units, take another one of the 2 ½ inch squares and line it up on the remaining corner (right sides facing).
Using a ¼ inch seam allowance, sew along both sides of the drawn line.
Then cut along drawn line and press towards the small triangles. You will have four flying geese units. Lastly, trim them down to 2 inches by 3 ½ inches.

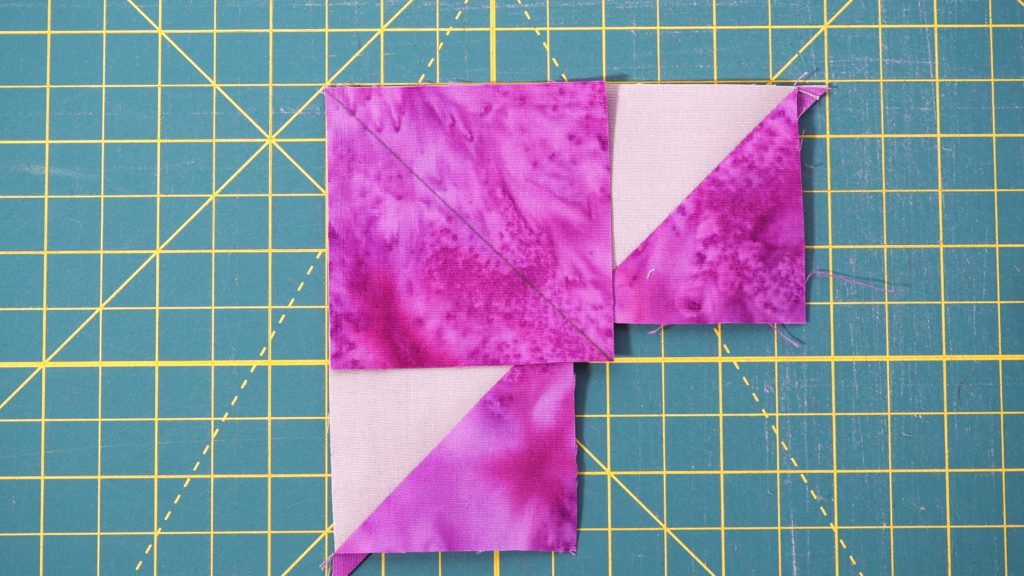
Repeat all steps to get four more flying geese. You will need eight total for 1 placemat.
Step 2 – Assemble the Corner Units
For this you will need 8 of the 2 3/8” Fabric D squares, 8 of the 2” Fabric A squares, and 4 of the 3 7/8” Fabric A squares.
1 Cut the eight fabric D squares that measure 2 3/8” in half on the diagonal. You will have 16 triangles.
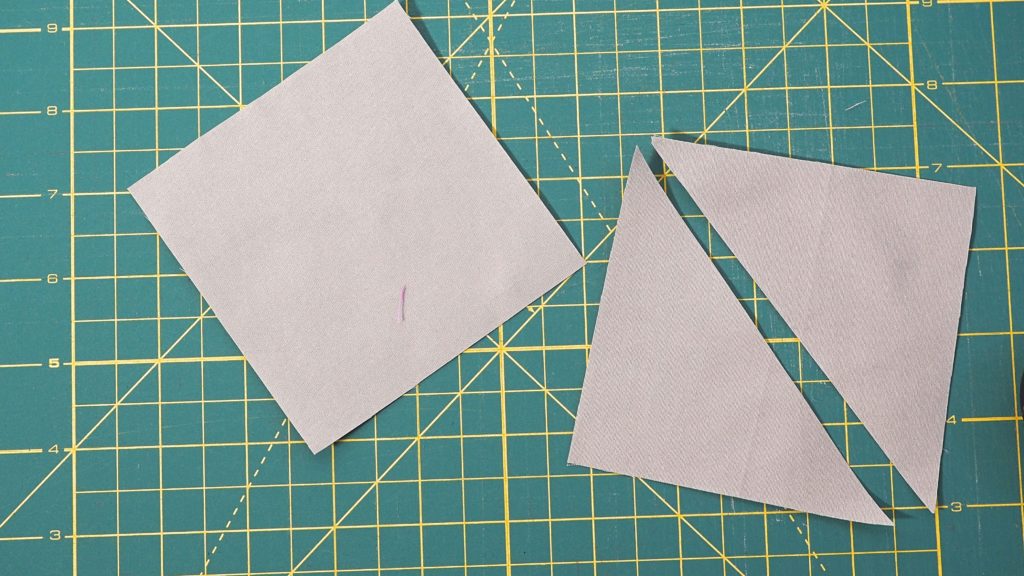
2. Cut the four fabric A squares that measure 3 7/8” in half on the diagonal. You will have 8 triangles.
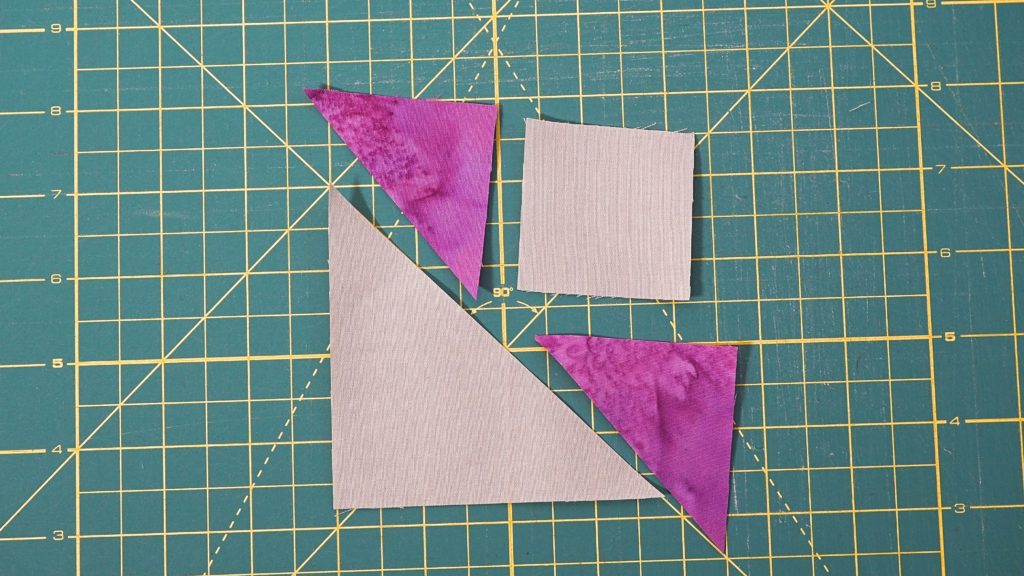
3. Assemble one corner using a 2” fabric A square, 2 of the smaller fabric D triangles, and 1 of the larger fabric A triangles.
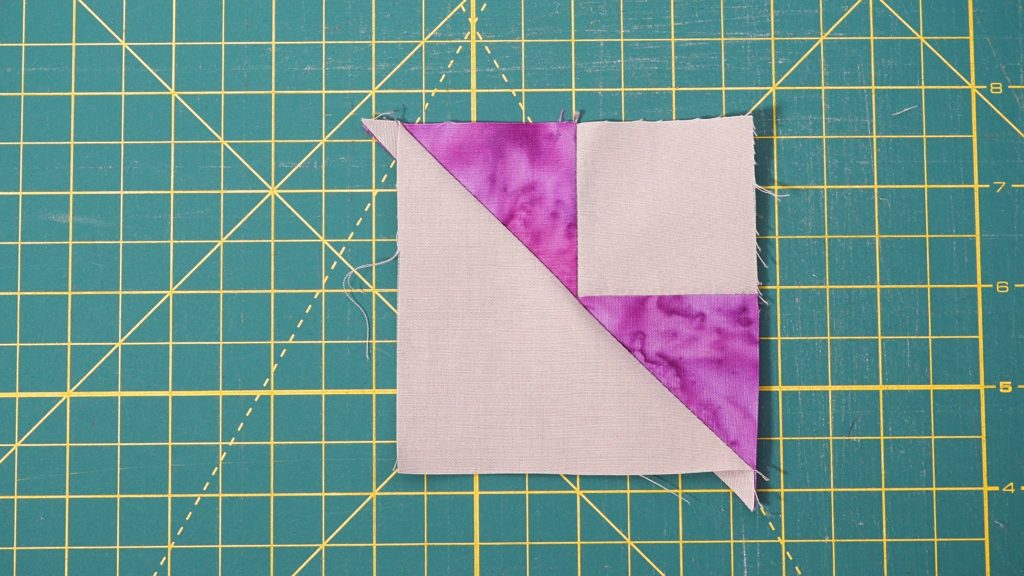
Repeat until you have 8 corner units that look like this.
Assemble the Inside Portion of the Placemats
The inside section of the placemats is made up of two blocks and the two fabric A rectangles.
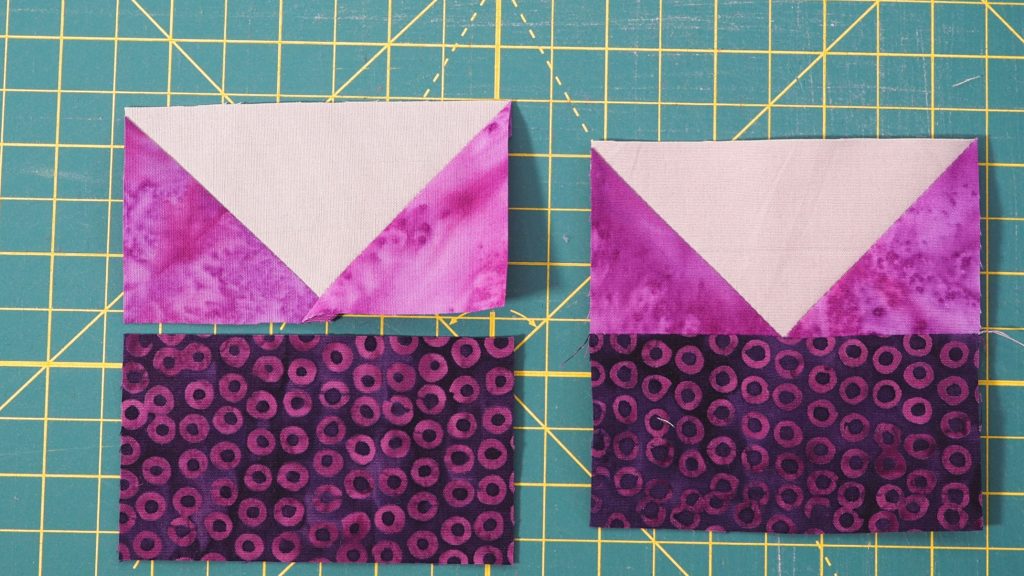
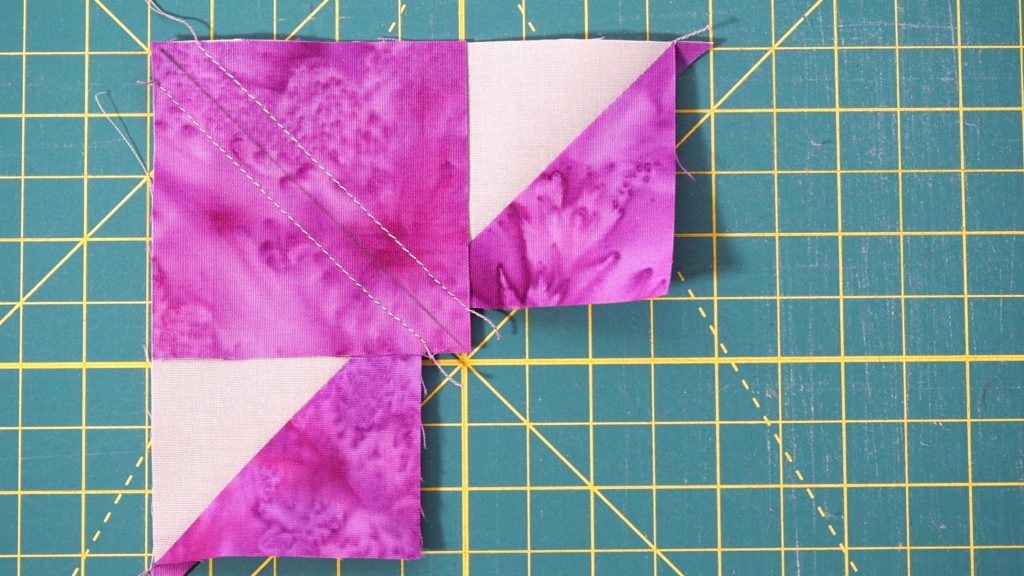
- Sew together a flying geese units and a 2” x 3 ½” fabric C rectangle. Repeat until you have eight of these units.
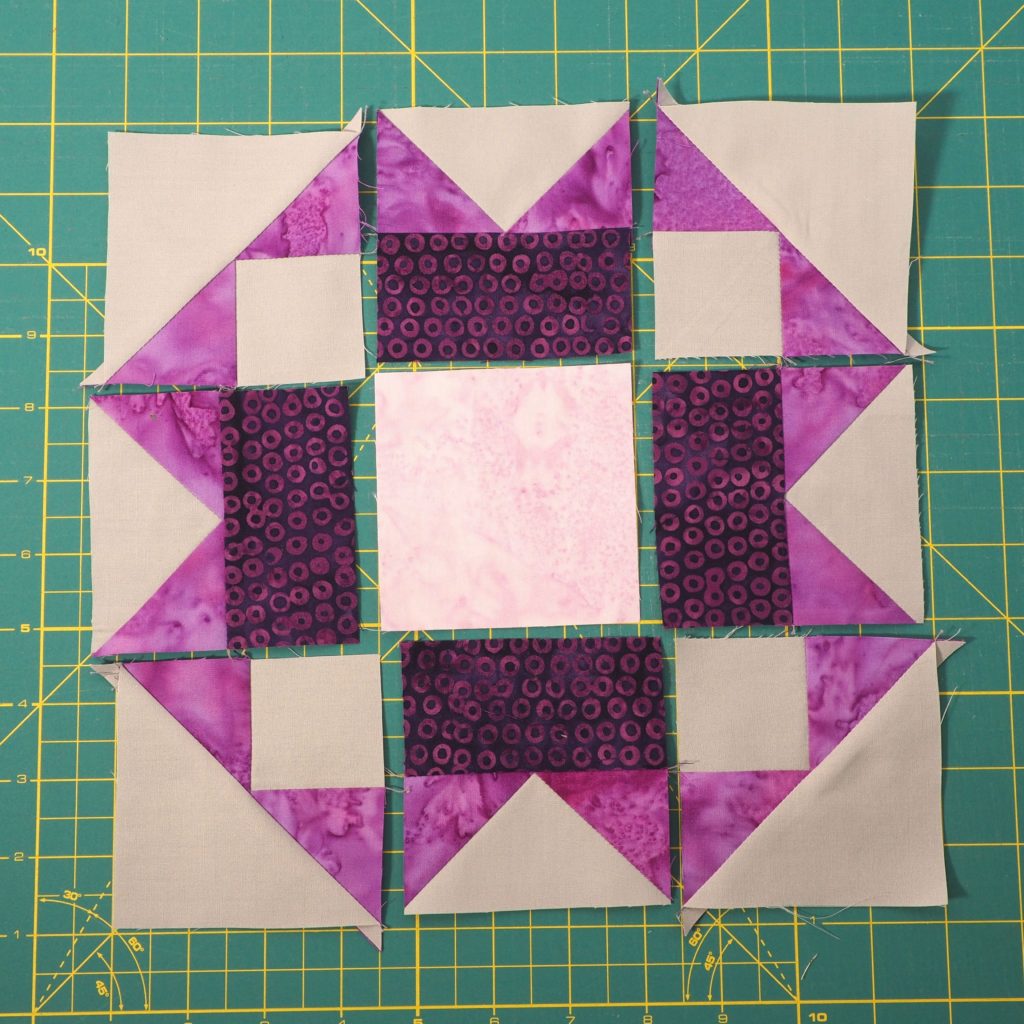
2. Lay out the units as show for both of the blocks.
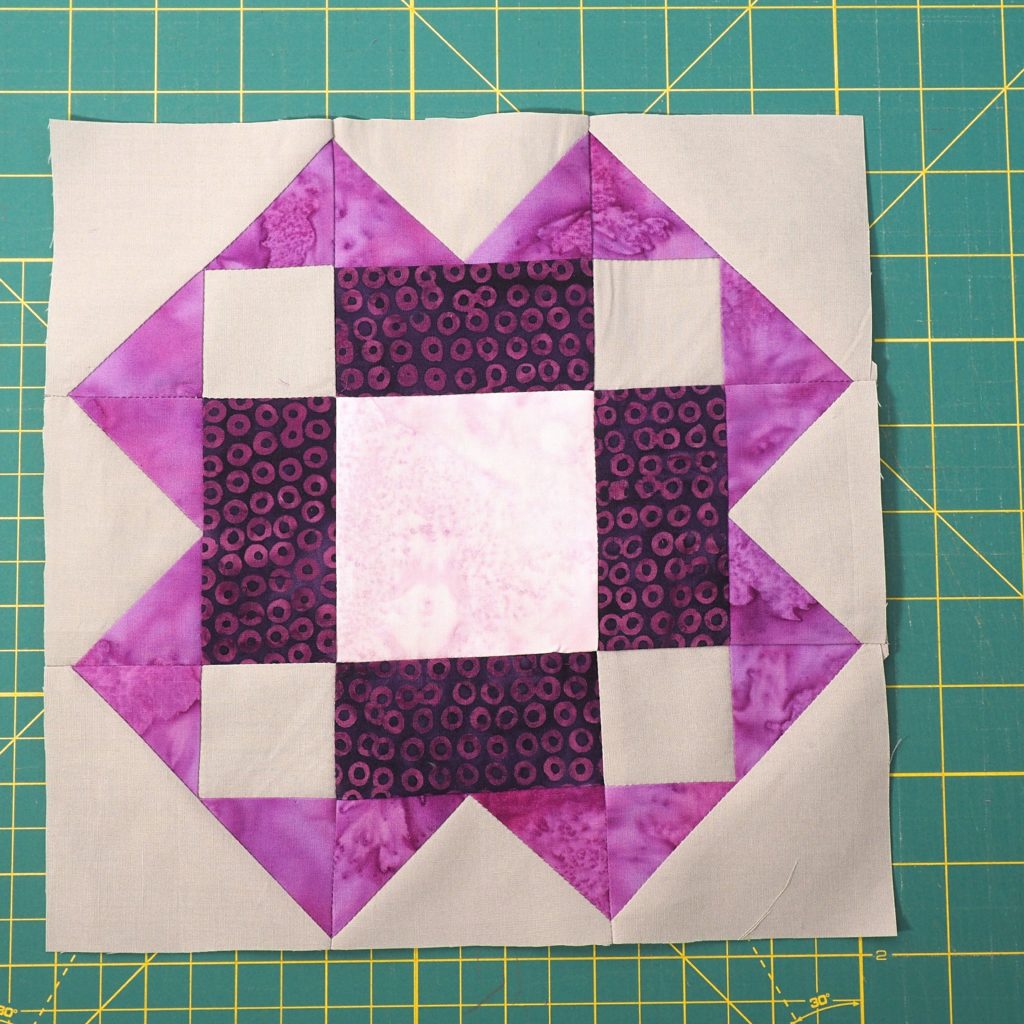
3. Then sew the block together. The blocks should measure 9 1/2″ square, so trim if needed. You need two of these blocks for one placemat.
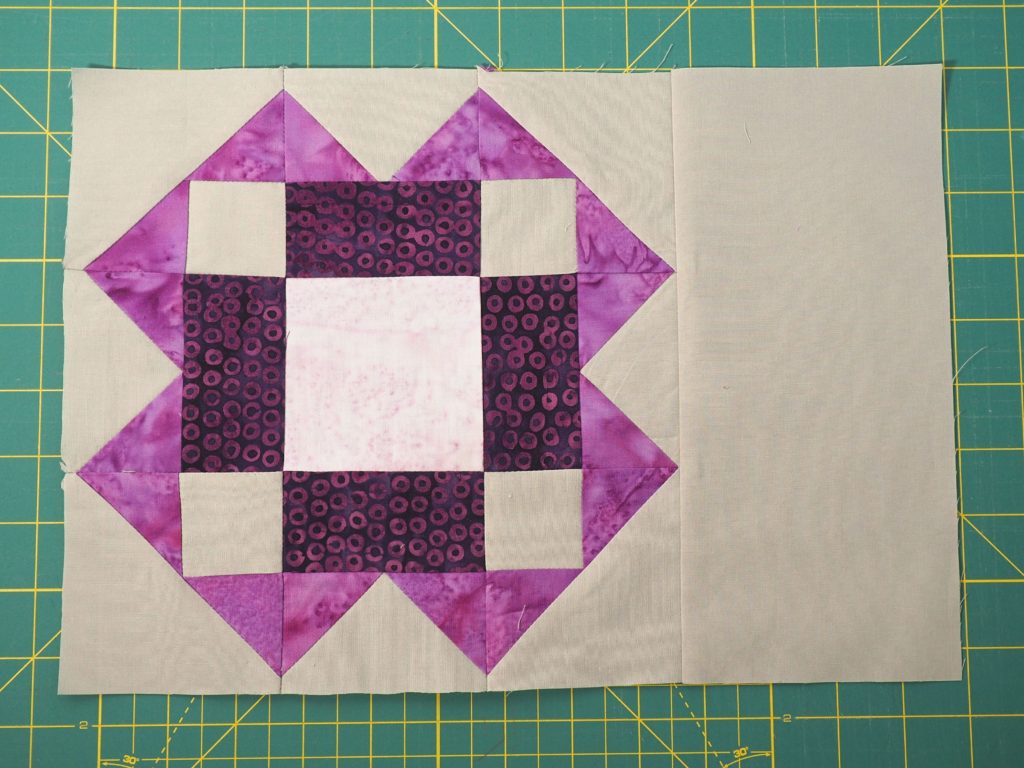
4. Add one of the larger rectangles of Fabric A to one end of each of the blocks.
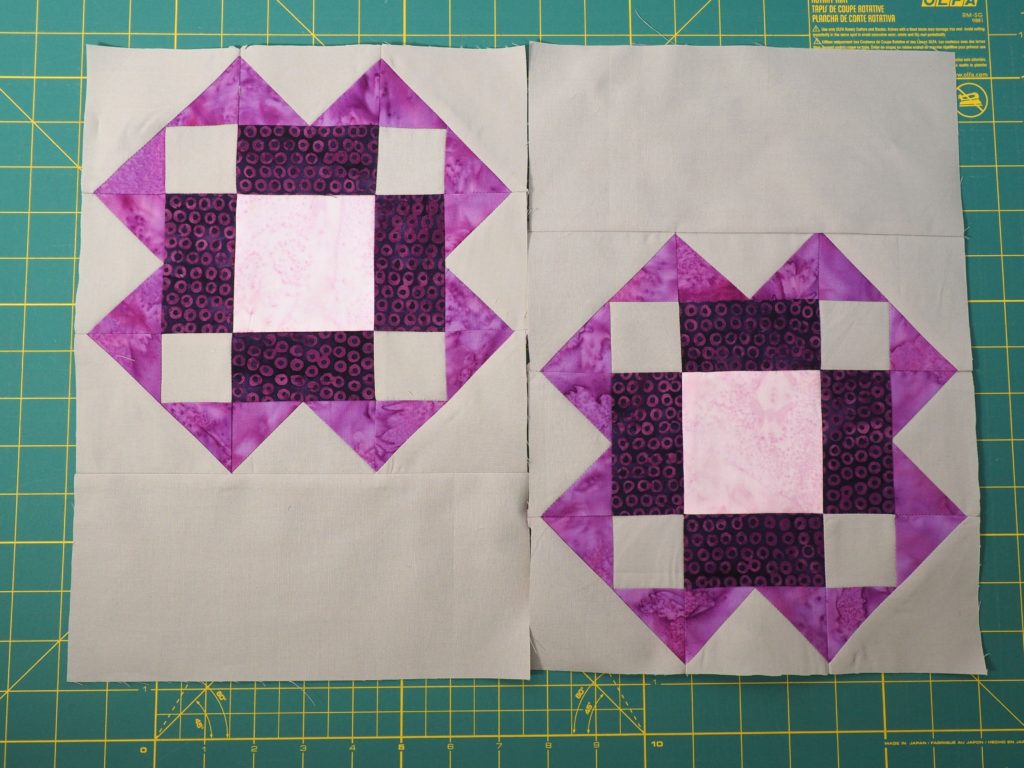
5. Sew these two units together on the long side to form the inside of the placemat.
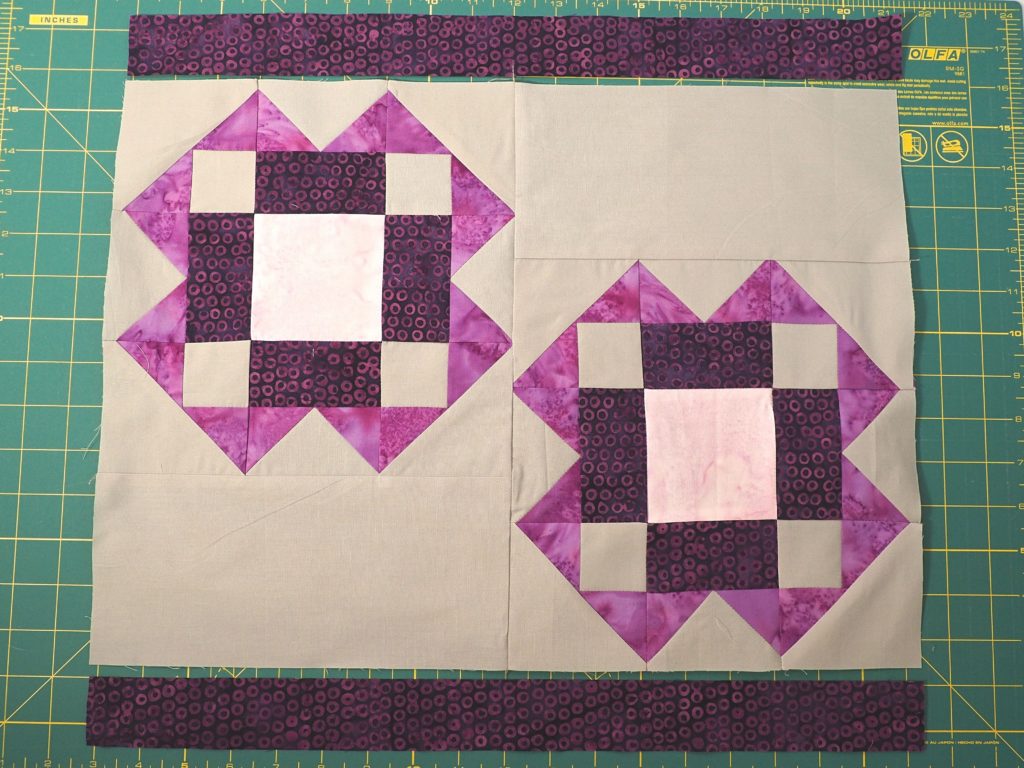
6. Using the two strips measuring 1 ½” x 18 ½”, sew one to the top and one to the bottom of the long side.
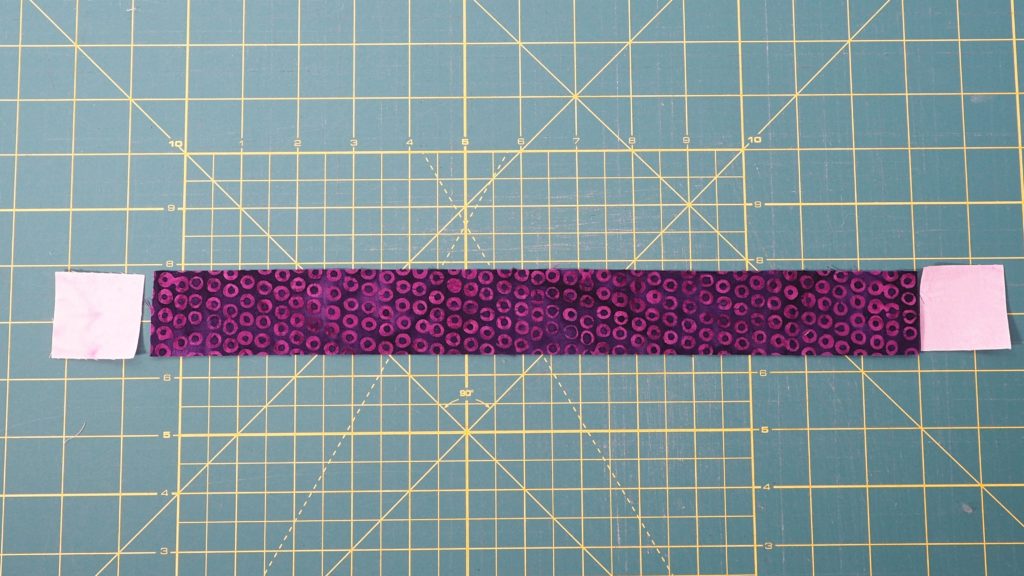
7. Add one of the 1 ½” squares of fabric B to both sides of the shorter strips that measure 1 1/2″ x 13 1/2″.
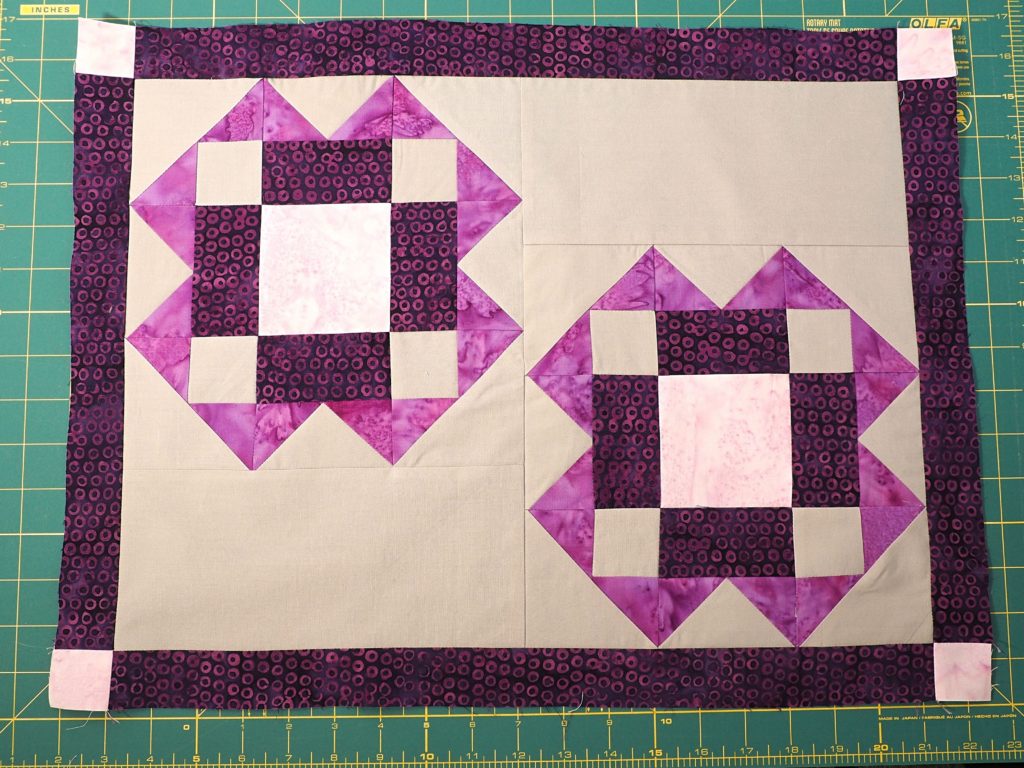
Sew these strips to both sides of the shorter edge of the placemat.
Repeat steps to make a total of four placemats.

Finishing the Placemats
- Lay your backing fabric on a long surface, with wrong side facing up.
- Then lay your batting on top of the backing.
- Lastly, lay your placemat on top with the right side facing up.
- Using your preferred method, baste the layers together.
- Quilt as desired.
- Lastly, bind using your preferred method.
Happy Quilting!


 Made with scr
13 Comments
Gail Sheppard
January 17, 2021 at 1:54 PMBeautiful placemats!!! Thanks for sharing the pattern and directions!
Happy Quilting!
createwithclaudia_7j76hs
January 18, 2021 at 6:23 AMThanks Gail! I appreciate it!
Maryellen McAuliffe
January 17, 2021 at 4:58 PMGreat color choice and fun design. They would look awesome on my table, too. Thanks.
createwithclaudia_7j76hs
January 18, 2021 at 6:21 AMThanks so much!
Jennifer Thomas
January 19, 2021 at 9:16 AMSo you are a fellow sky watcher? The ever changing sky is one of my favorite things. I love the block you used in your placemats. Great project!
createwithclaudia_7j76hs
January 20, 2021 at 8:08 PMI love watching the sky change colors and just thought that the purples and grays really captured that winter look we sometimes get. Thanks!
Emily
January 19, 2021 at 7:13 PMSuch pretty purples! These will brighten gray days for sure! Lovely placemats.
createwithclaudia_7j76hs
January 20, 2021 at 8:08 PMThanks so much. That purple stash builder called out to me!
Preeti Harris
January 25, 2021 at 12:37 PMThese are beautiful – they glow like gems. Thank you for the tutorial!!!
createwithclaudia_7j76hs
January 25, 2021 at 2:07 PMThanks so much!
Patti
February 2, 2021 at 10:43 AMThank you so much for this tutorial. This is a lovely pattern.
Anne
February 24, 2021 at 5:31 PMWhat date Does Stars of the Prairie Start., Please.
createwithclaudia_7j76hs
February 27, 2021 at 6:21 AMIt started in January 2021, but it is not too late to start. January and February blocks are posted and March will be soon.