
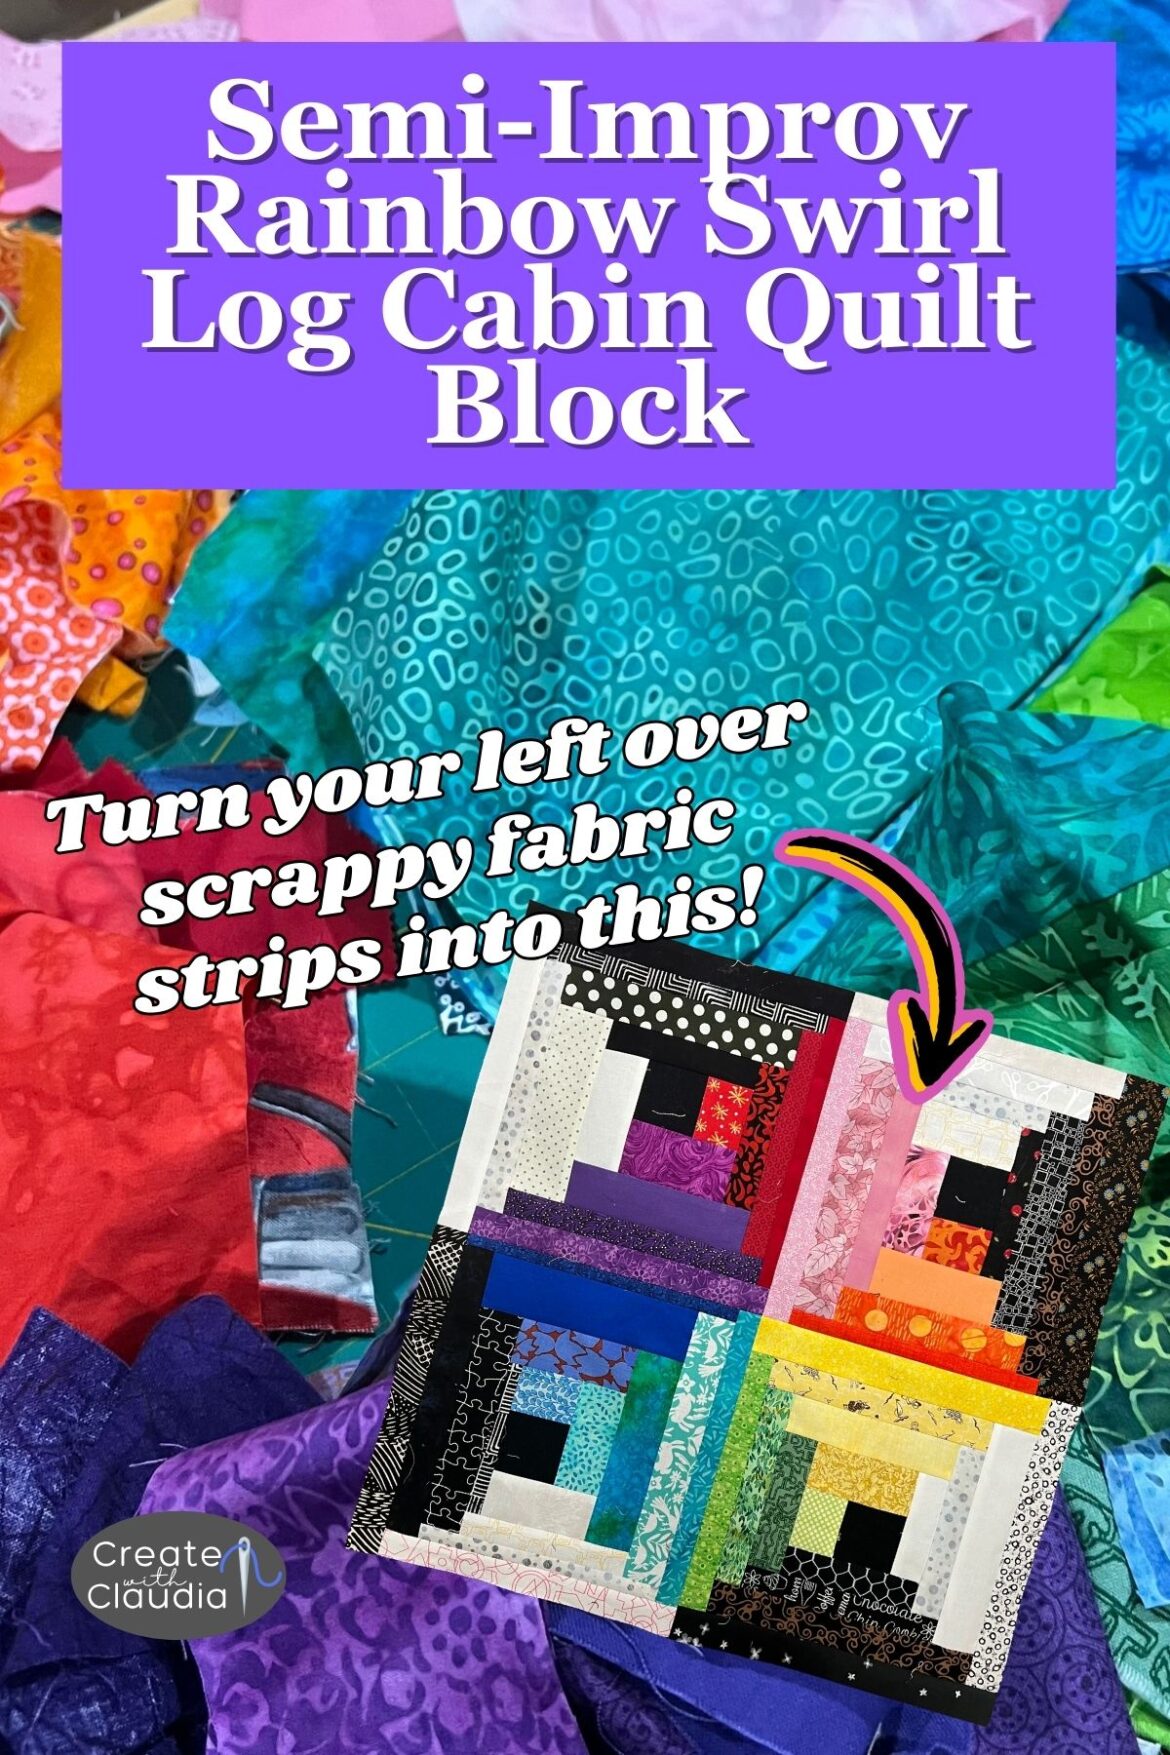
Semi-Improv Rainbow Log Cabin Quilt Block Tutorial
We all have them…those leftover scraps from one of our quilt projects. I don’t know about you, but I always end up with a lot of strips in all sorts of widths. and I just can’t bear to throw them out. That is why I came up with this fun and easy tutorial It combines a bit of improv sewing with a bit of planning. It’s episode #18 of my YouTube series “Working Our Scraps Off”. I also have companion Facebook group called “Working Our Scraps Off” which you are welcome to join. Start digging through your scrap fabric bins and join me in making a semi-improv rainbow log cabin block.
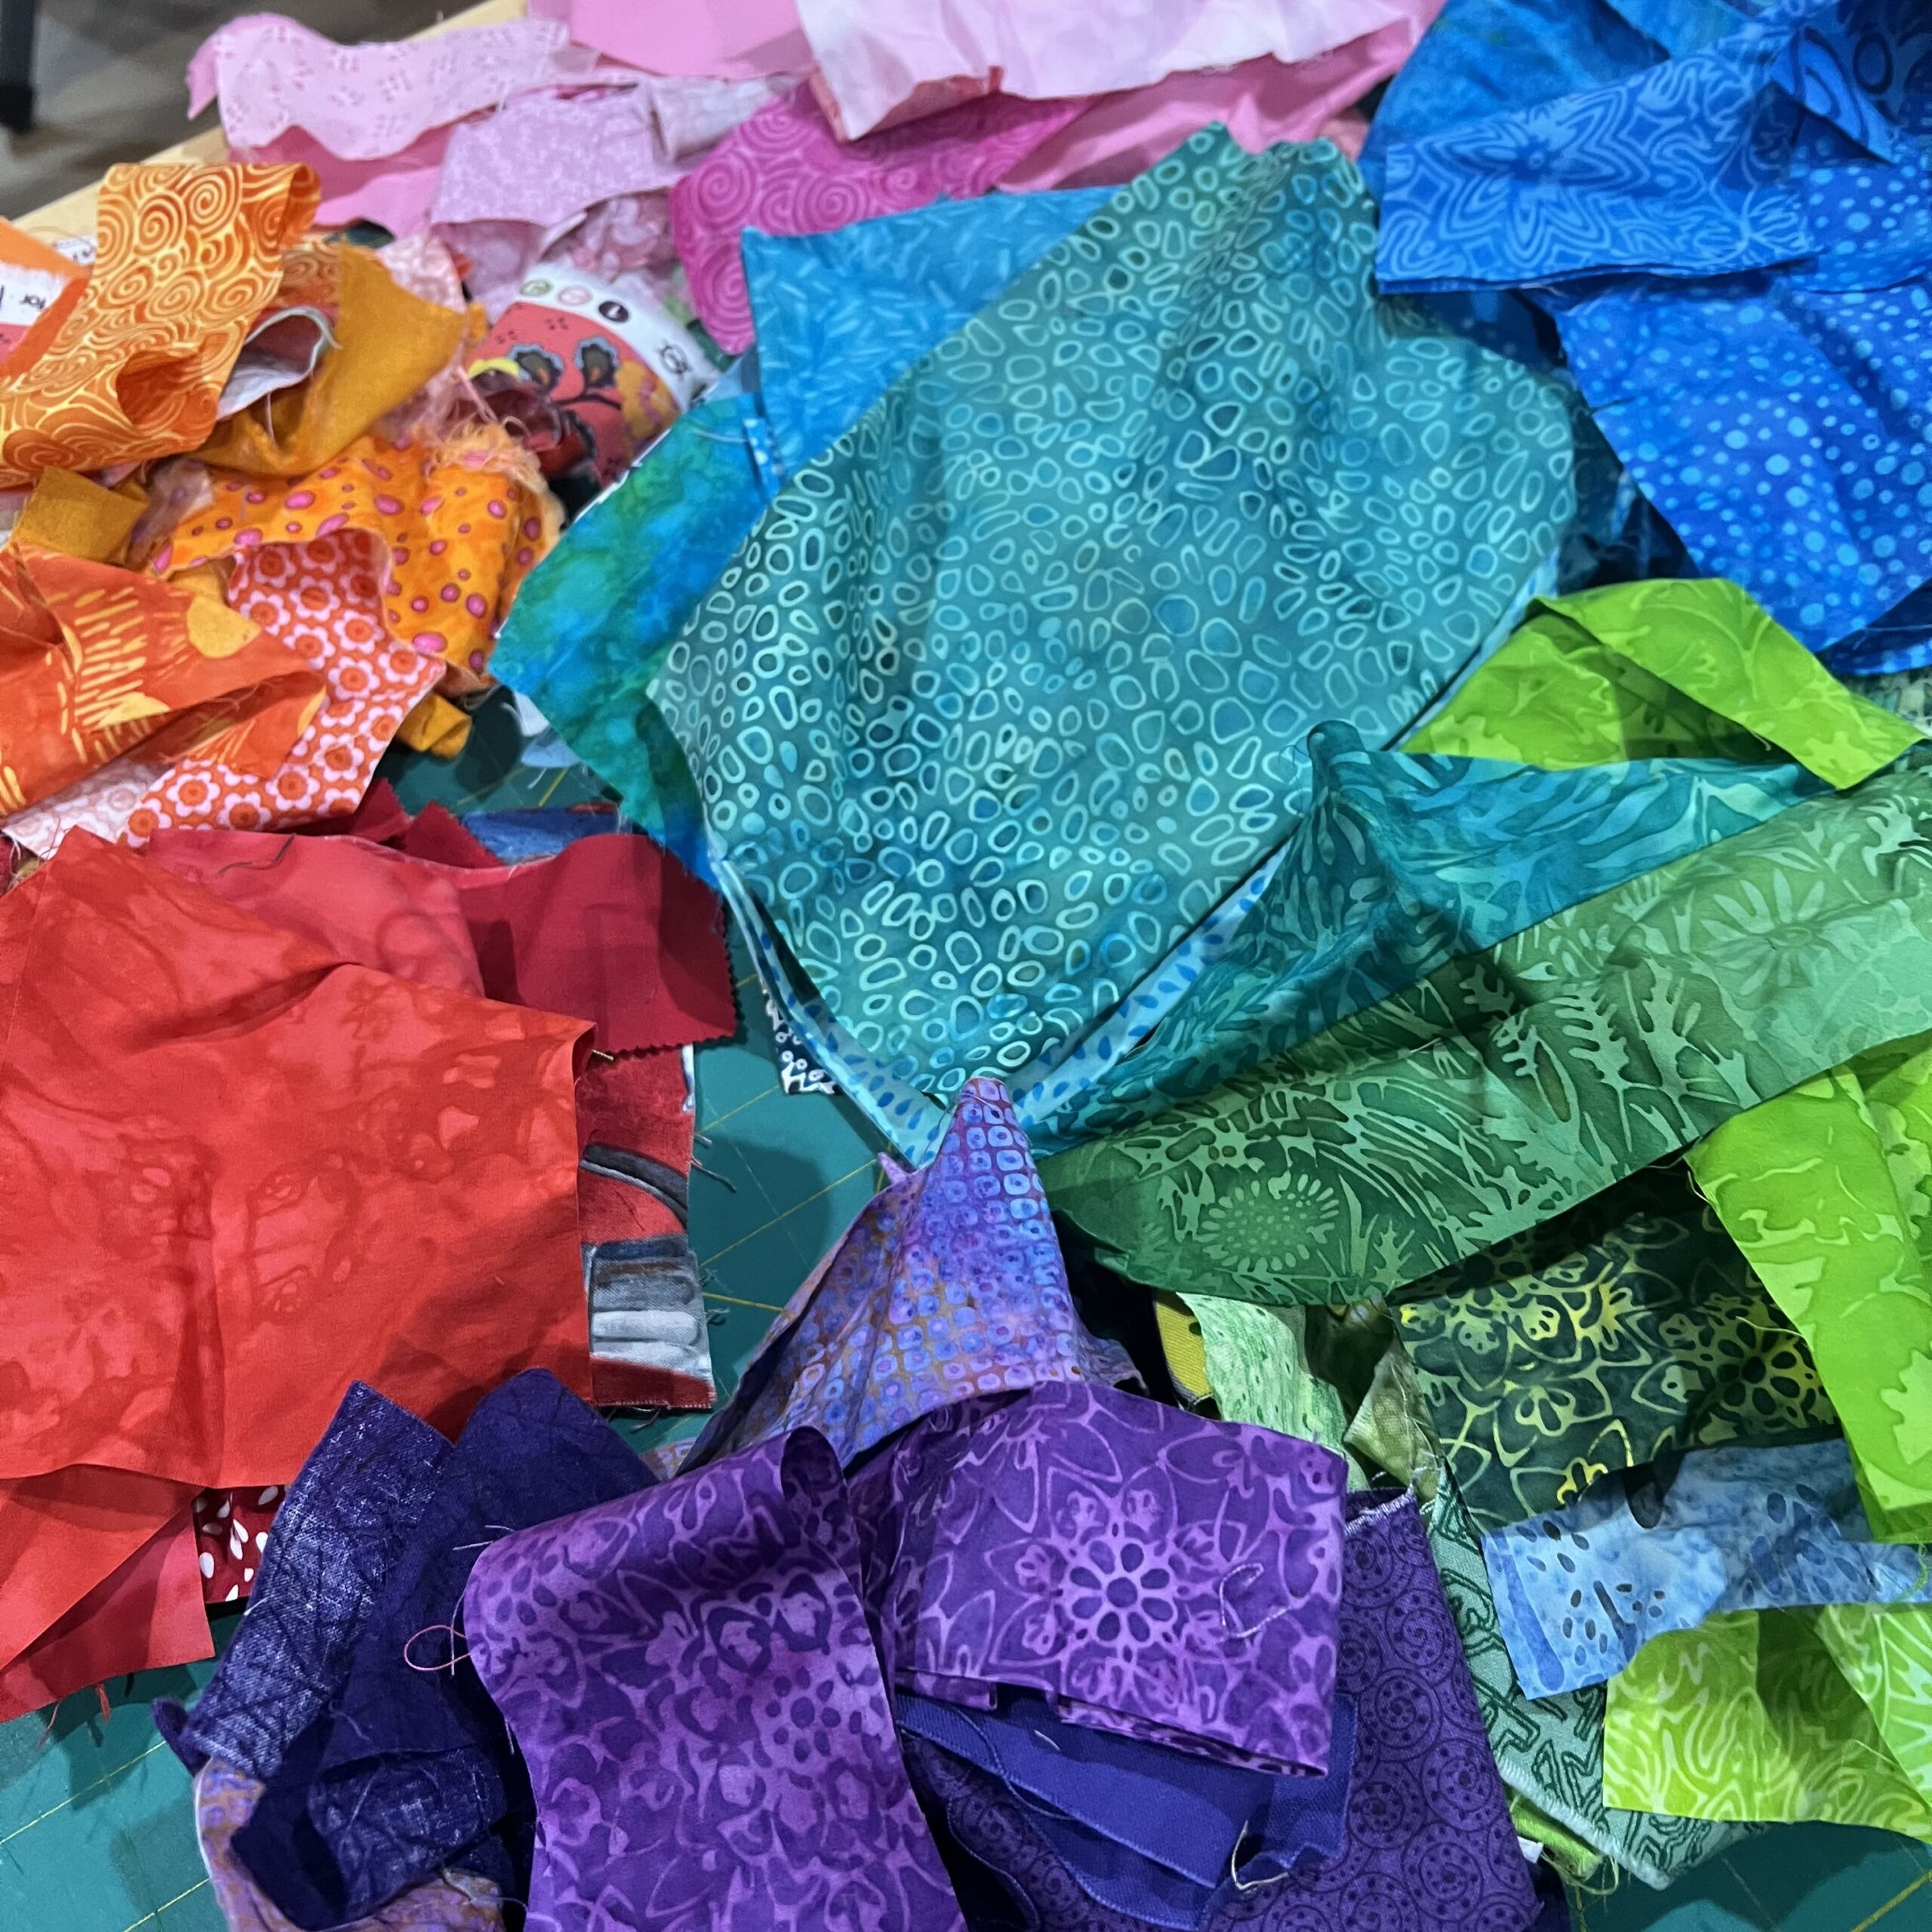
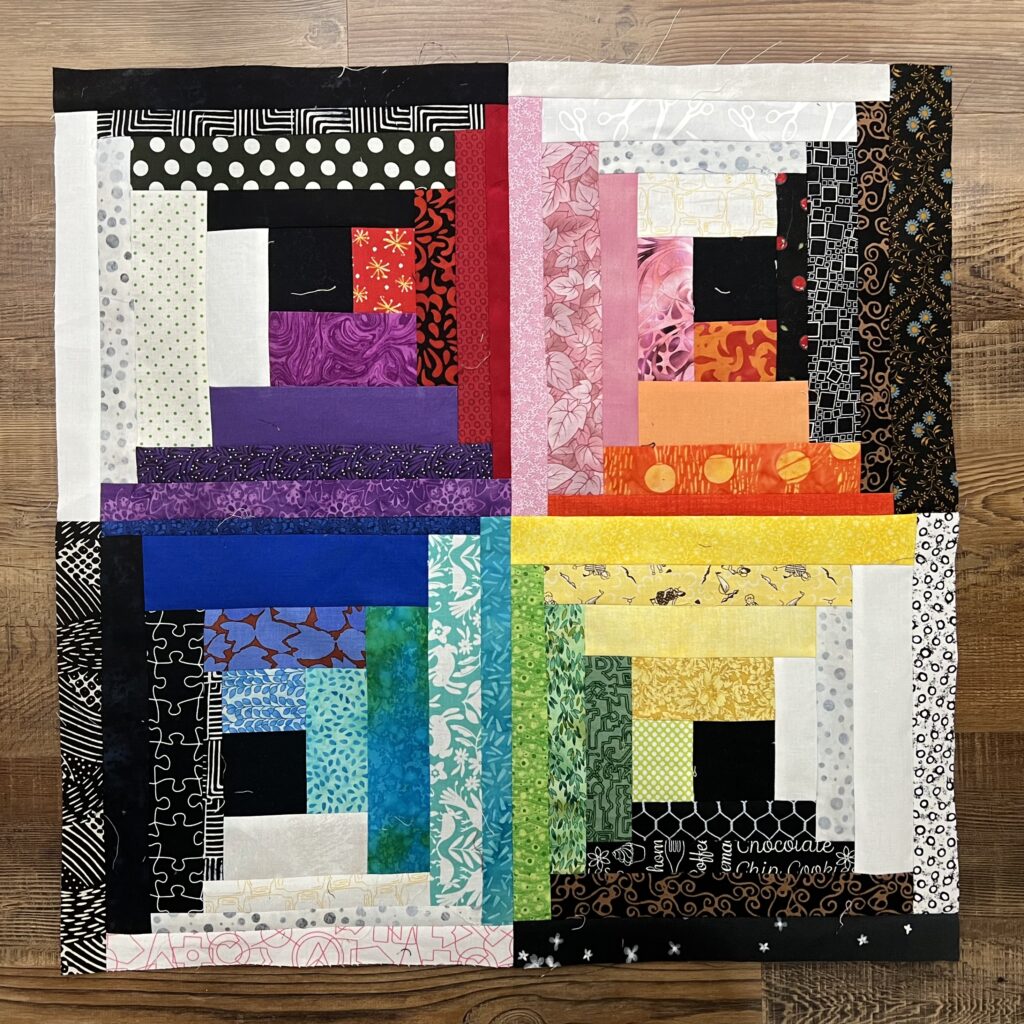
Because I love lots of color I decided to use bright scraps and dug through my bins to pull out as many strips as I could find. That gave me a nice array of colors to choose from. I also decided to go with strips from my black and white bins. There were plenty of those too. I like the way the black and white make the rainbow colors pop even more.
How to Make a Semi Improv Rainbow Log Cabin Quilt Block
What You’ll Need
- Scrappy strips in various widths, lengths and colors
- General sewing supplies including some square quilting rulers. Check out my Amazon shop if you need any of these rulers. As an Amazon affiliate I earn from qualifying purchases.
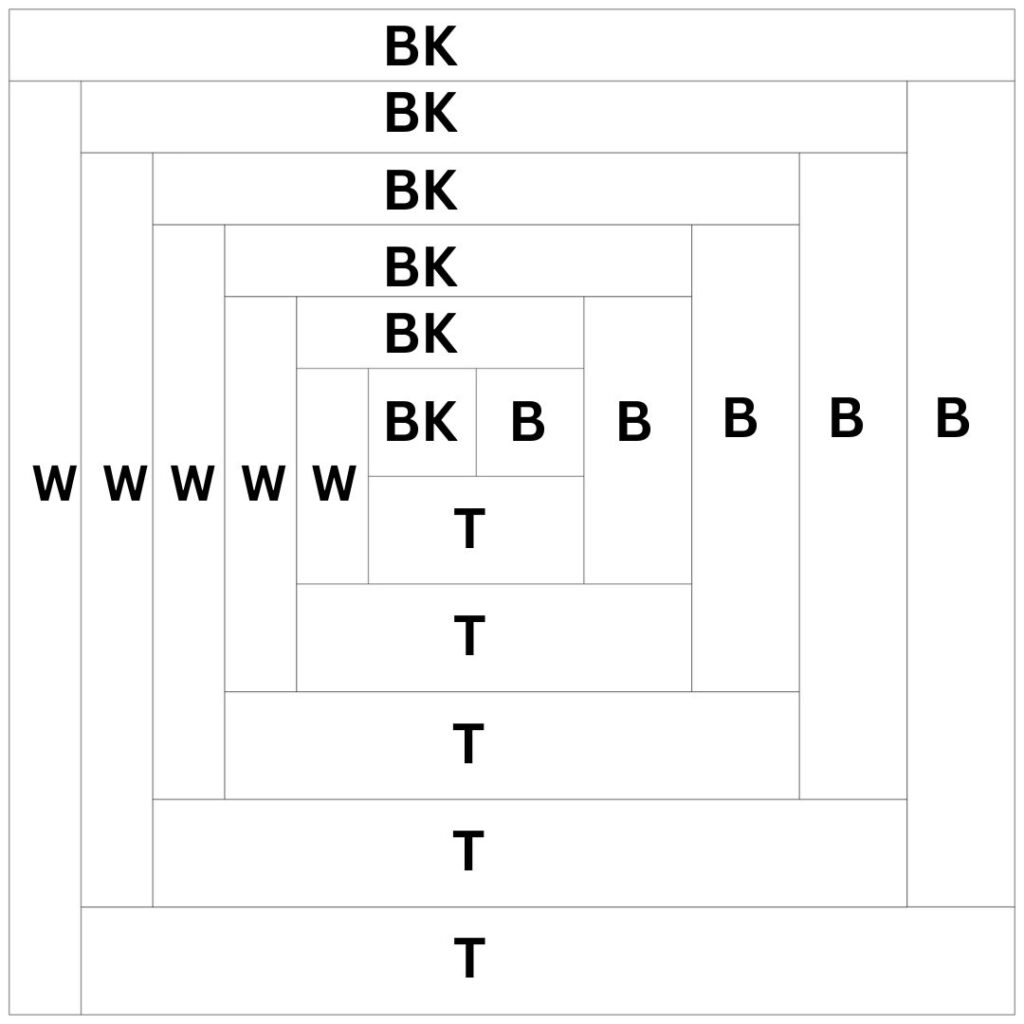
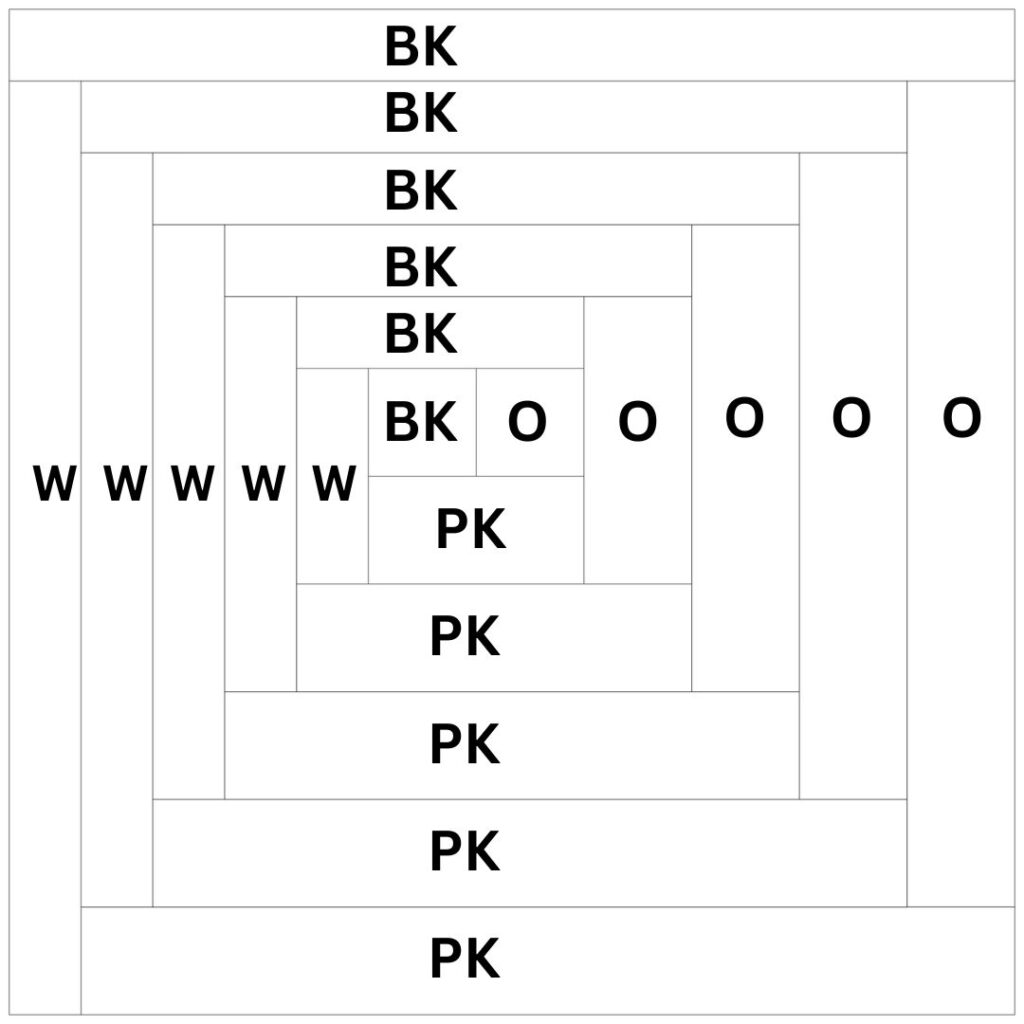
- Layout diagrams
You will also want to use this diagrams below. They will help you with your fabric placement so you can get that rainbow effect. You can click on the diagram to get the downloadable PDF.
Diagram Abbreviations: BK – Black, W – White, B – Blue, T – Turquoise, O – Orange, PK – Pink, R – Red, PU – Purple, G – Green, Y – Yellow


Putting the Improv Into This Block
Here is where the fun improv begins. While the diagrams show a specific number of strips in each color, you DO NOT need to use that number of strips. The number of strips you use will depend on the size of your block.
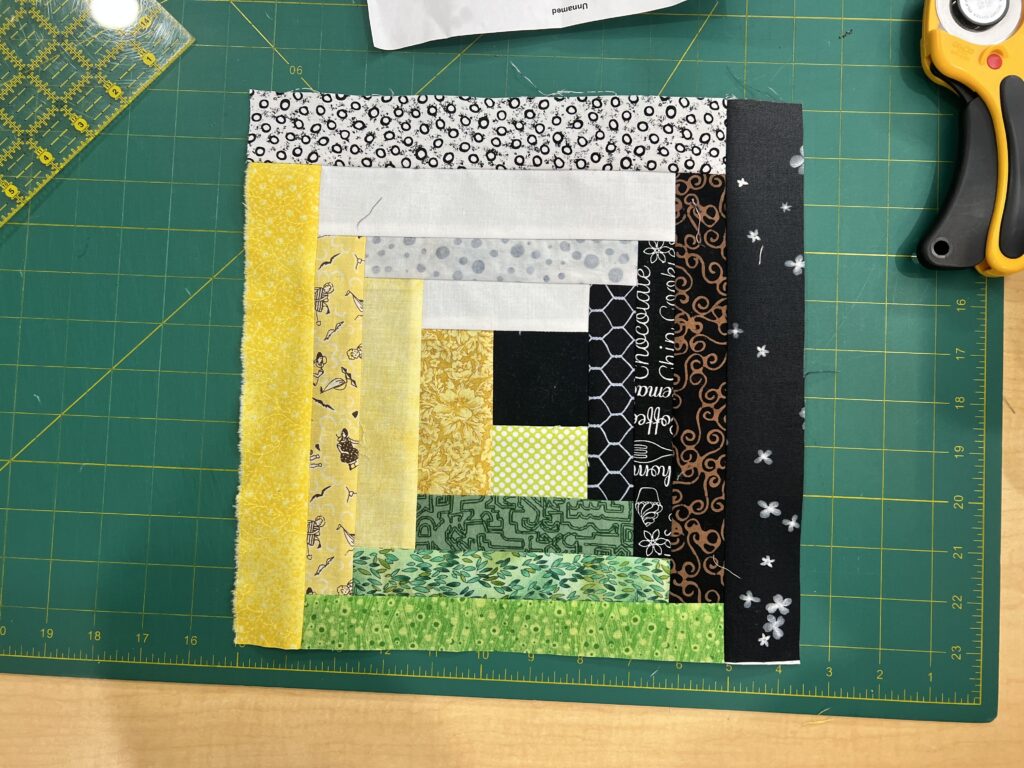
First, decide on what size block you want. I ended up with an 11″ unfinished block and the way I ended up with that was that I made one block before starting the other three. I liked the way it looked and I decided to go with that size for the rest of the project. In the video tutorial I decided to go with a 10 1/2″ unfinished block.
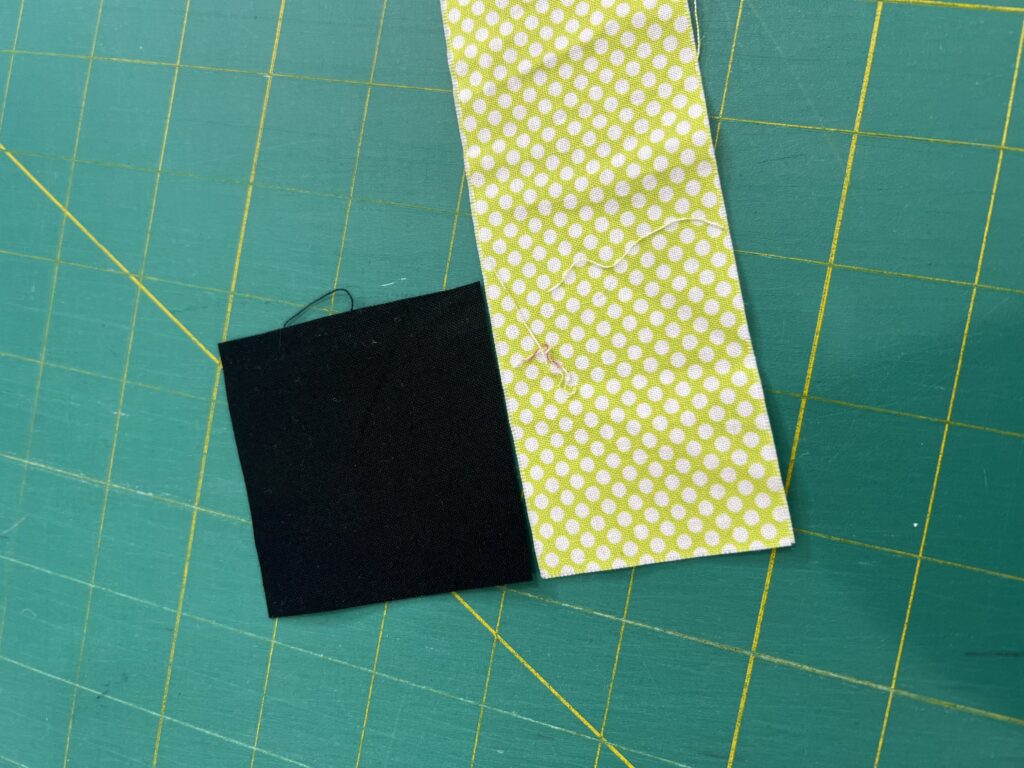
For the center I used a solid black 2″ square because I had a lot of those left over from a previous project. I then just started adding strips. I did not worry too much about size…I just trimmed the strips down as I pieced the block. For example, in the photo on the left, the strip is very long. Before adding the second strip I trimmed off that extra fabric so it was even with the black square.
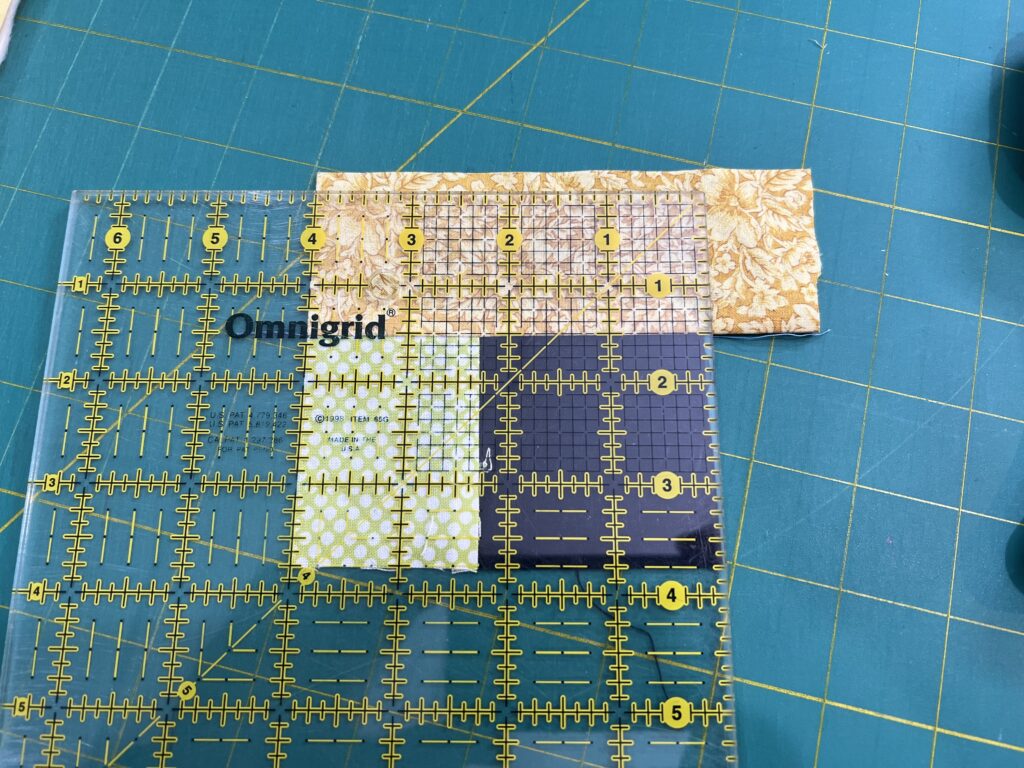
I kept adding and adding around until I had a nice square block in the size I wanted. You definitely want to keep trimming every time you add a strip to make sure it’s remaining relatively square.

To get the rainbow effect, make each of the four blocks in the colors shown. Then piece the blocks together to get the design.
Here are a couple of the blocks I made. The one on the left was for this tutorial and the one on the right is the one I made in the video tutorial. Recognize any of the scraps?

You can see in the photo that the strips used were all sorts of widths. I think that adds nice interest to the piece.
Color Selection
When choosing my scraps I tried hard to keep them all close to the same tones. For example, the yellows were fairly similar, as were the purples. That can be harder to do than you think, but for me that is one of the fun parts. I love digging through my scraps. It’s almost like a walk through memory lane.
I will admit that I did have to cheat once to get a turquoise that I liked. My stash came in handy for that.
I hope you give this fun and scrappy project a try. Don’t forget to join my “Working Our Scraps Off” Facebook group for all kinds of inspiration.
Happy Quilting! – Claudia

1 Comment
Lori H
February 6, 2025 at 11:24 AMThank you for the templates for the Semi Improv Rainbow blocks. They are beautiful blocks!