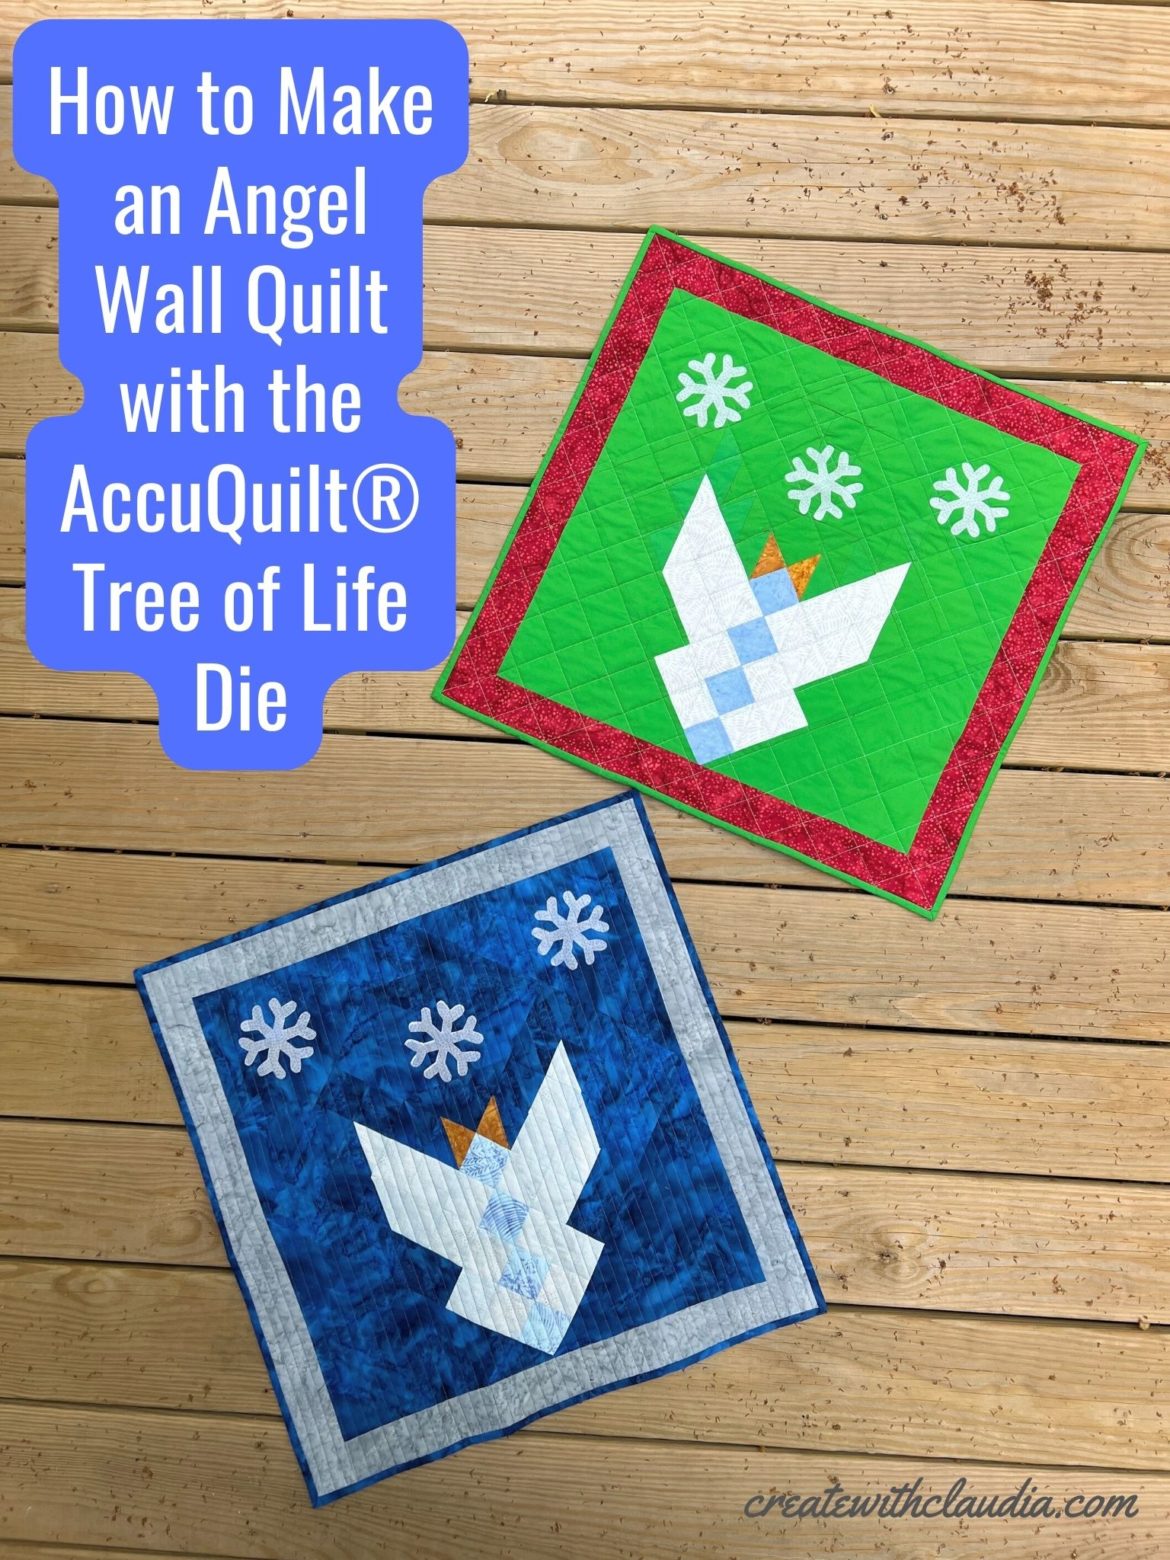
How to Make an Angel Mini Quilt with the AccuQuilt® Tree of Life Die
I am always up for a good challenge so when the folks at AccuQuilt® generously sponsored this month’s Island Batik Ambassador project I was ready. We were asked to do a Christmas in July project using their Tree of Life die. It took me a little while to decide what to do, but as soon as I figured it out I knew it was perfect. You can make it too. Here’s how to make an angel mini quilt with the Accuquilt® Tree of Life die.
Digging through my stash of Island Batiks, I picked out various fabrics. I decided to make two angels and they will be given to my mother-in-law and a sewing friend. These two ladies are angels in my life so I thought they would be a nice gift for them.
Disclosure – The items used to make this project were generously provided by Island Batik, AccuQuilt, Hobbs Batting, Aurifil Thread and Schmetz Needles.
All of the steps are detailed below. I have also made this easy-to-follow video tutorial to help you out.
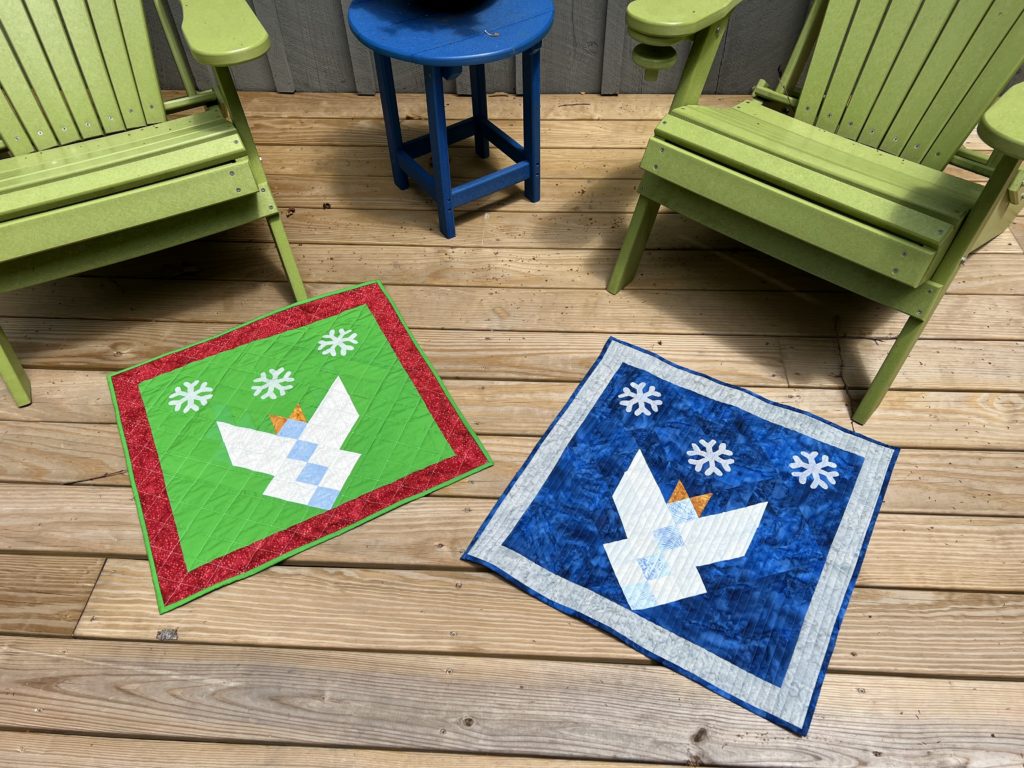
The finished wall hanging measures about 24″ square.
What You Will Need
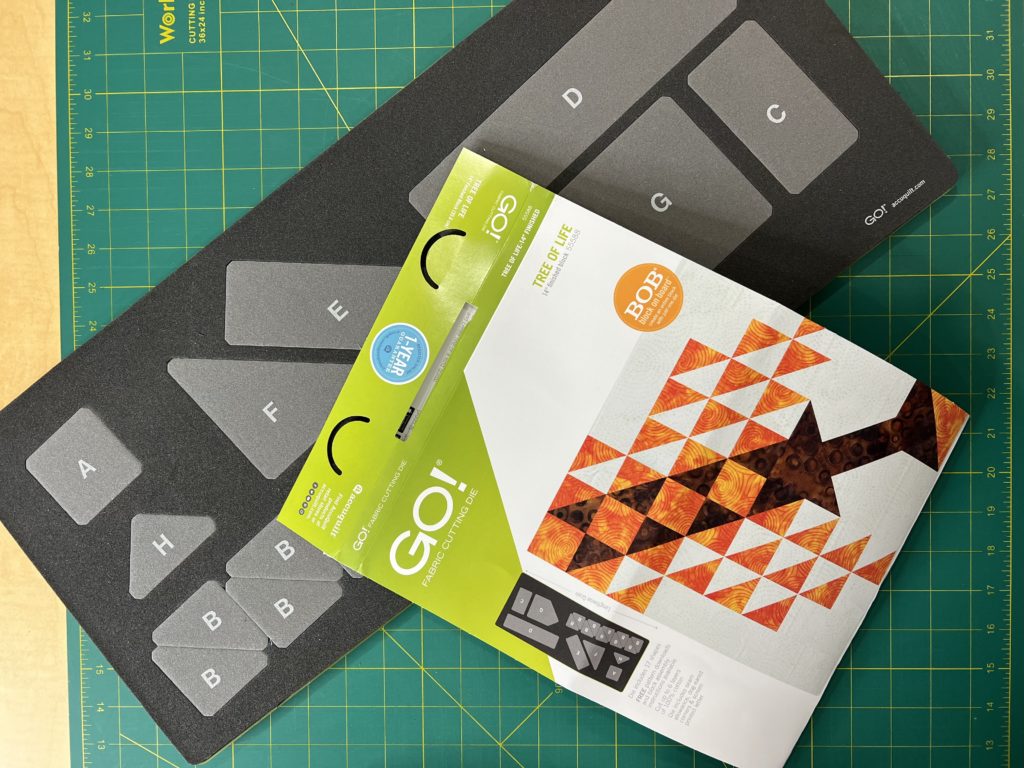
AccuQuilt® Tree of Life Die
5 different fabrics for the Angel body, Crown, Angel Wings, Background and Borders. Extra fabric for snowflakes (optional)
Batting, Backing and Binding
General Quilting and Sewing Supplies
Heat ‘n Bond for the snowflakes (optional)
You can find almost everything you need for this project in my Amazon storefront here.
As an Amazon Associate I Earn from Qualifying Purchases
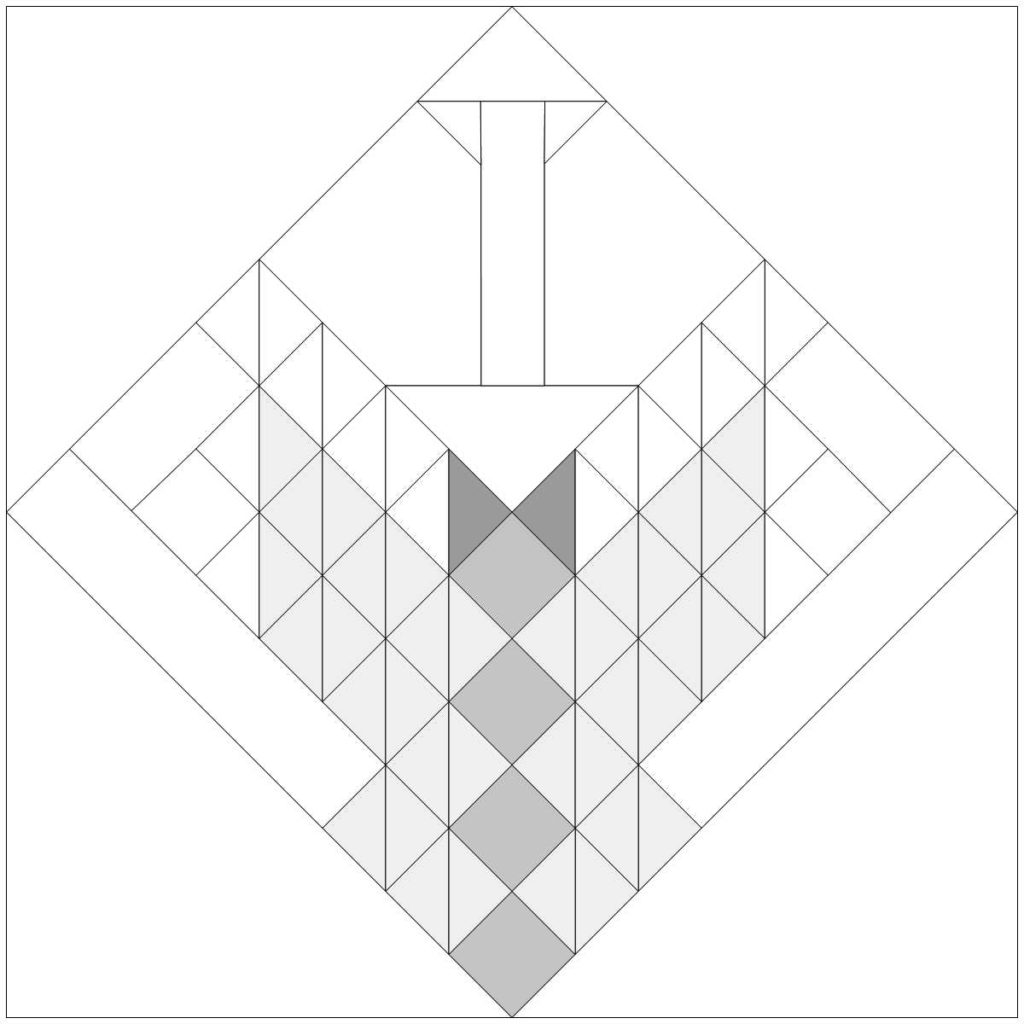
Angel Tree of Life Template
Refer back to this template. You can print it out and use it as your reference. It will be extremely helpful when assembling your angel. You can download it here.
Cutting Out the Pieces
To make my angel, I use the exact same pieces that the instructions on the Tree of Life die list. However, mine are all in different colors.
You will also need a few other pieces that are not cut from the die. 1 square of background fabric cut 15 1/2″ square, 2 strips of the border fabric cut 2 1/2″ x 20″ and 2 strips of the border fabric cut 2 1/2″ x 24 1/2″.
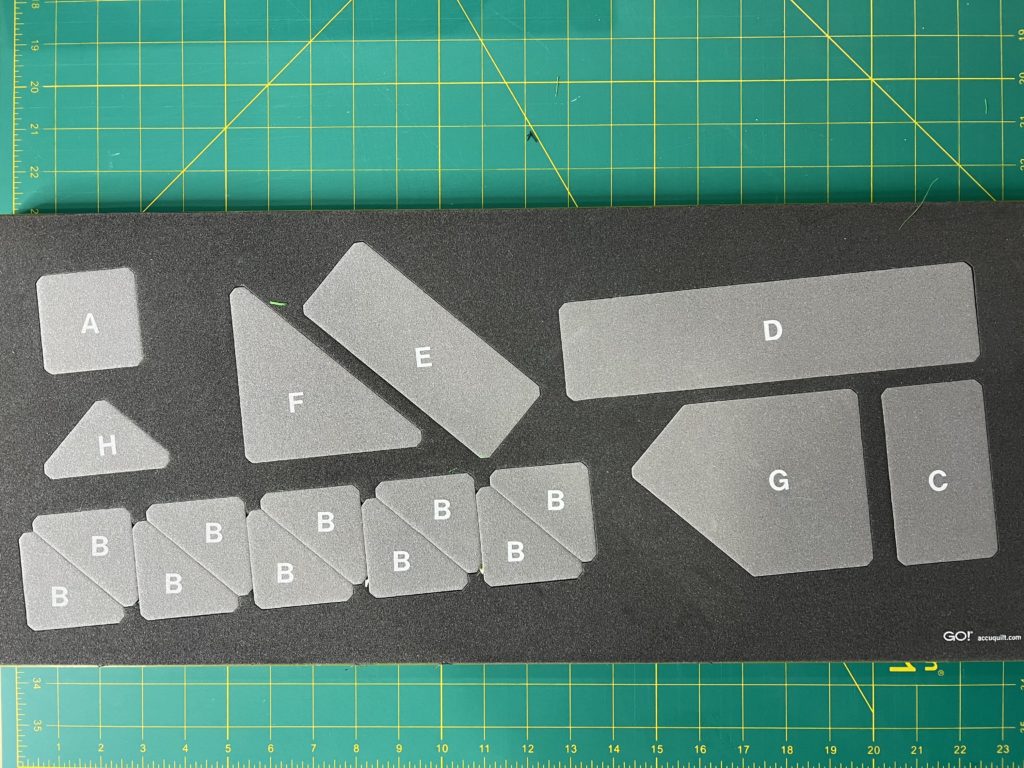
For the Angel (in my case white) – 36 triangles from AccuQuilt® template B
For the Angel Body (in my case blue) – 4 squares from AccuQuilt® template A
Angel Crown (in my case gold) – 2 triangles from AccuQuilt® template B
Background Fabric (in my case green) – 2 strips from from AccuQuilt® template D, 2 strips from template C, 1 strips from template E, 2 triangles from template F, 2 shapes from template G, 2 triangles from template H, 2 squares from template A and 18 triangles from template B
Sewing the Angel
The first things you need to make are all of the half square triangles. To do this you will need all of the triangles cut from die template B.
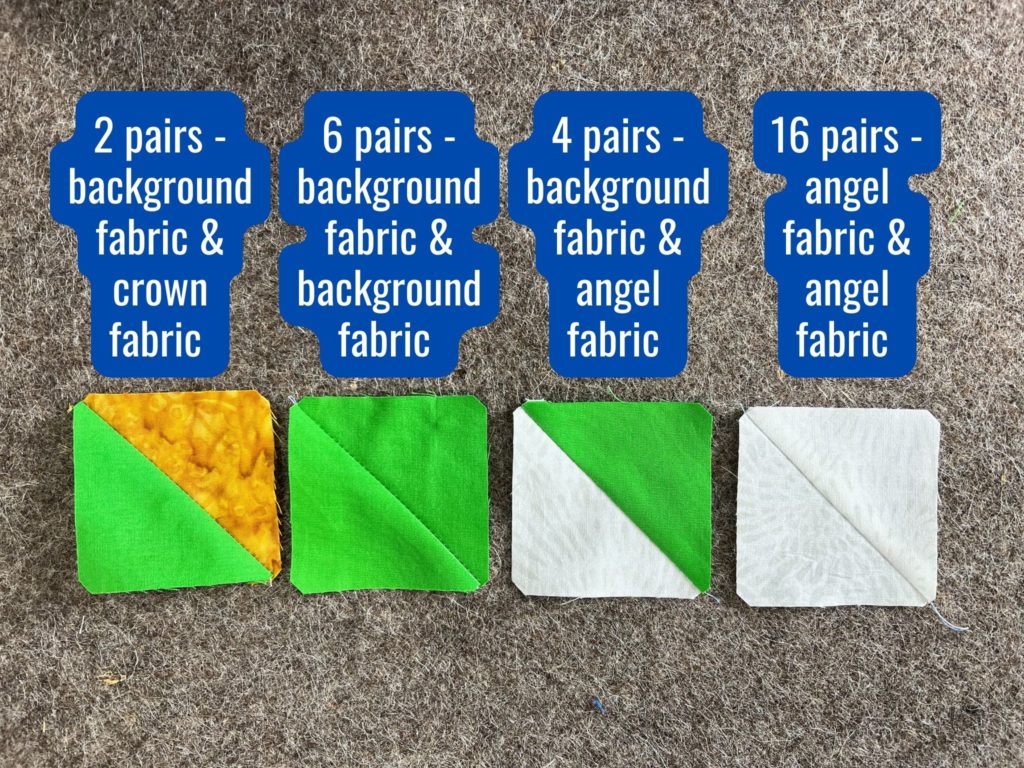
Pair them up to make the required number of half square triangles. To make one half square triangle, line up two of the triangles with right sides facing. Sew along the long edge and press. Use a 1/4″ seam allowance.
Making the Sections
Important: Follow these steps in the order shown so that your angel will come together. In addition, note that all of the half square triangles are facing the same direction.
Making Section 1
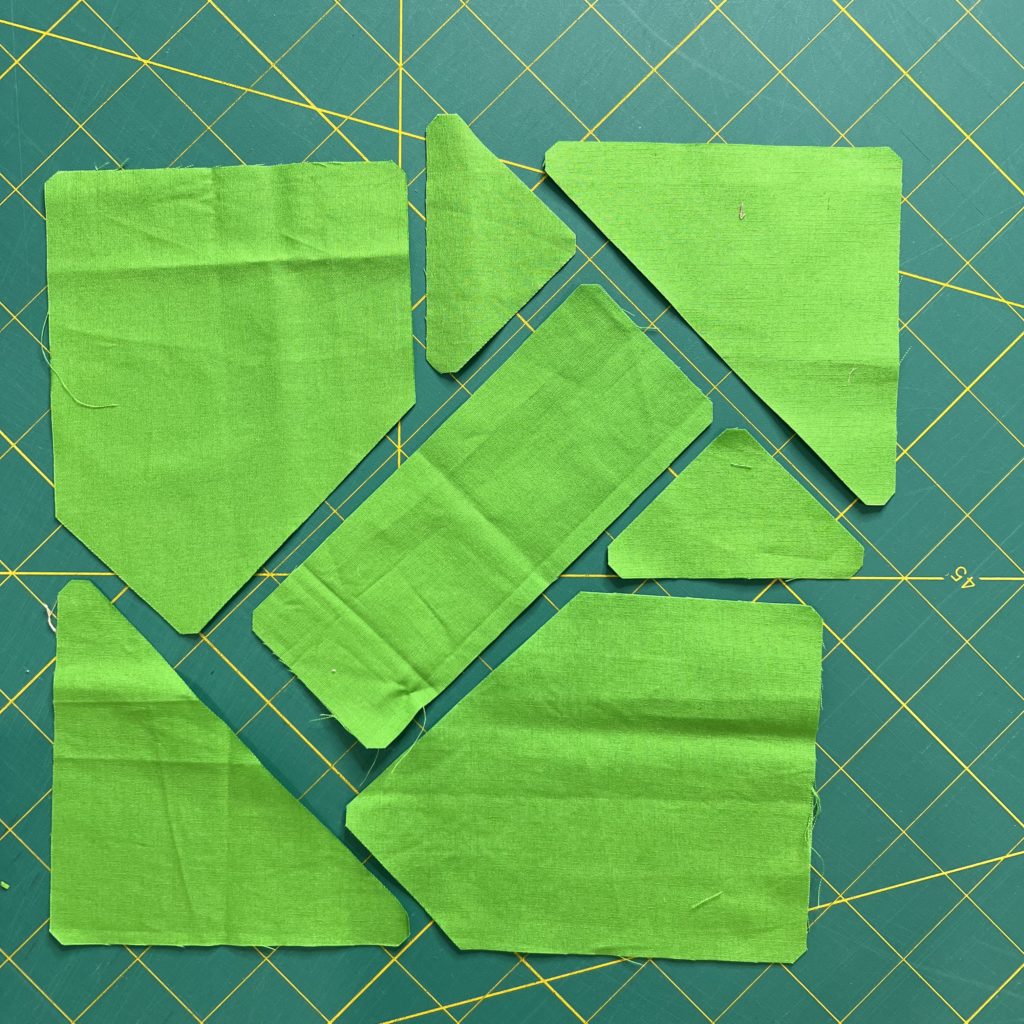
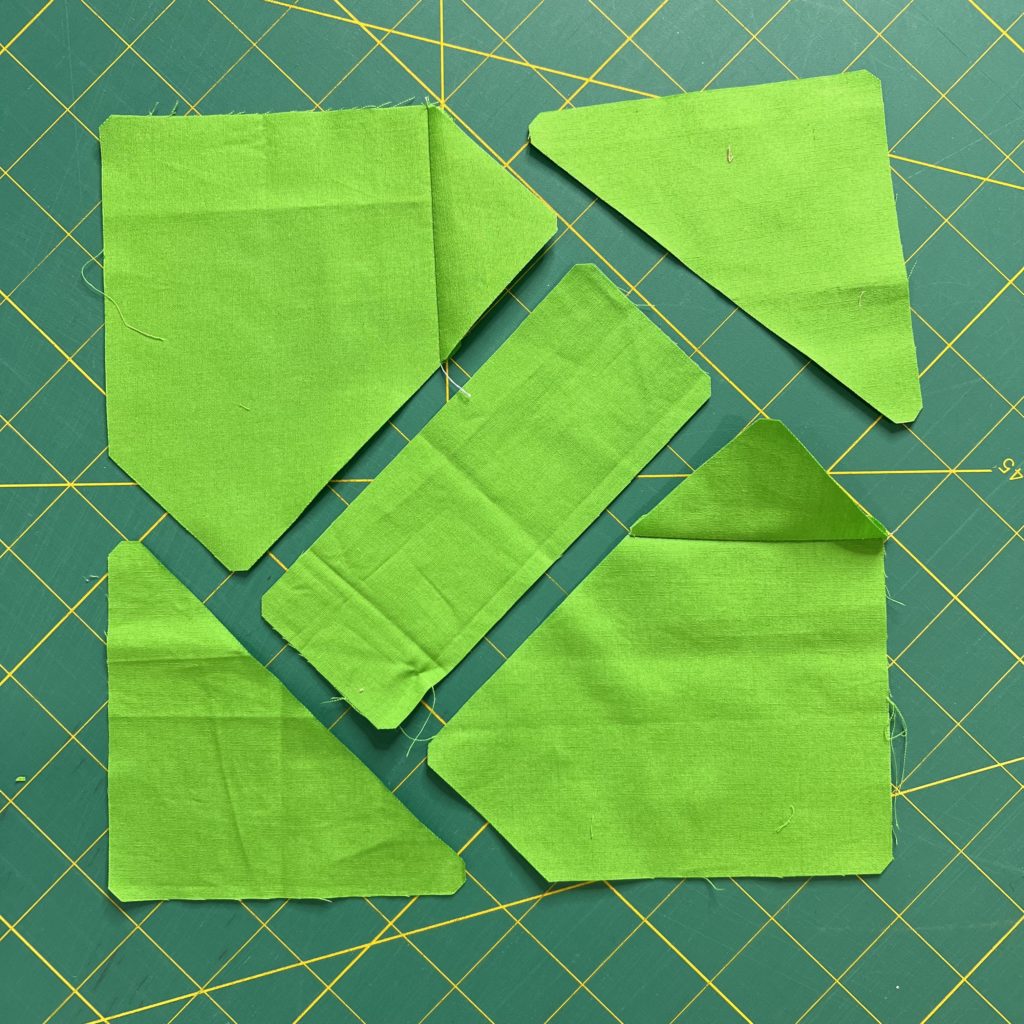
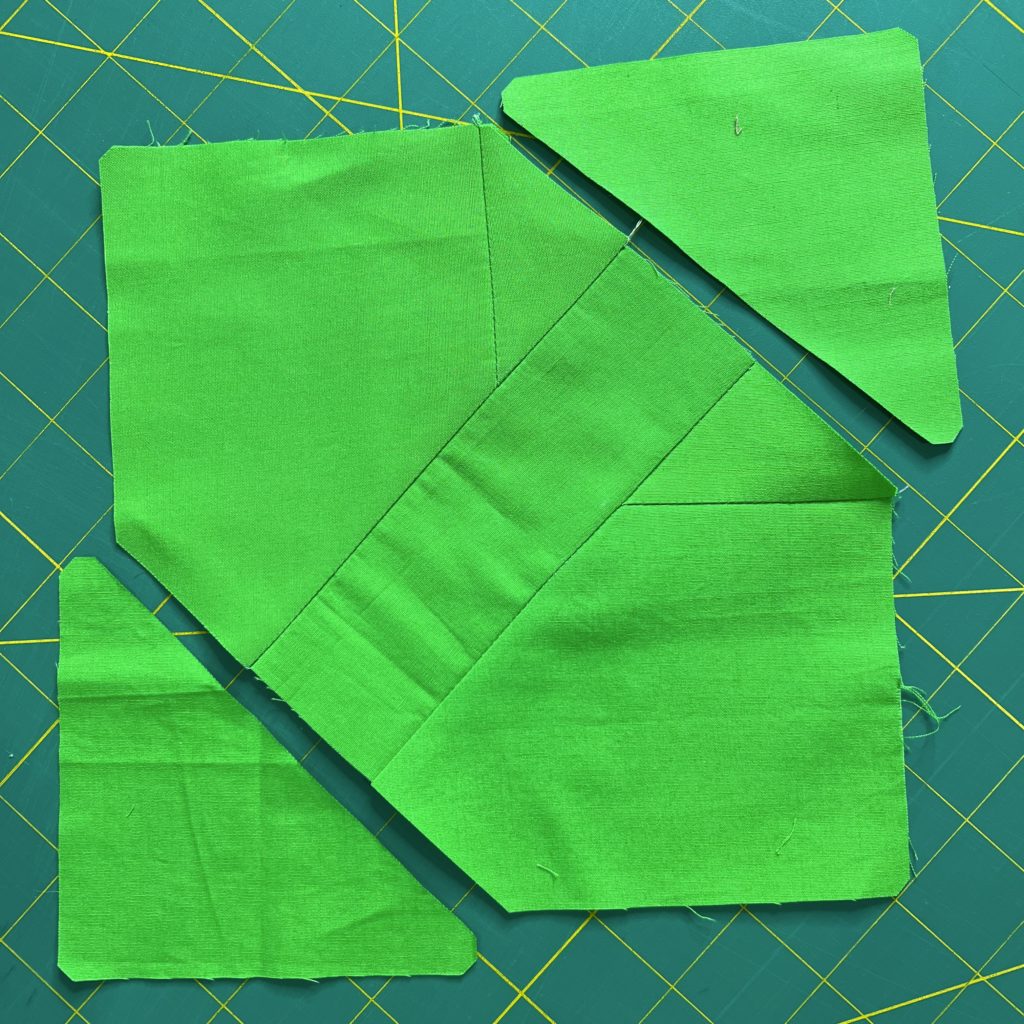
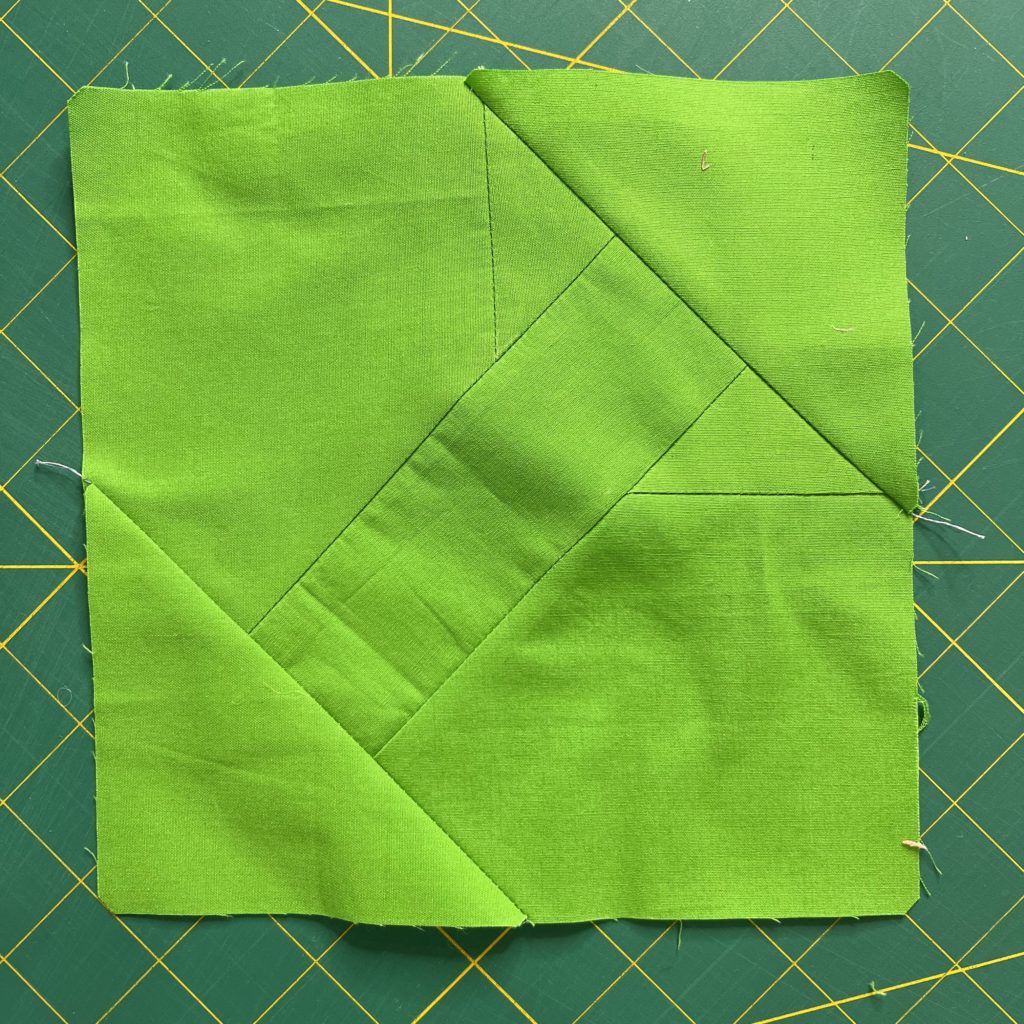
To make the first section you need your background fabric pieces as follows: 2 F triangles, 2 G shapes, 1 E strip and 2 H triangles. Sew together in order shown beginning with H triangles and G shape. After that, press and set section aside.
Sewing Section 2
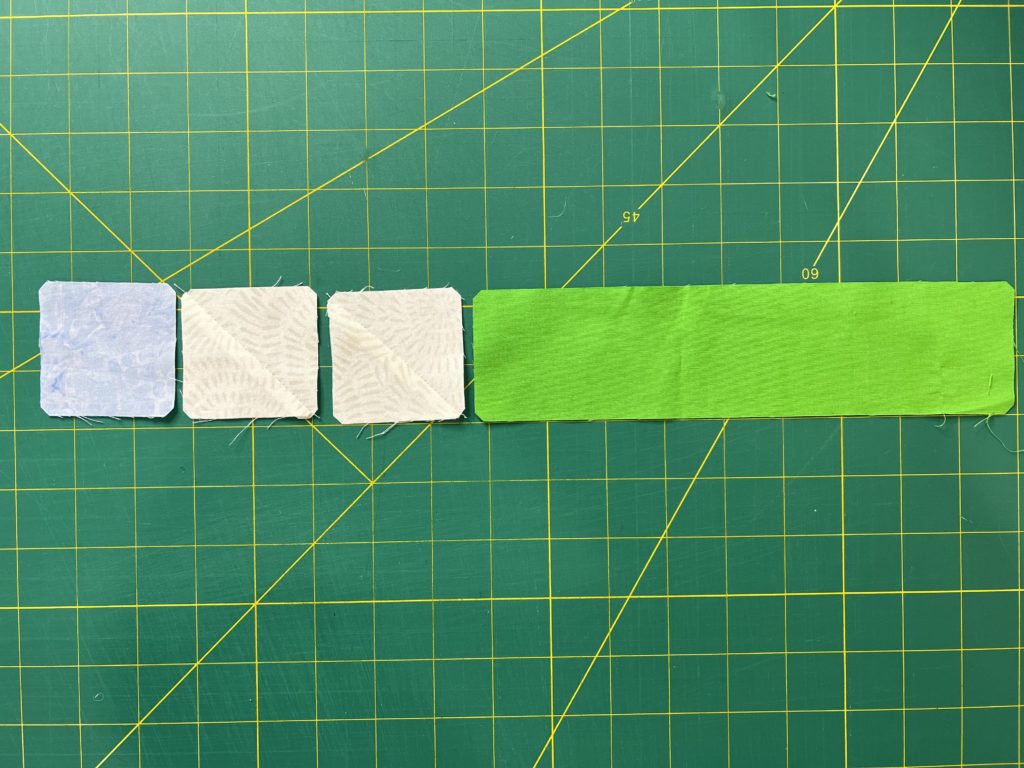

Sew together the pieces in the order as pictured above. The long strip is from Accuquilt® template D. After that, press and set aside.
Sewing Section 3
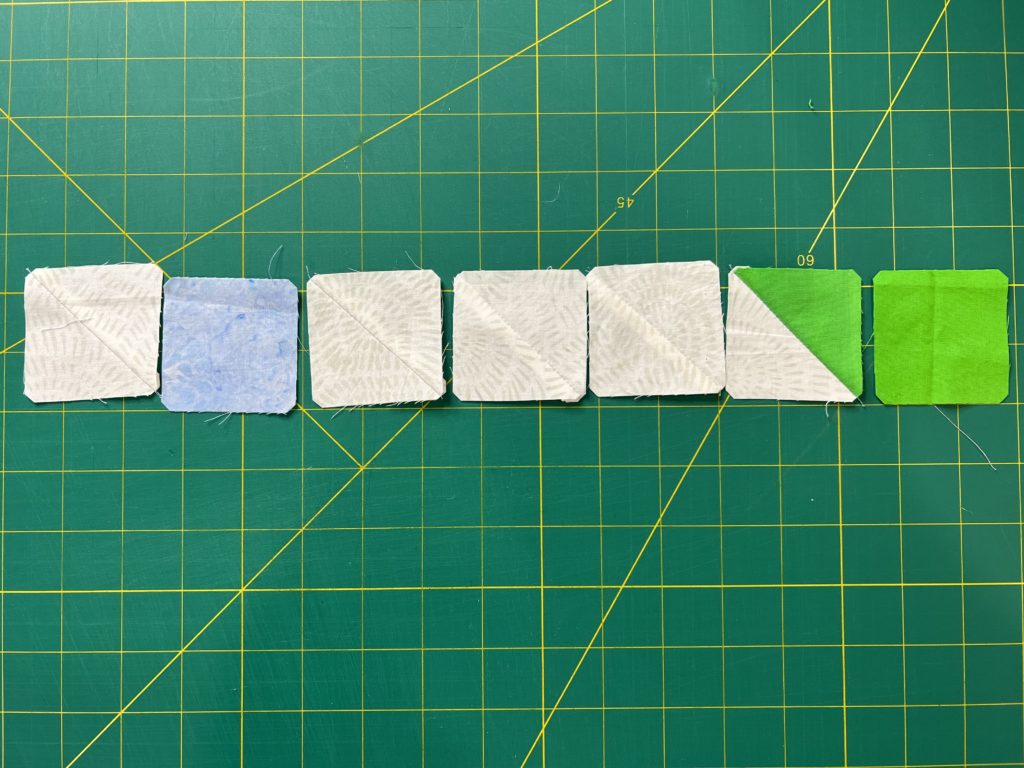
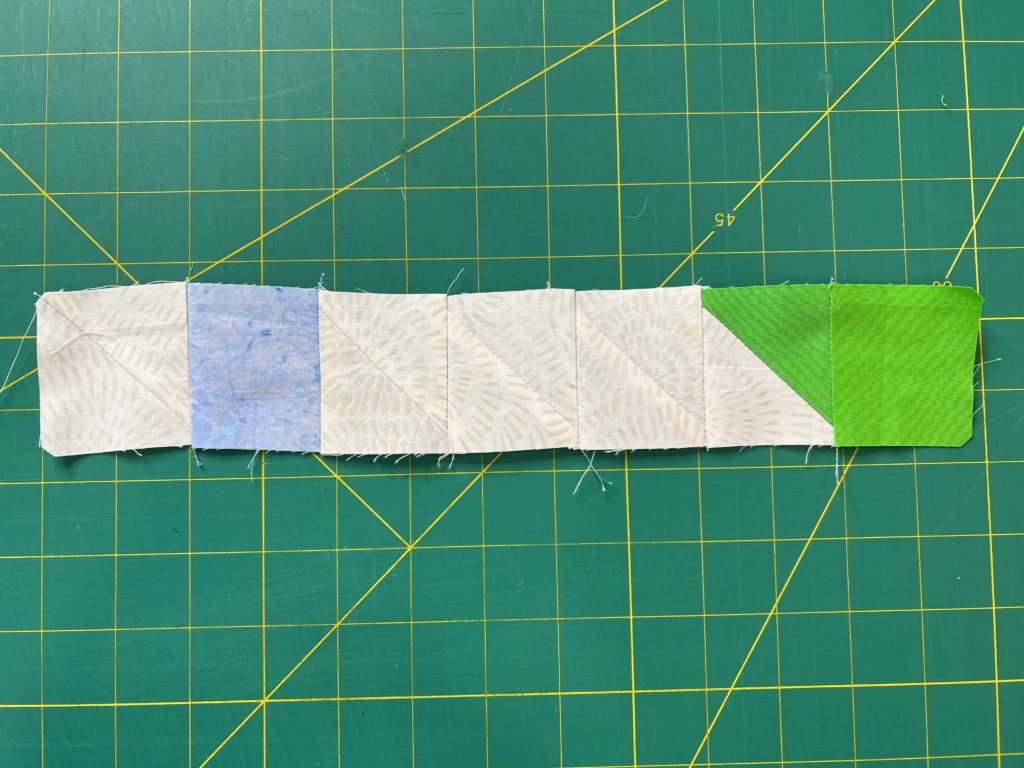
Sew together the pieces in the order as pictured above. After that, press and set aside.
Sewing Section 4
There are 2 strips that are the same (except for the coloring) for this section.


Sew together the pieces in the order as pictured above. After that, press and set aside.
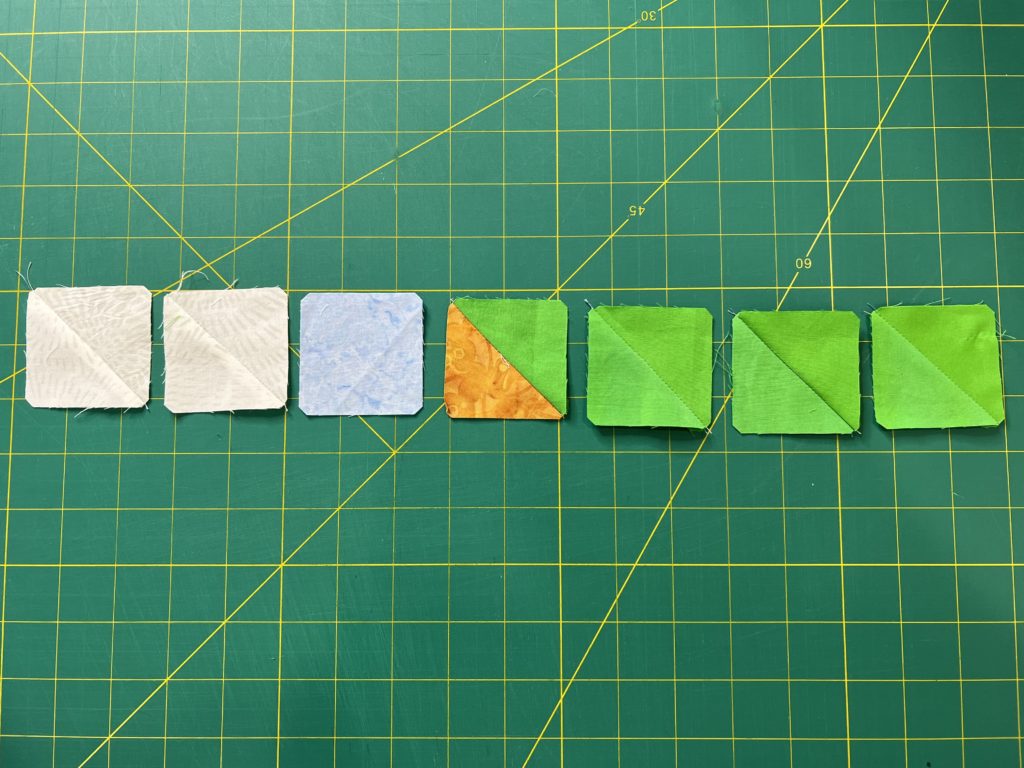
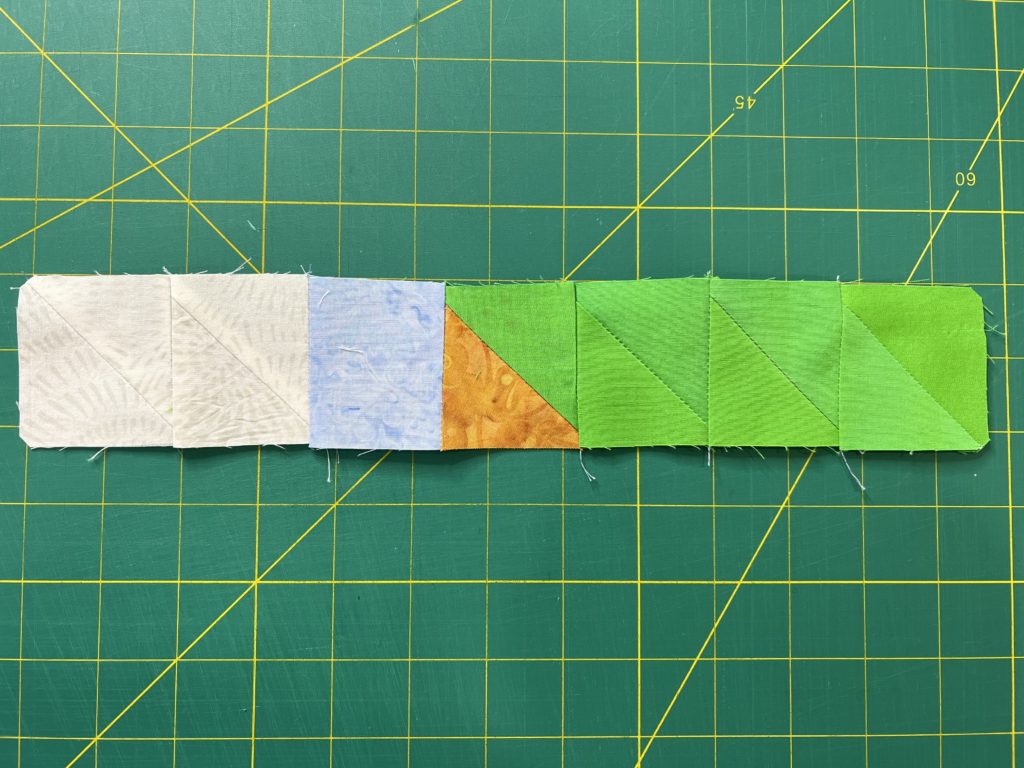
Sew together the pieces in the order as pictured above. Note that this is the second strip in section 4. The coloration is different than the first strip. Set aside.
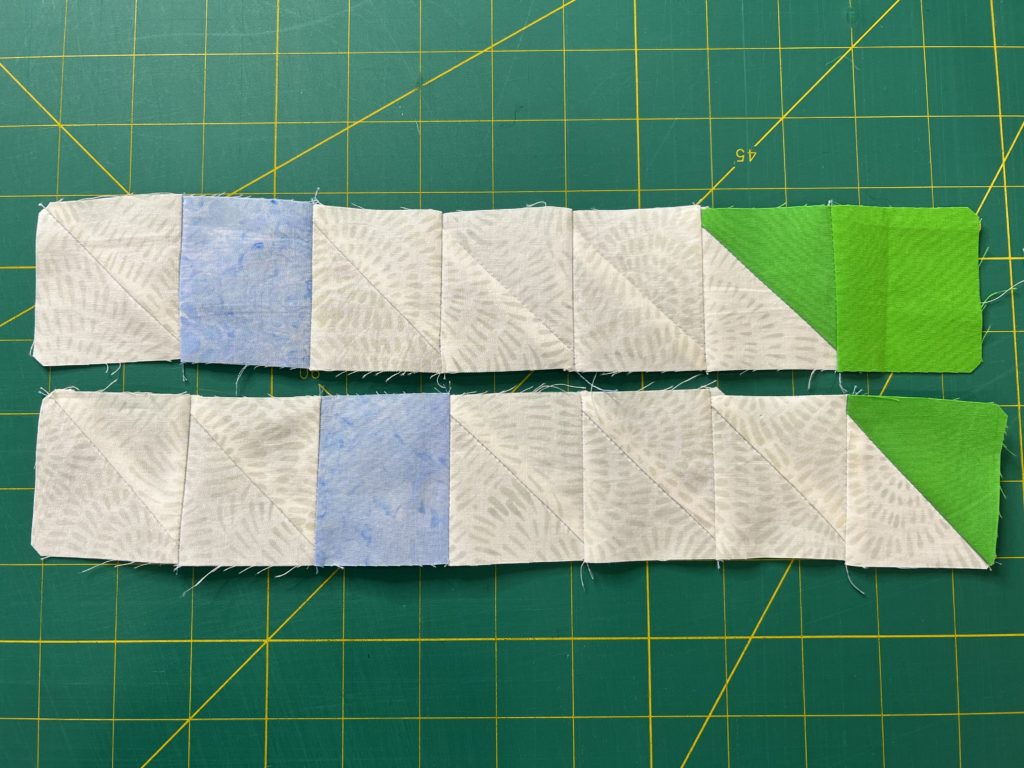
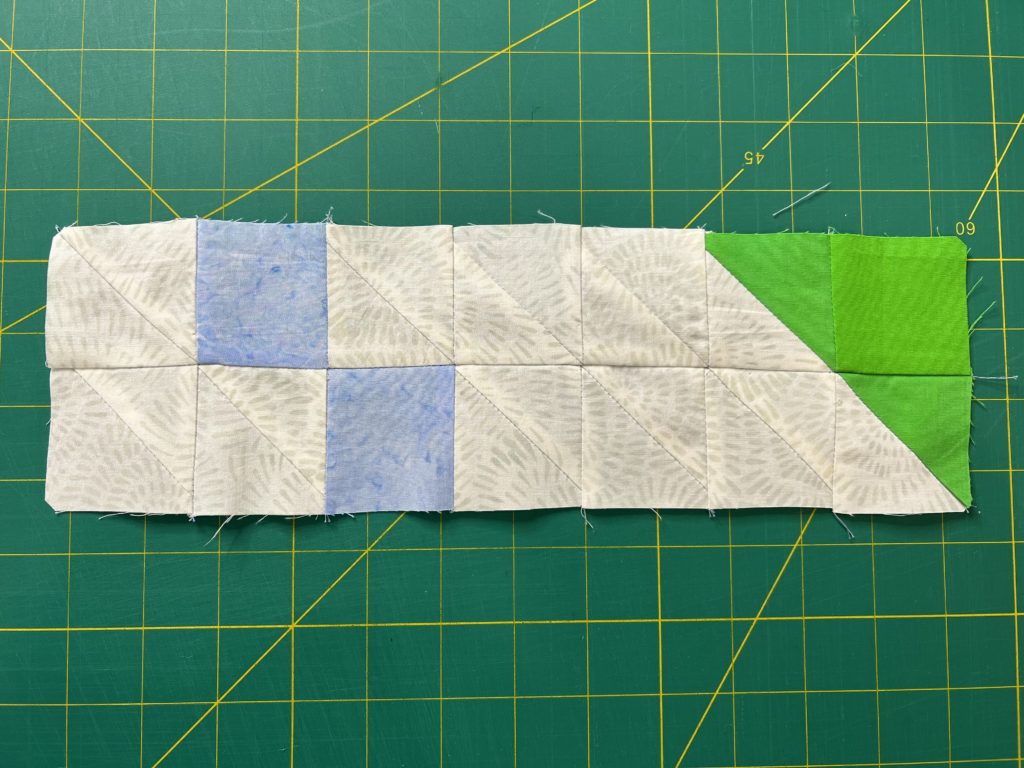
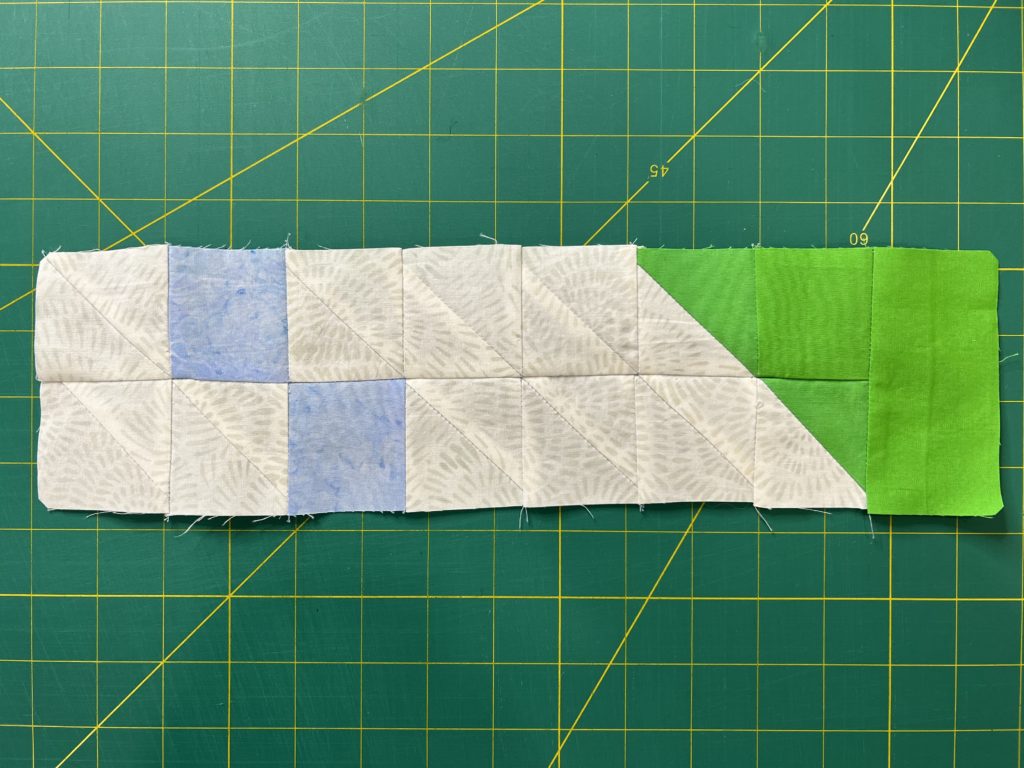
Sew together the section 3 strip and the first strip of section 4. Then add strip from template C to end.
Sewing Section 5
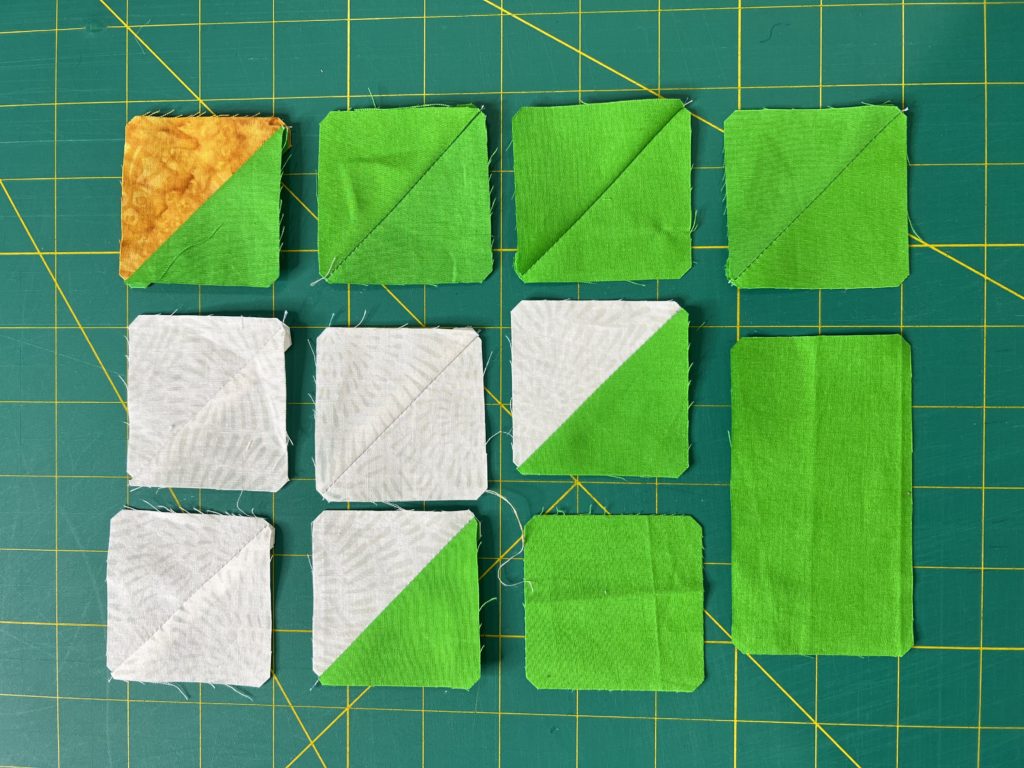

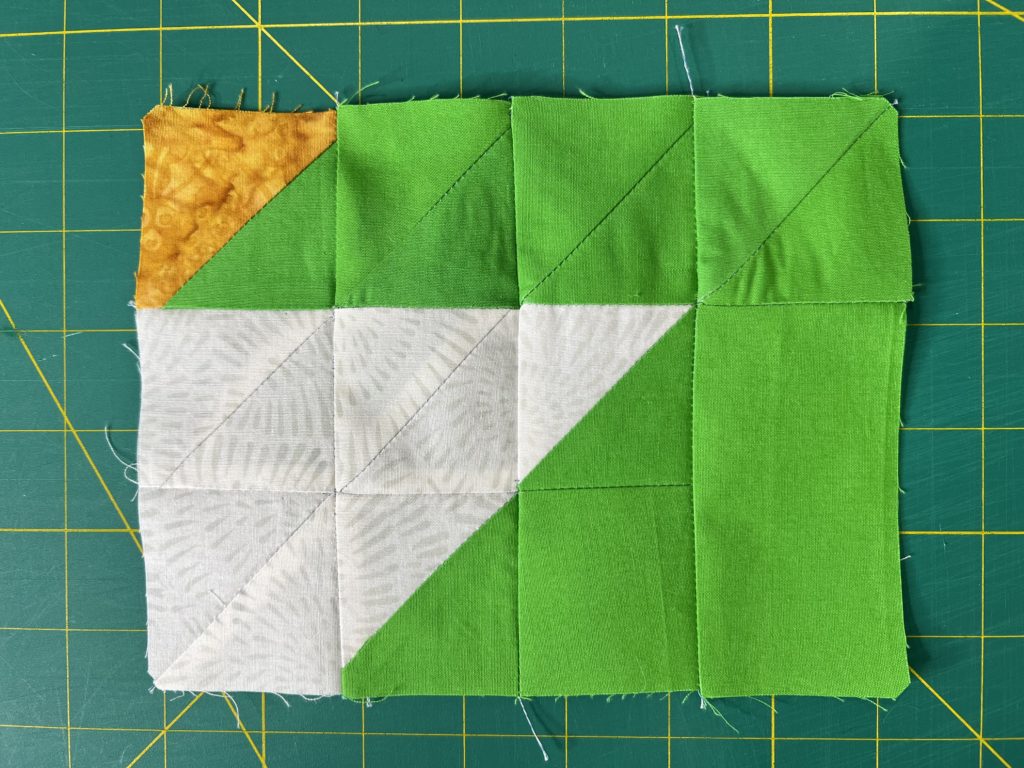
In section 5 you will be making a rectangle. The long strip in the bottom right is template C. The rest of the squares are all various half square triangles.
Sewing the Angel Together
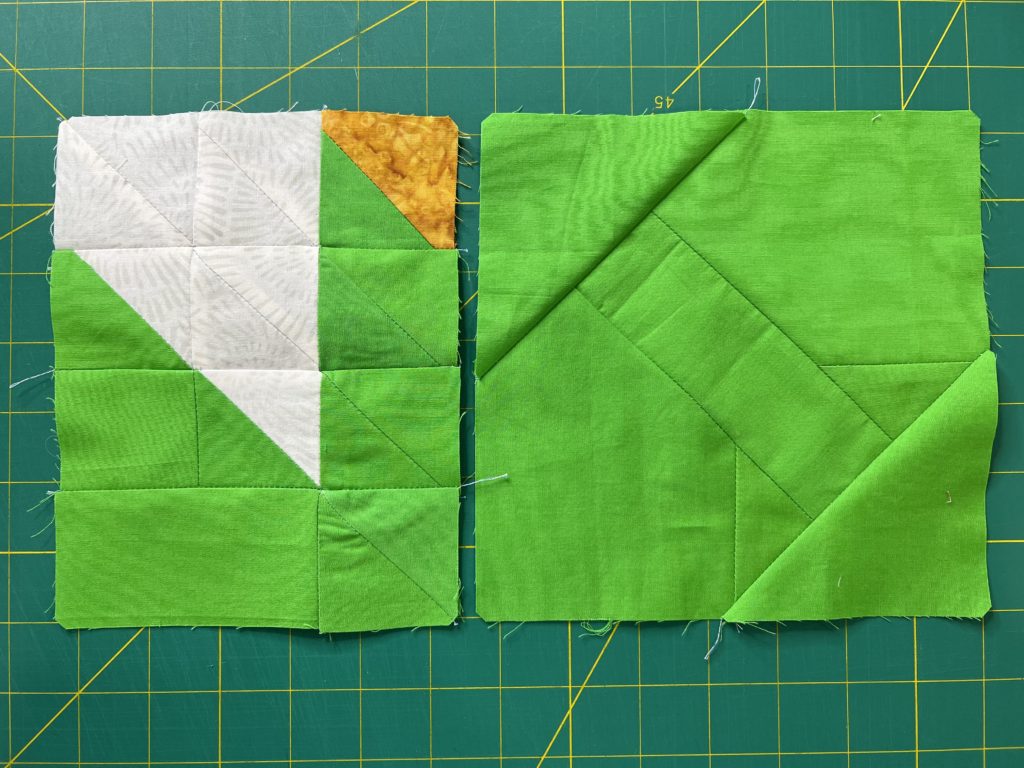
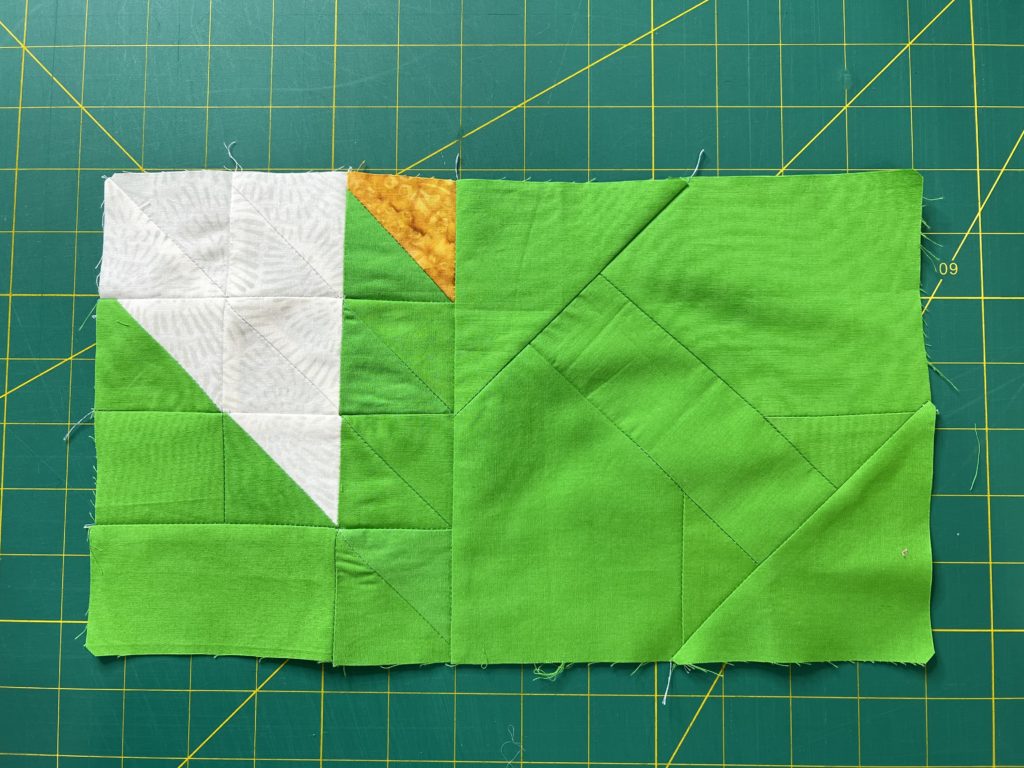
Firstly, sew together sections 1 and 5 as shown.
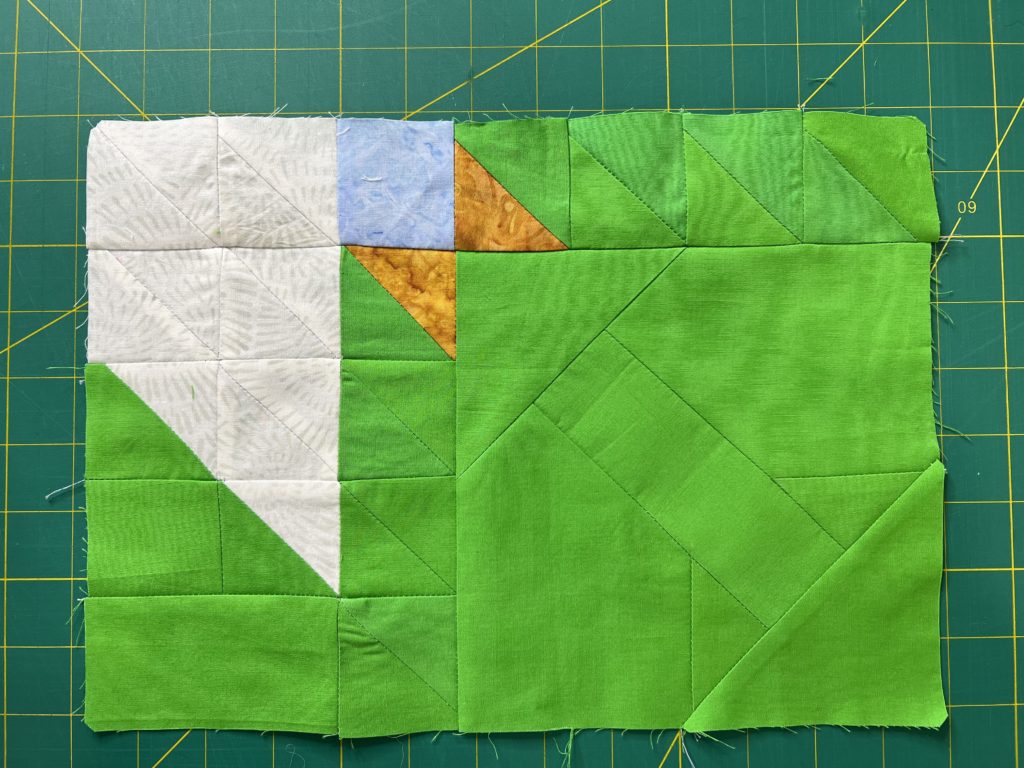

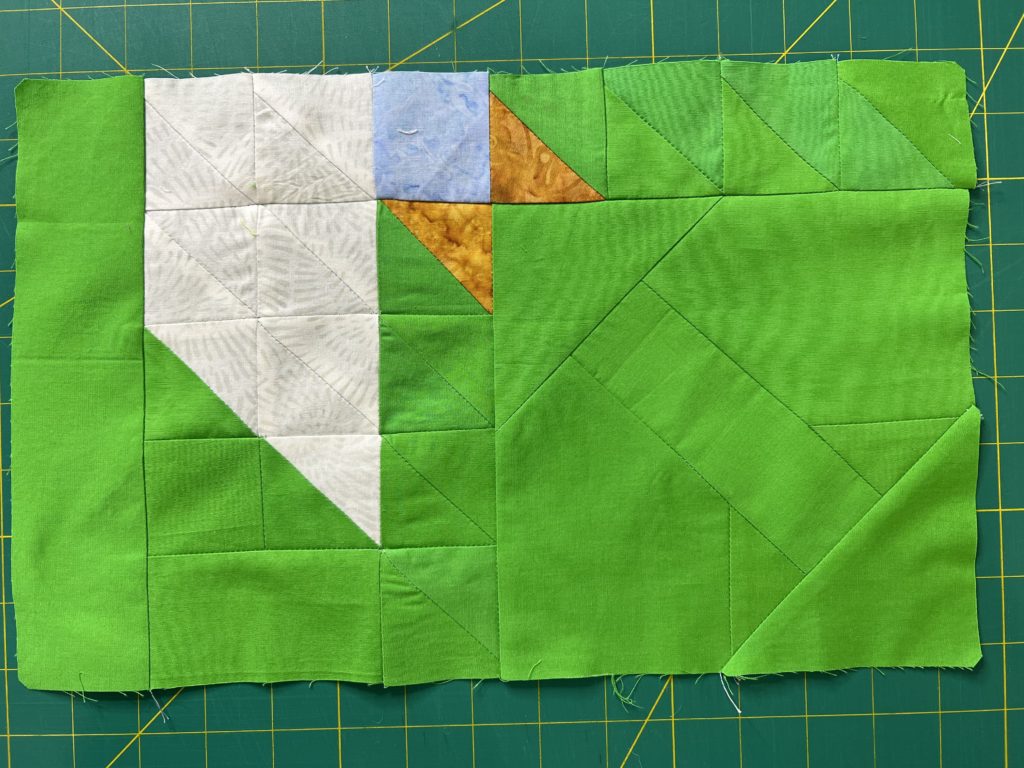
Then add the second strip from section 4 (top row in photo on the left). After that add the strip from template D as shown.
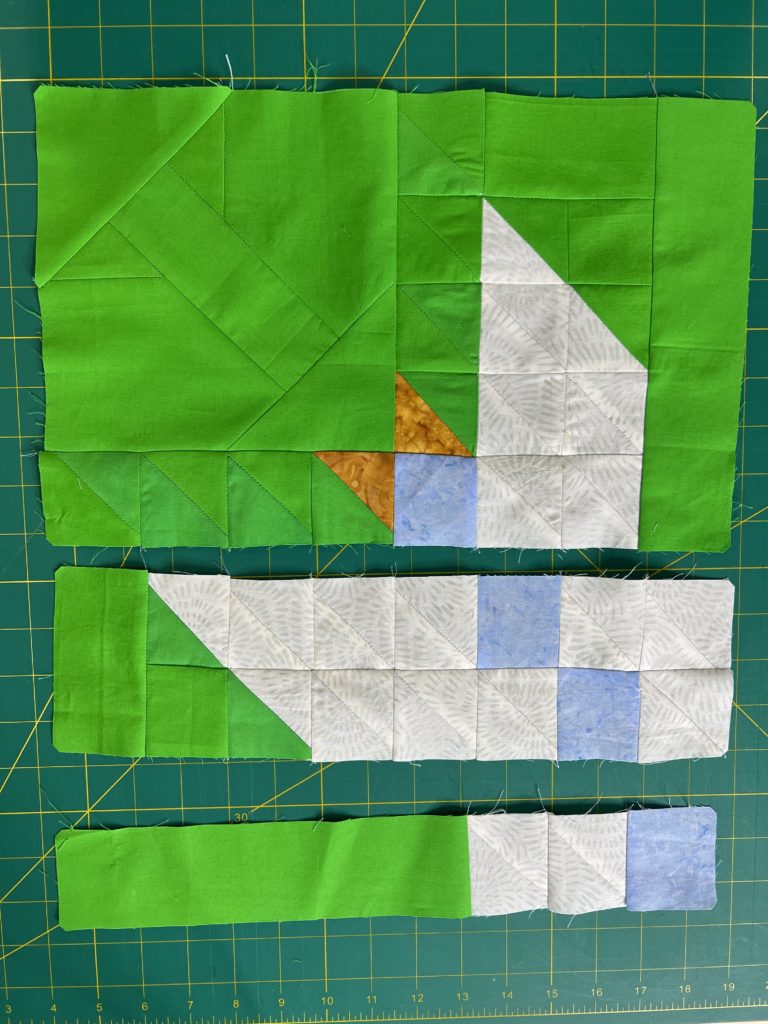
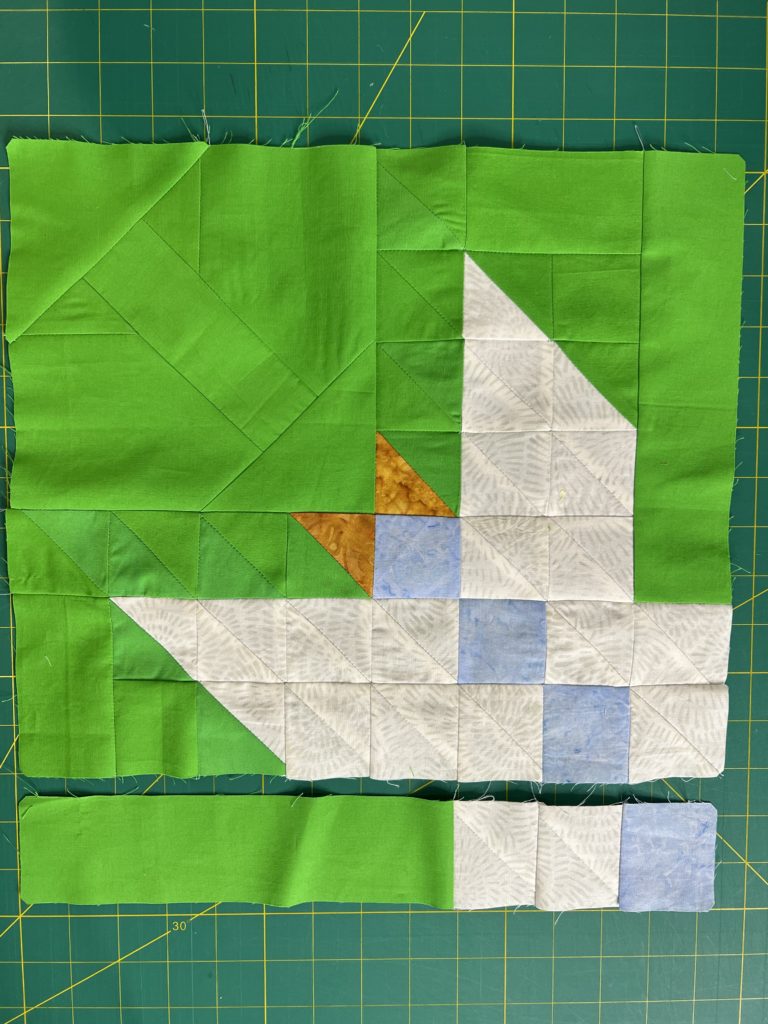

Next add the unit that was made up of sections 3 & 4(first strip). Finally, add the section 2 strip. You now have the angel made out of the Tree of Life die. You may need to square up the block at this point. It should measure 14.5″ square.
Making the Wall Quilt

Out of the background fabric, cut a square that is 15.5″ by 15.5″. Cut in half on the diagonal 2 times. You will have 4 large triangles.

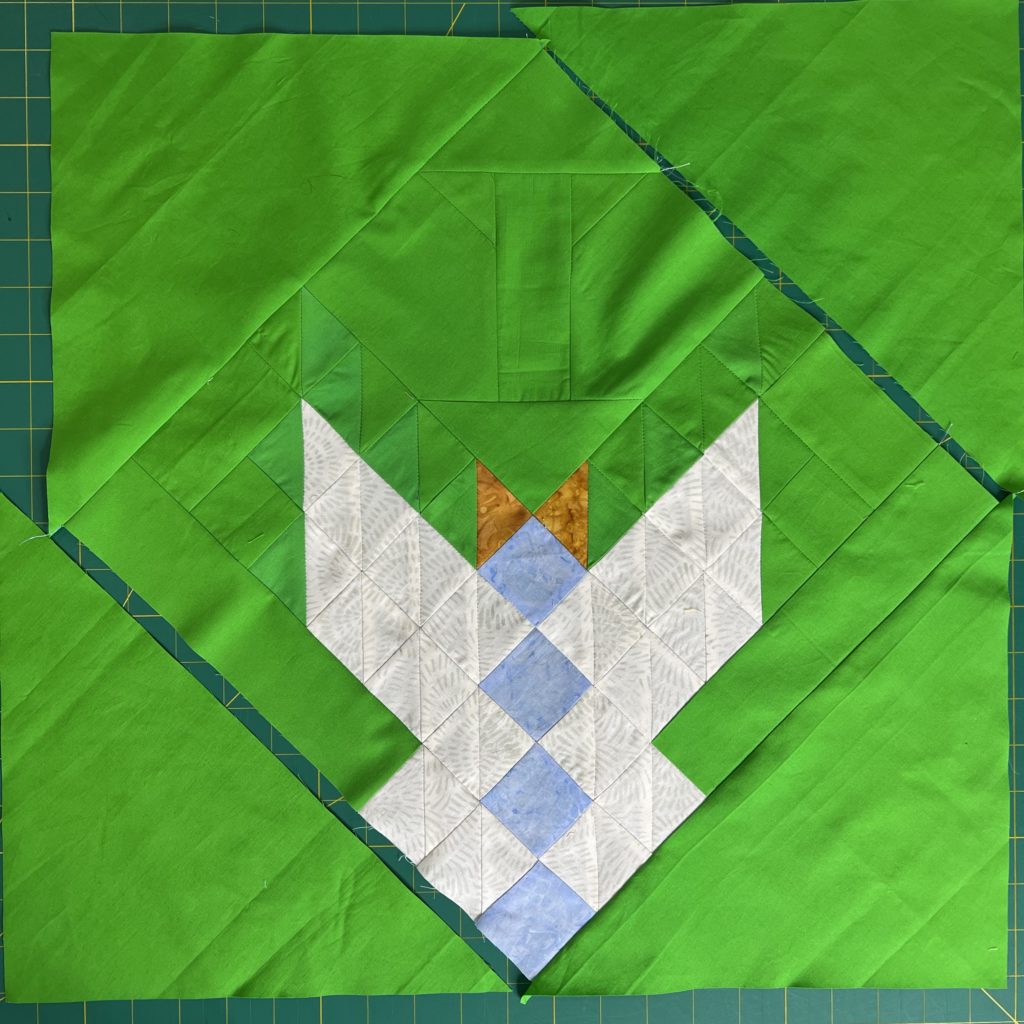
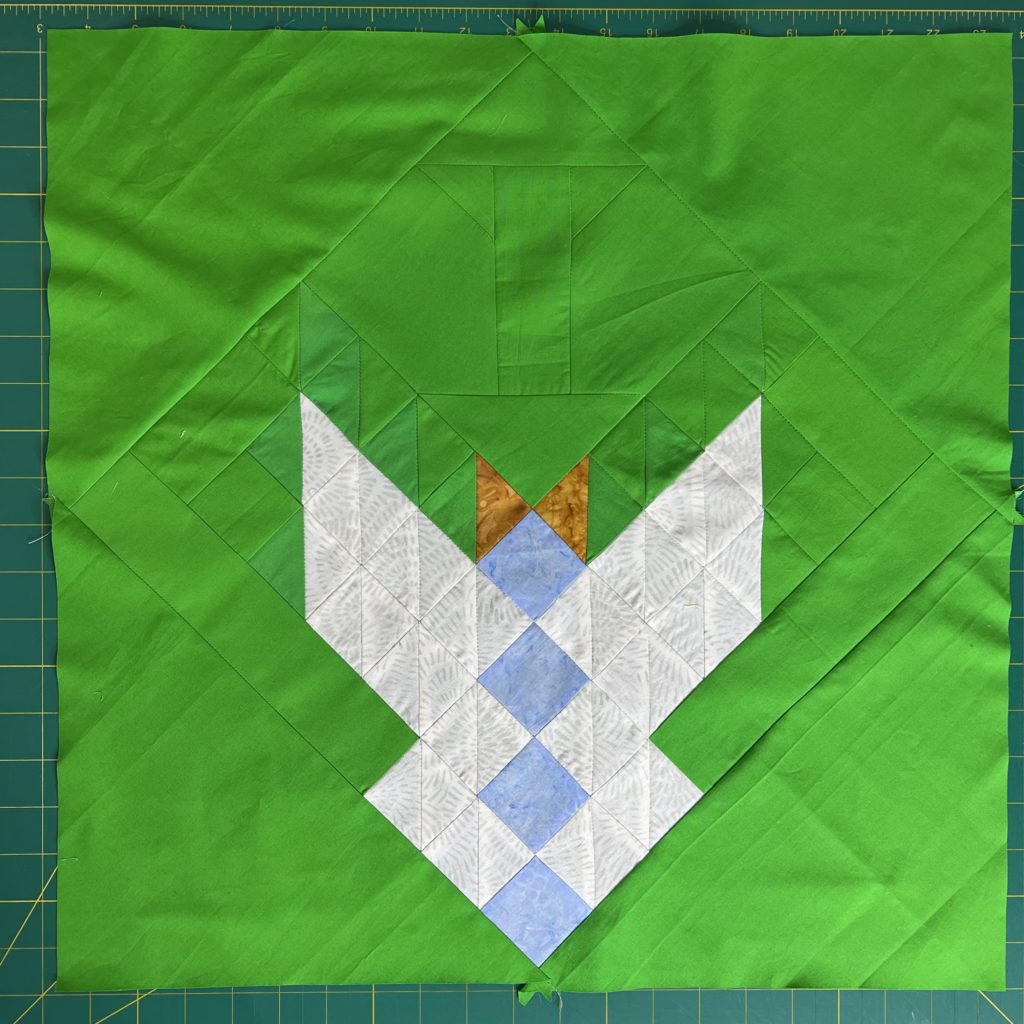
Add two of the triangles on opposite sides. Use the center seams in the angel block to help you center the triangles. Once those 2 triangles are added, add the other two. Press and trim quilt to 20″ square.
Adding the Borders

Add the strips that measure 2 1/2″ x 20″ to the right and left. Then add the strips that measure 2 1/2″ x 24 1/2″ to the top and bottom. Lastly, press and square up if needed.
Adding the Snowflakes (optional)

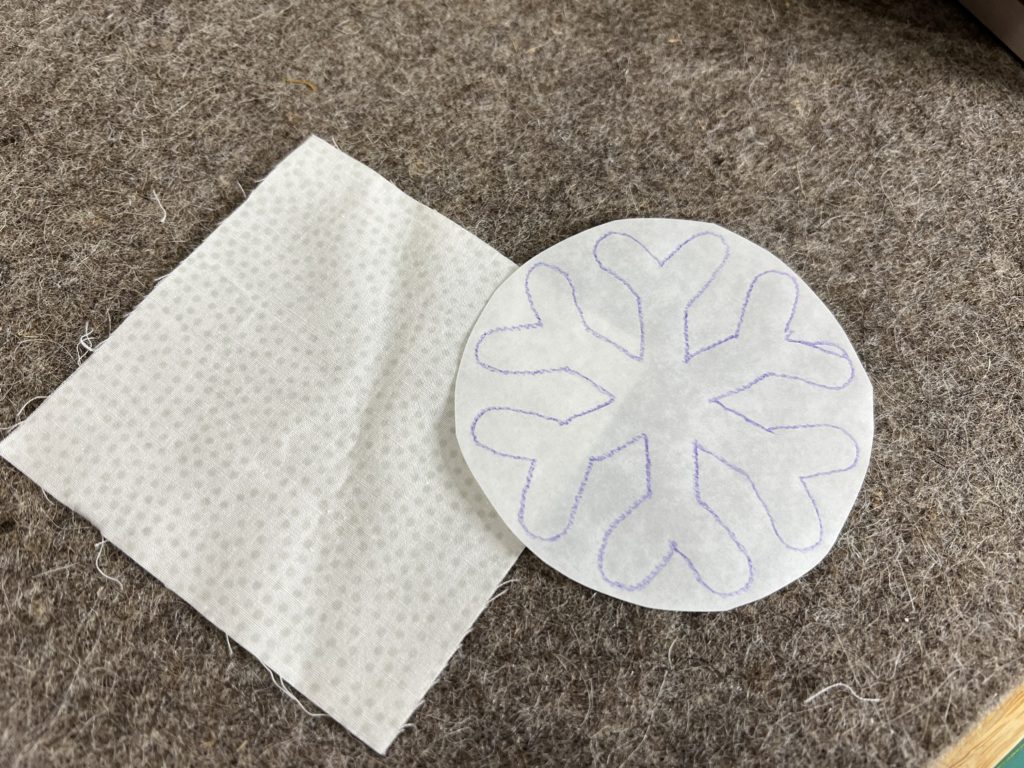
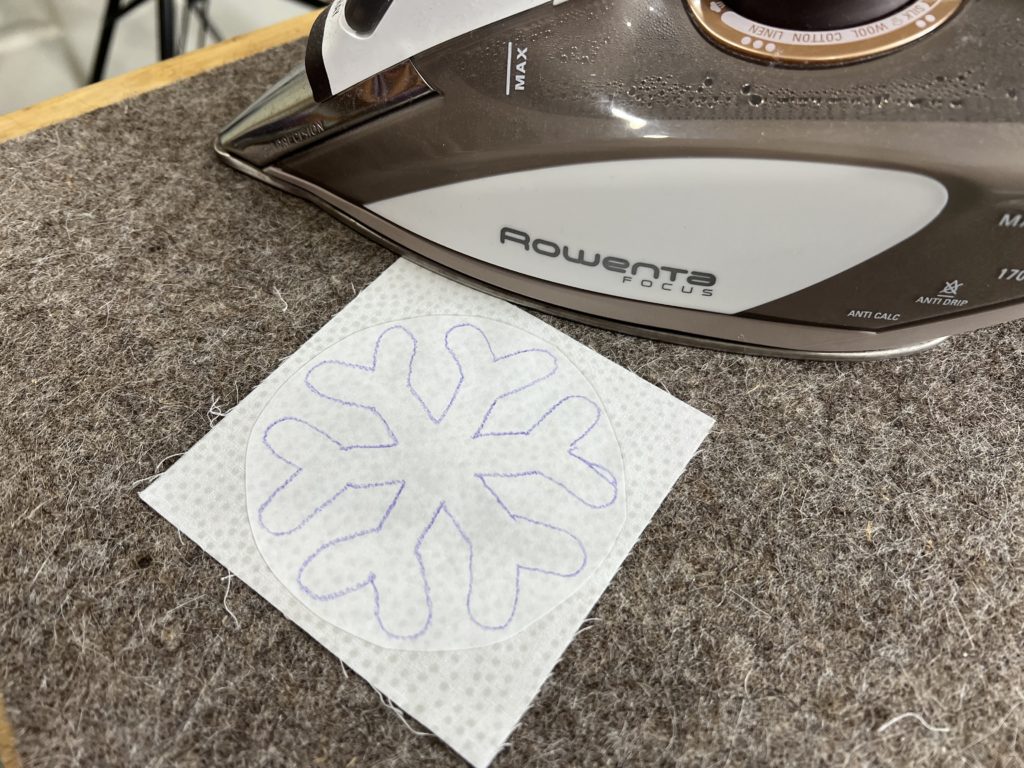
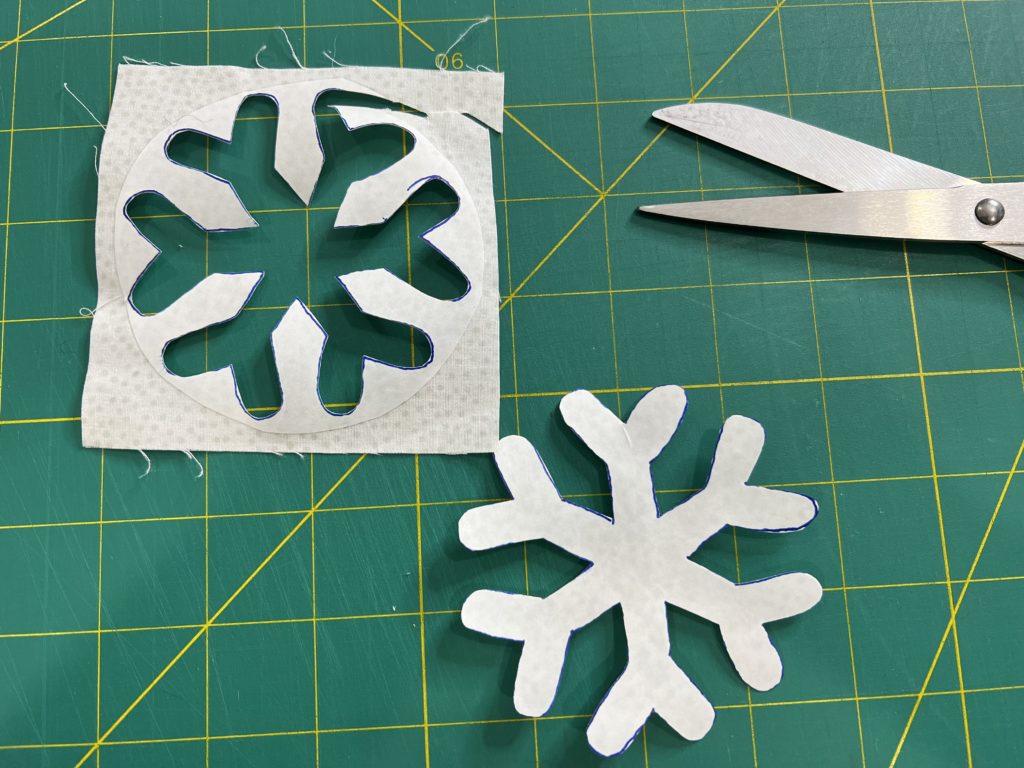
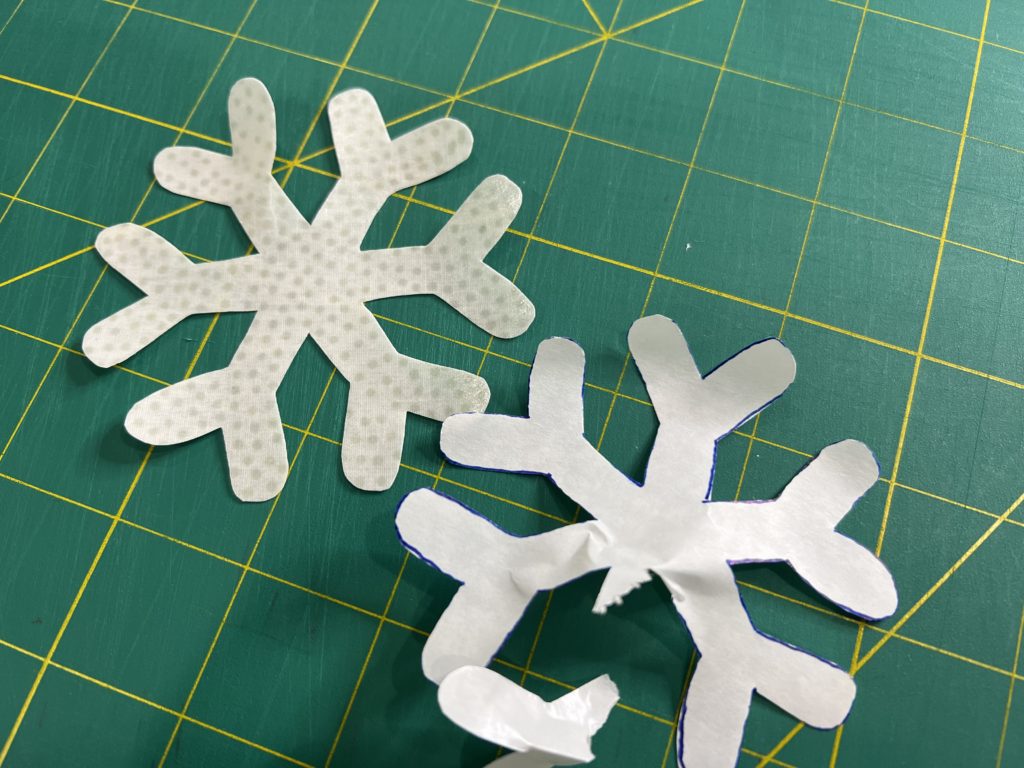
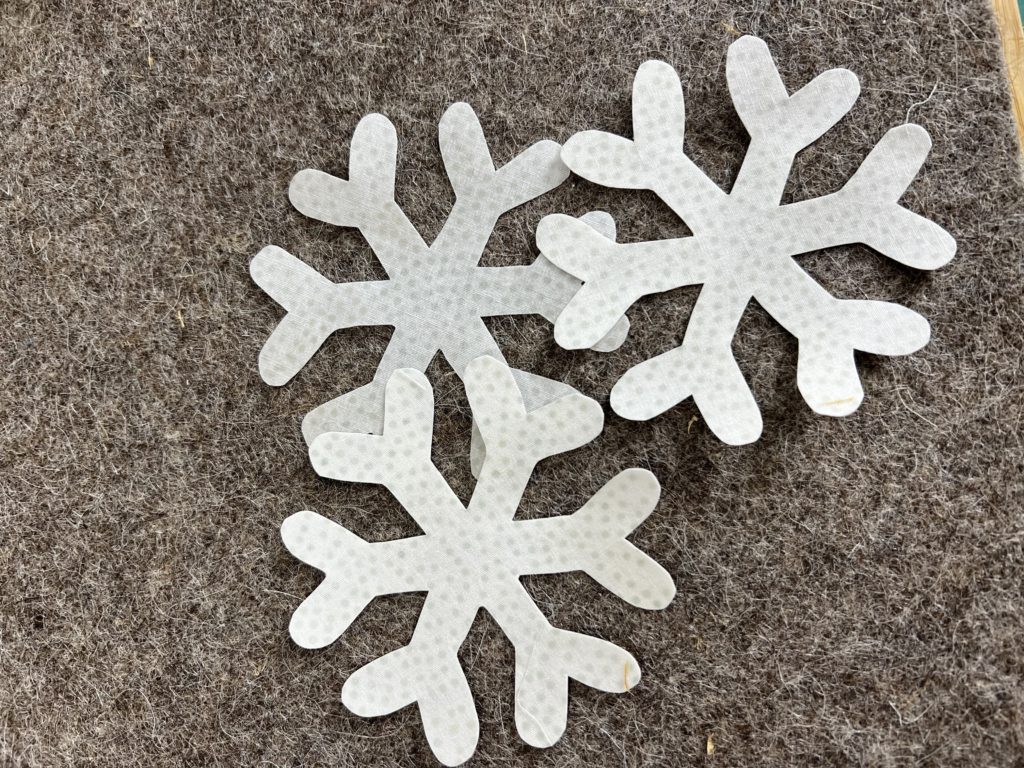
If desired you can add some snowflakes to the top of the quilt. I thought that the area above the angel looked empty which is why I added them. To make my snowflakes I used fusible paper-backed adhesive and some fun polka dot Island Batik fabric. I followed the manufacturer’s instructions and adhered them to my quilt.
Here is the snowflake template that I used. You can print it to any scale you desire. Here is the pdf file for the snowflake. Feel free to download it.
Finishing Your Quilt
Quilt as desired. In both of my angels I decided to add binding that matched the background fabric. I thought it added a little extra something to the piece.
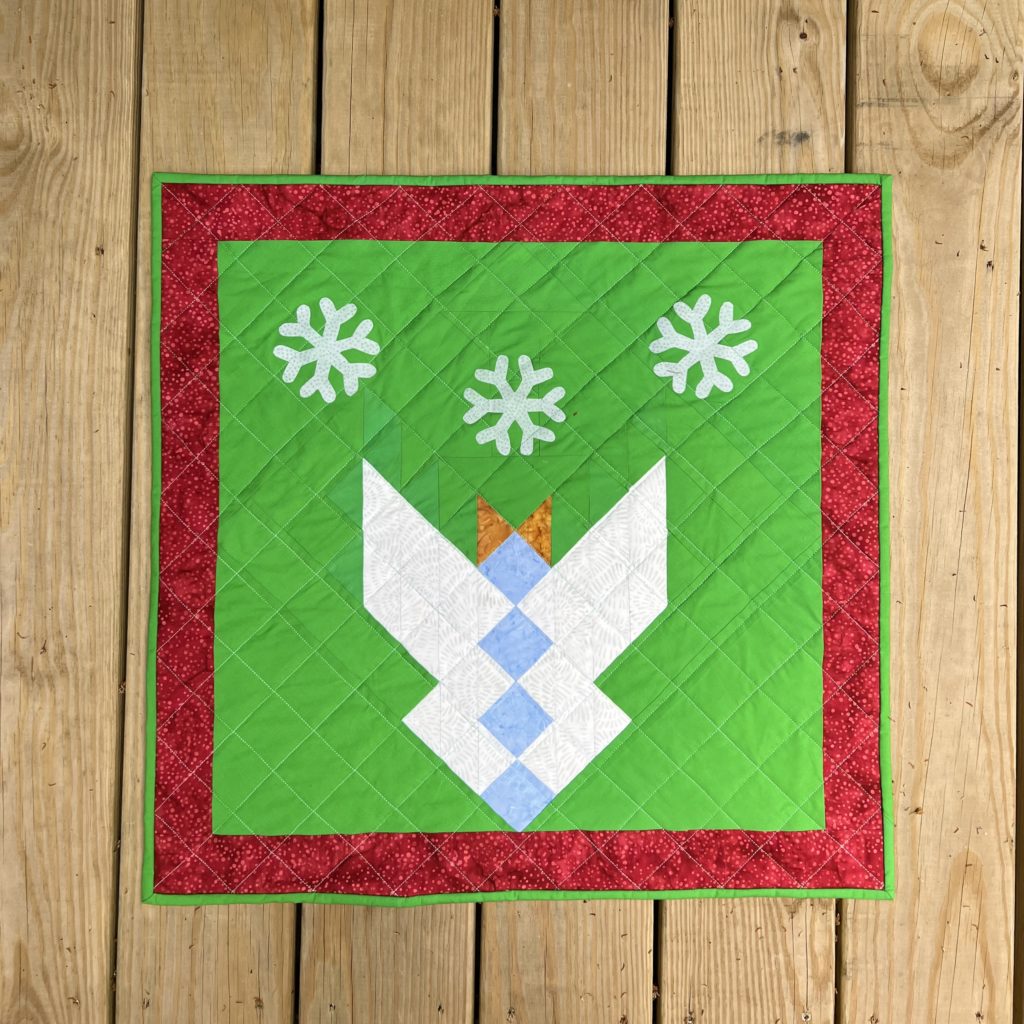
I hope have enjoyed learning how to make an angel using the Accuquilt® Tree of Life die. There are a lot of steps, but the results are lovely. Make your angel in your favorite colors and bring a smile to anyone’s face.
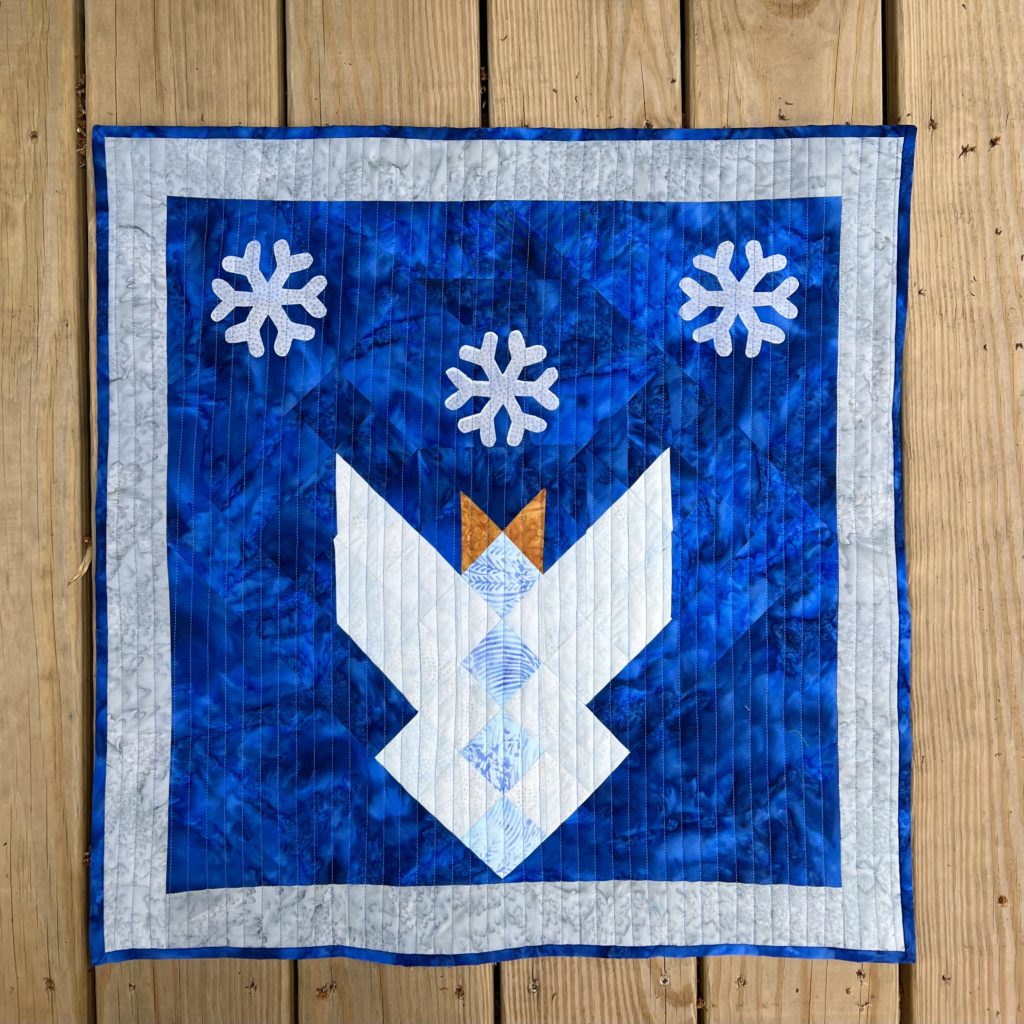
Thank You to The Sponsors
To make my quilt I used various fabrics from Island Batik Foundations. The die is from Accuquilt. I used Hobbs Batting in both of my quilts and I used Aurifil thread to piece and quilt them. In my machine I used Schmetz Needles. Thank you to the sponsors.

Happy Quilting! – Claudia


6 Comments
Brenda @ Songbird Designs
July 13, 2022 at 9:03 AMI love this, Claudia!! Great use of the die!
Gail Sheppard
July 13, 2022 at 5:05 PMThe angels are simply darling! 🙂
Jennifer Thomas
July 14, 2022 at 8:11 AMThat is just amazing! I never would have seen the angels in the Tree of Life die.
createwithclaudia_7j76hs
July 18, 2022 at 6:56 AMThanks! I was looking at it online when I found out what the challenge would be and I looked at it upside down and it just popped out .
Vivian NOLEN
July 16, 2022 at 2:33 PMGreat design I love it but there’s no way I can afford a die cutter. Can you list the sizes of the pieces so I can cut them myself. Thank you
createwithclaudia_7j76hs
July 18, 2022 at 6:58 AMI am working on coming up with a blog post with the dimensions for folks who don’t have a cutter. Thanks for reading!