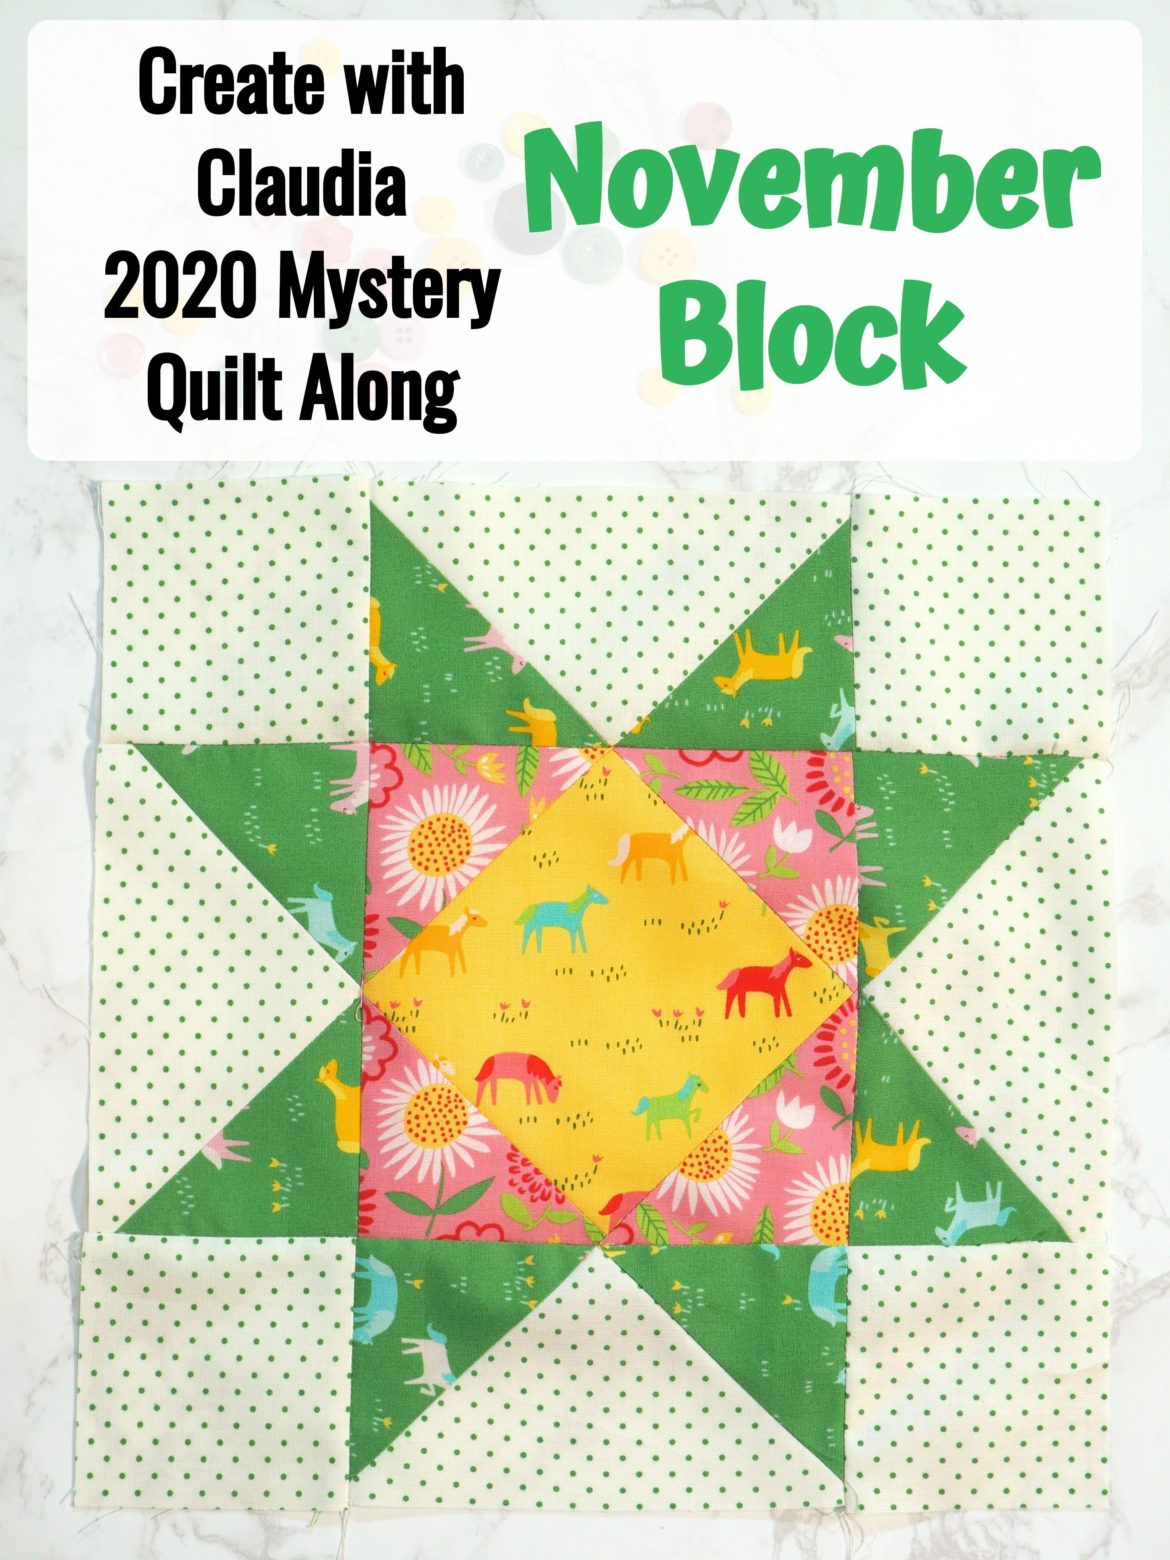
How to Make a 12 1/2″ Variable Sawtooth Star Quilt Block
Originally part of my 2020 Sparkling Sampler Mystery Quilt Along, this tutorial shows you how to make the big and bold Variable Sawtooth Star quilt block.
Well, here we are. It’s the final block for the 2020 Create with Claudia Mystery Quilt Along. I can’t believe it! After all of this time and work, this is the last block we will be doing before we assemble the quilt top next month! I hope you have been enjoying this mystery quilt, and I hope you like this November mystery quilt along block.
I took it easy on you this month in that you only need to make one block. This pattern does incorporate skills that we have learned in prior months, plus a center part that is a little different. Don’t worry though, like the others, this block comes together easily.
So gather up your fabric, head over to your sewing space and let’s tackle the final block!
*Download the Free PDF Pattern for the November Mystery Quilt Along Block Here*
Fabric Requirements
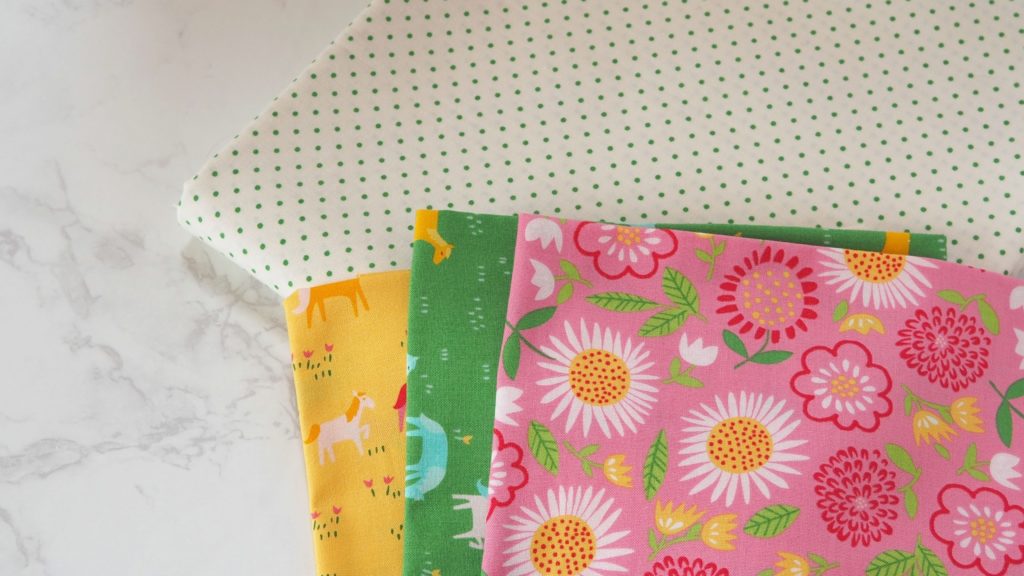
We are using four fabrics this month and will need the following amounts:
- Fabric A – Fat eighth
- B – 9″ square
- C – 8″ square
- D – 6 1/2″ square
This month, the fabrics that I used were all from Moda. They include Kelly Green on White from the Essential Dots collection. The yellow and green fabrics, called Rainbow Ponies, and the pink fabric, called Fresh Cut Flowers, are all from the Best Friends Forever collection by Stacy Iest Hsu.
The quilt block in the video tutorial is made up of various fabrics from my stash.
Items That May Help With This Block
You can find many of the items that I used to make this project in my Amazon Store.
As an Amazon Associate I earn from qualifying purchases.
Video Tutorial
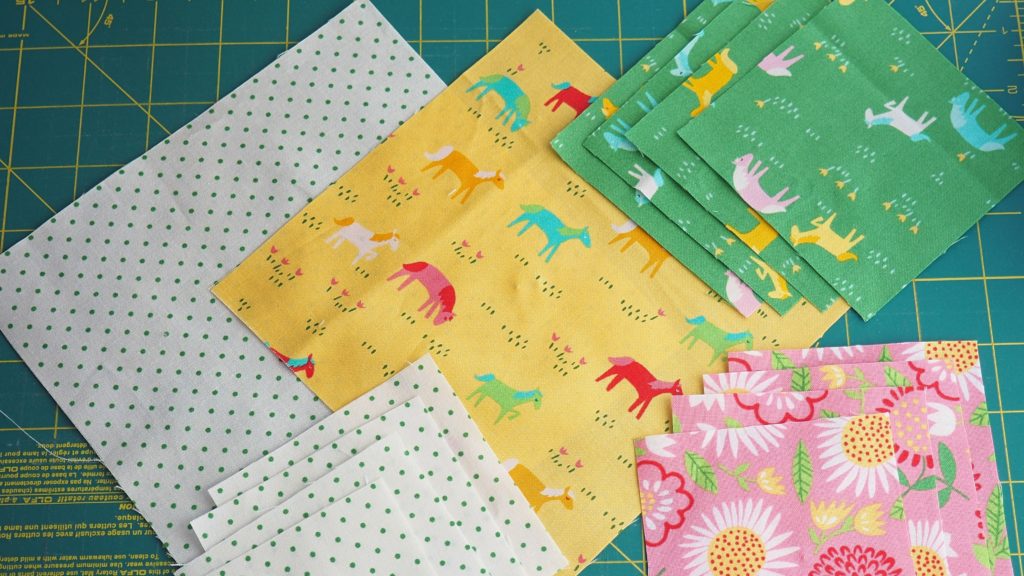
Cutting
Fabric
- A – Four 3 ½ inch by 3 ½ inch squares
- A – One 7 ¼ inch by 7 ¼ inch square
- B – Four 4 ¼ inch by 4 ¼ inch squares
- C – Four 3 ½ inch by 3 ½ inch squares
- D – One 6 ½ inch square
November Mystery Quilt Along Block Assembly
Assemble the Geese
For this you will need the 7 ¼ inch square of fabric A and the 4 ¼ inch squares of fabric B.
First – Draw a diagonal line on the back(wrong) side of the smaller squares.
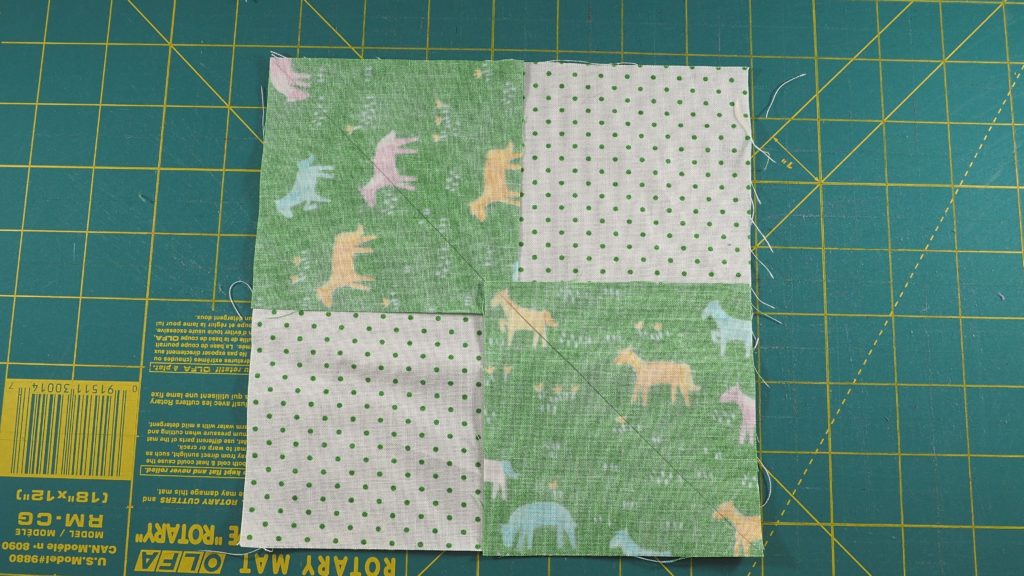
Next – Line up one of the small squares on top of the large square with right (front) sides facing. Line up another small square on the opposite corner.
Next, using a scant ¼ inch seam allowance, sew down each side of the line drawn.
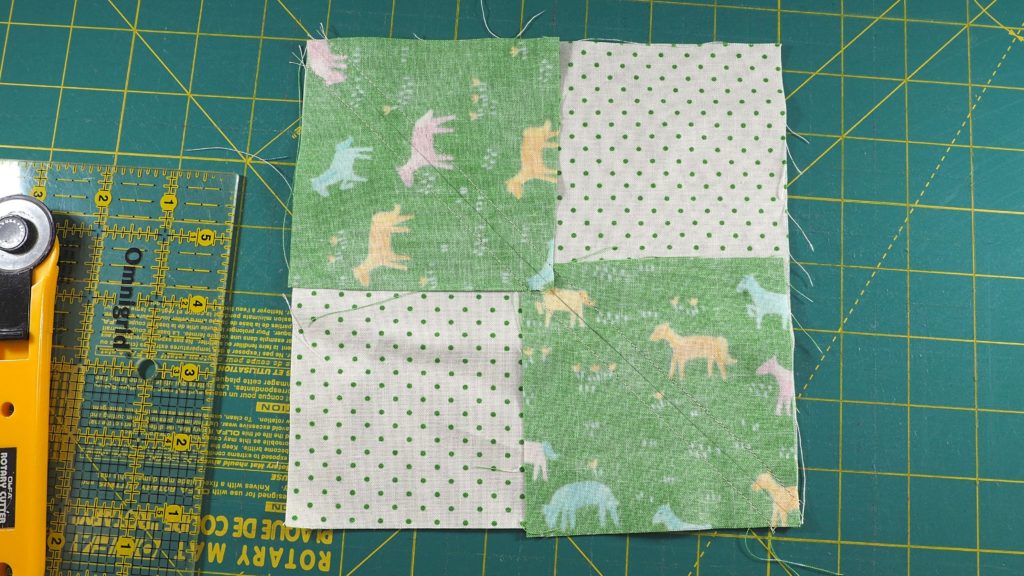
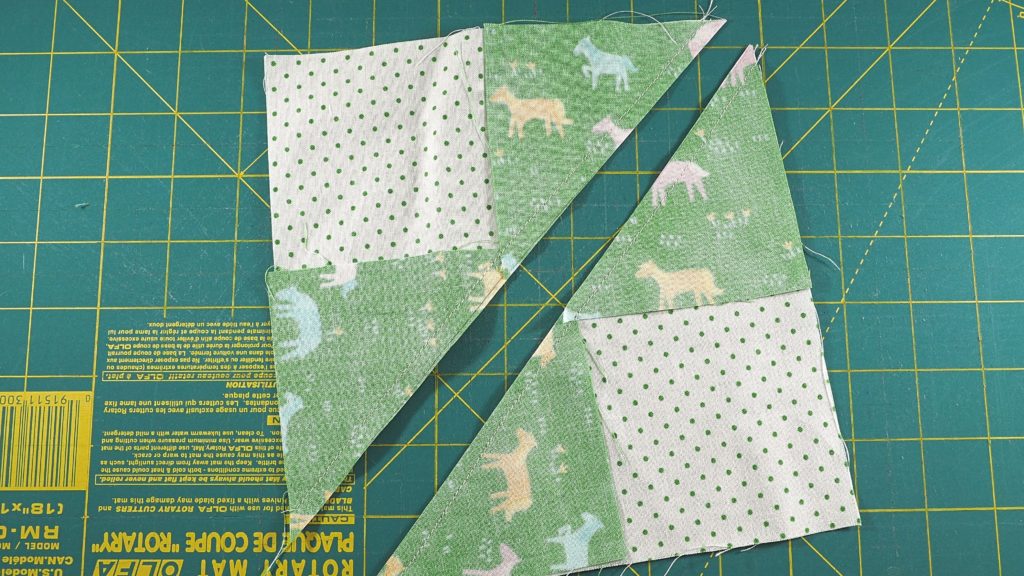
Cut along the drawn line and press open.
Using one of these units, take another one of the small squares and line it up on the remaining corner (right sides facing).
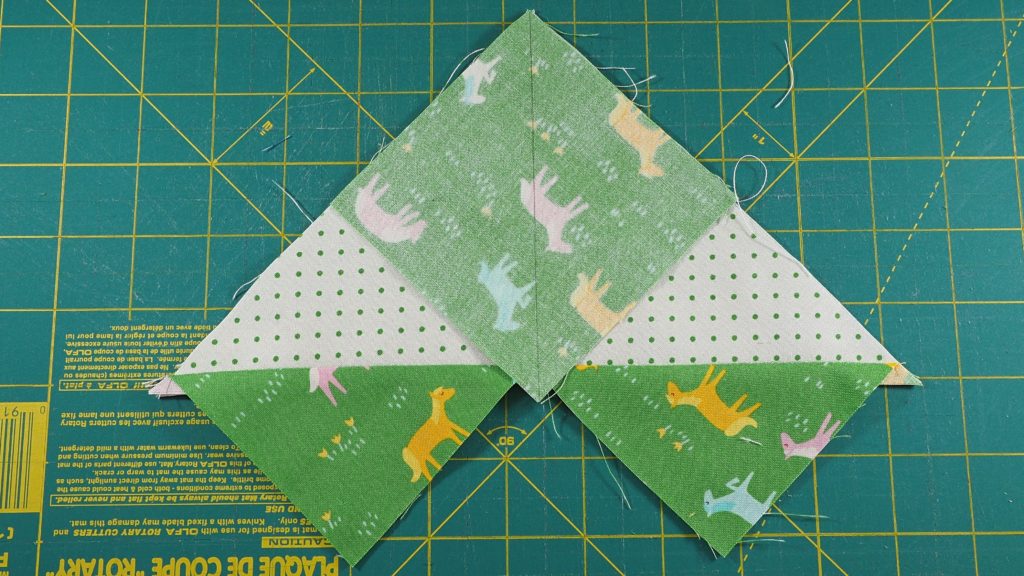
Sew along each side of that drawn line, using a 1/4 inch seam allowance.
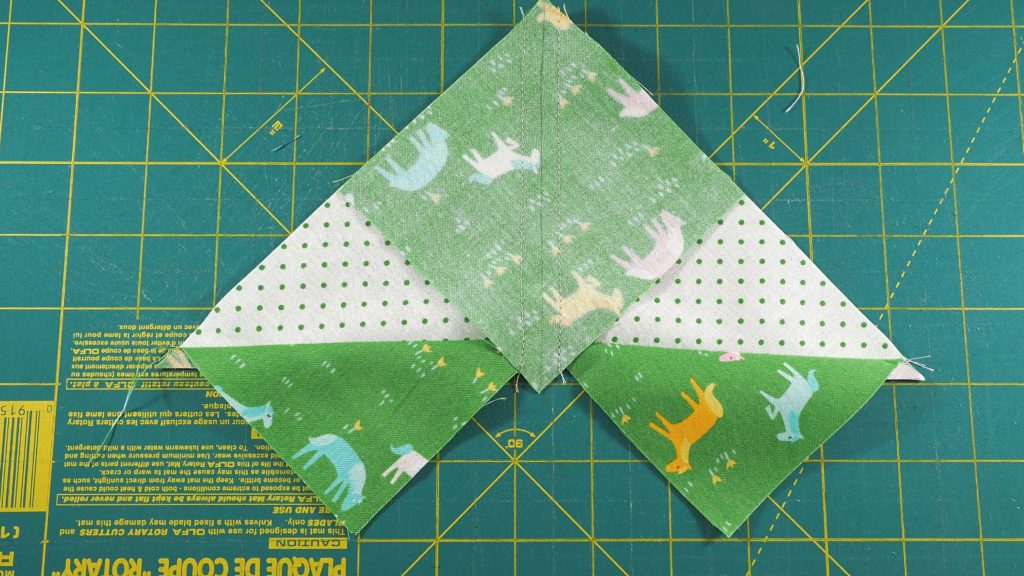
Cut along drawn line, press open.
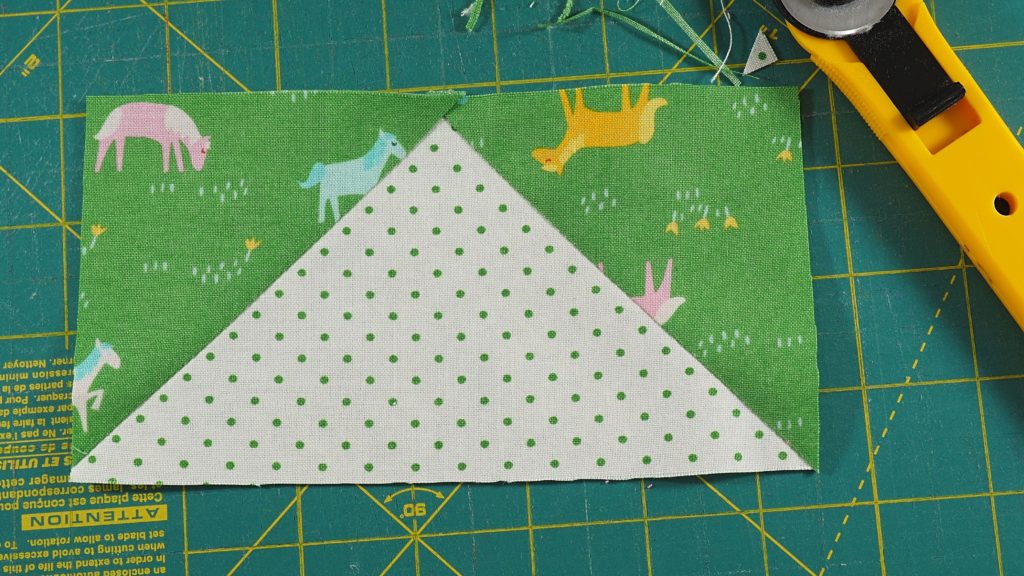
You will have two flying geese units. They will not be exactly the size needed and need to be trimmed down to 3 ½ inches by 6 ½ inches. Repeat with the second unit.
You will end up with four flying geese units.
Assembling the Center
You will need the 6 ½ inch square of fabric D and the four 3 ½ inch squares of fabric C.
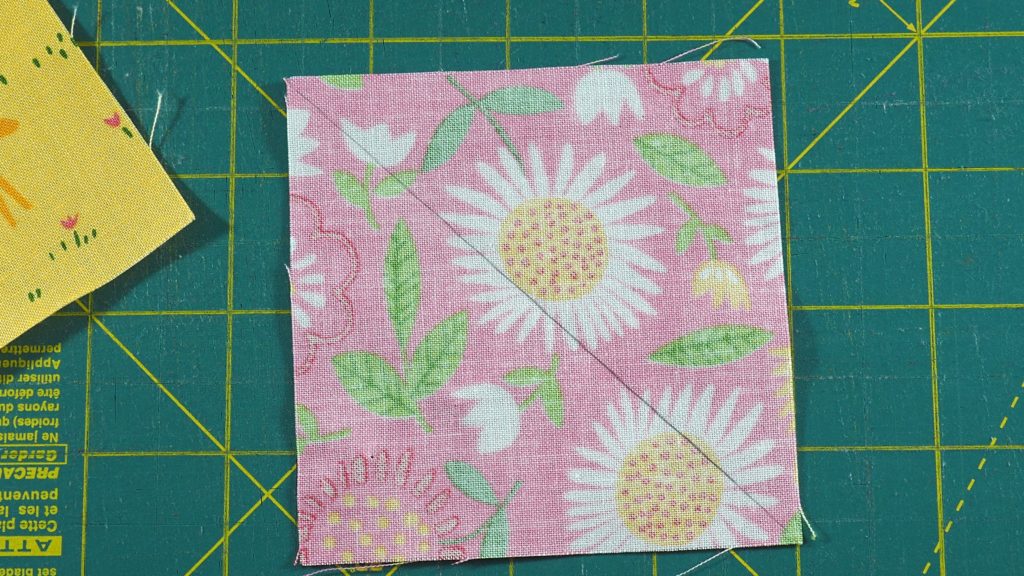
Draw a diagonal line on the back side of the four smaller squares
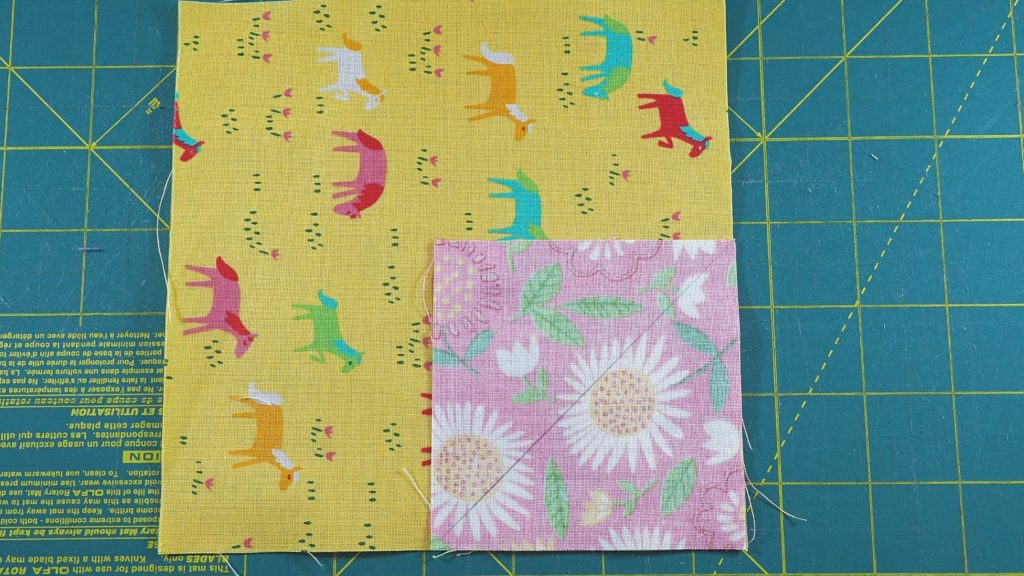
Take two of the smaller squares and lay them on top of the large square on opposite corners with right sides of fabric facing.
Sew just along the outside of the drawn line (closer to the corner). That way when you fold back the corner it will be large enough.
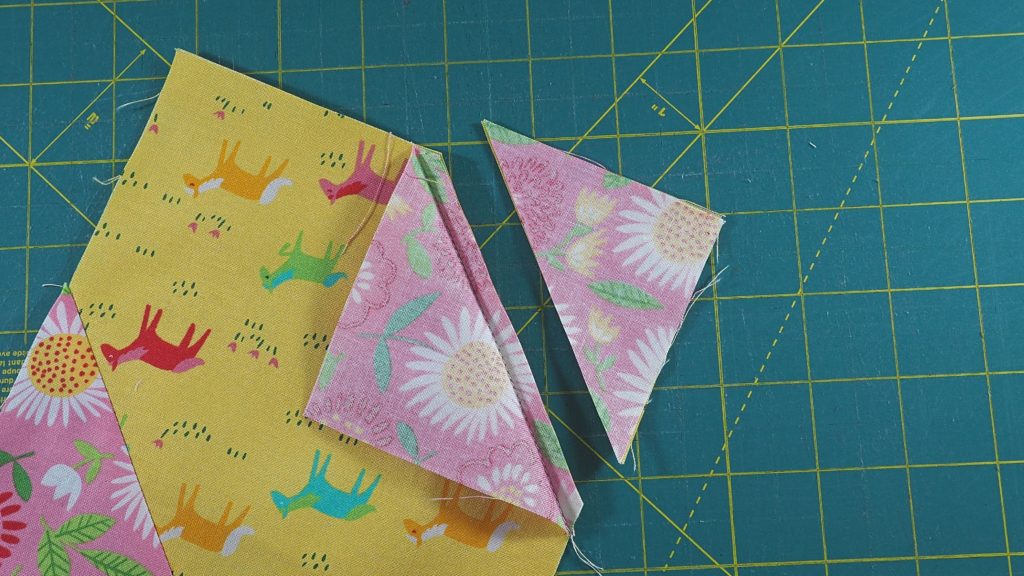
Trim off the part of the square that is closest to the corner, leaving about ¼ inch from the sewn line. Repeat on the opposite corner.
It will look like this.
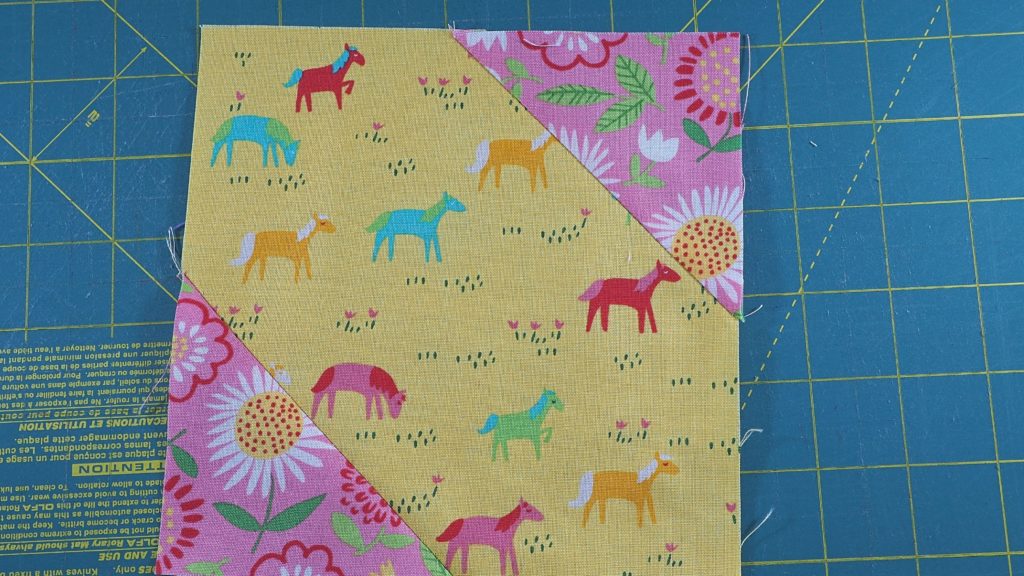
Then repeat with the other two corners.
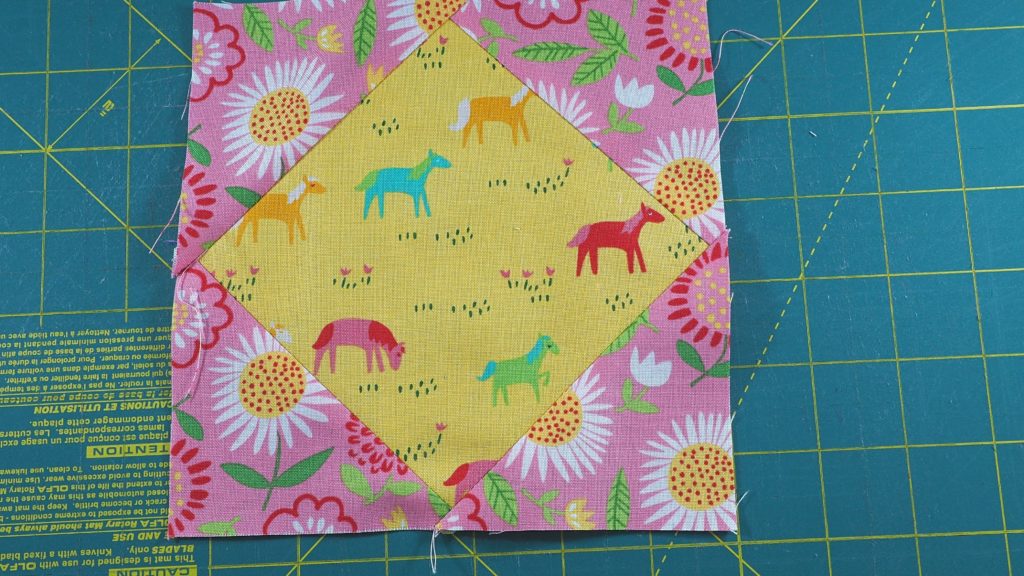
Press open and trim block to 6 ½ inches by 6 ½ inches (if needed).
Final Block Assembly
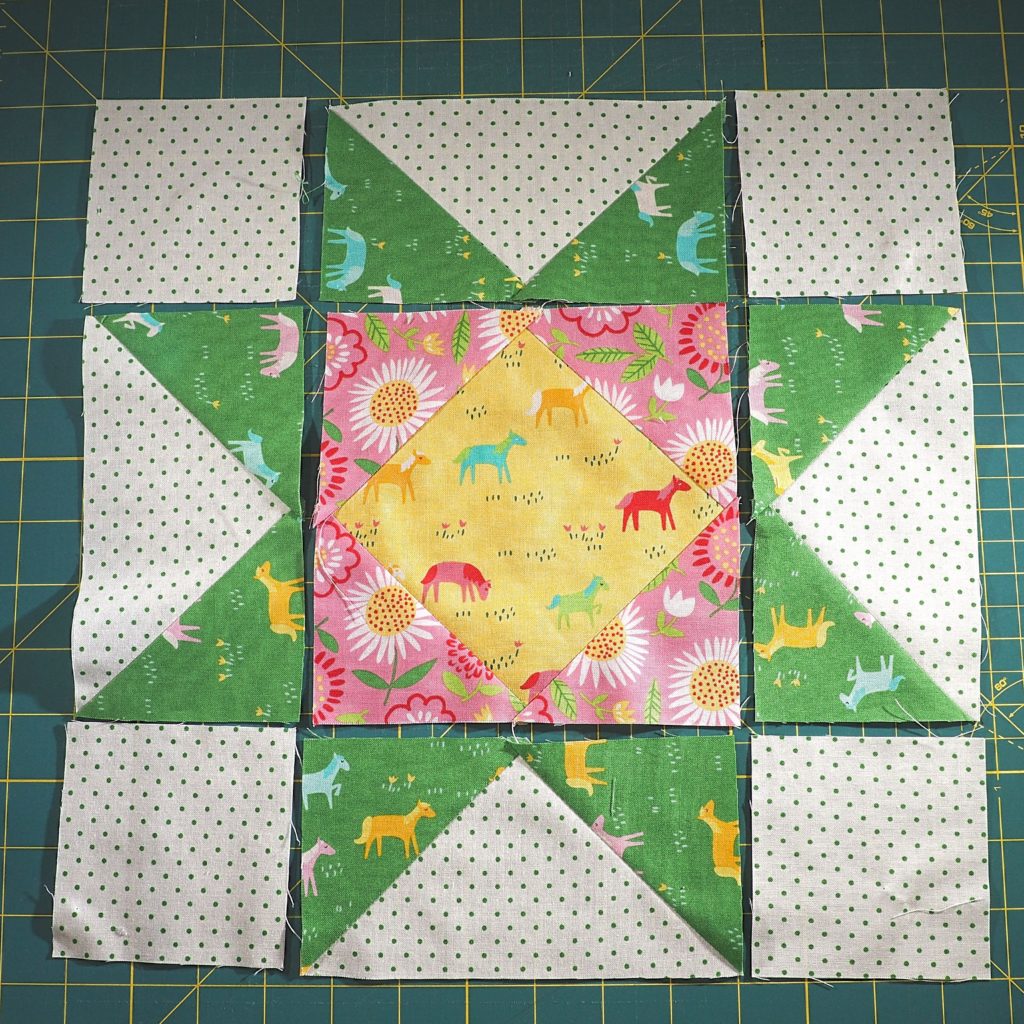
Lay out the units of the block as shown.
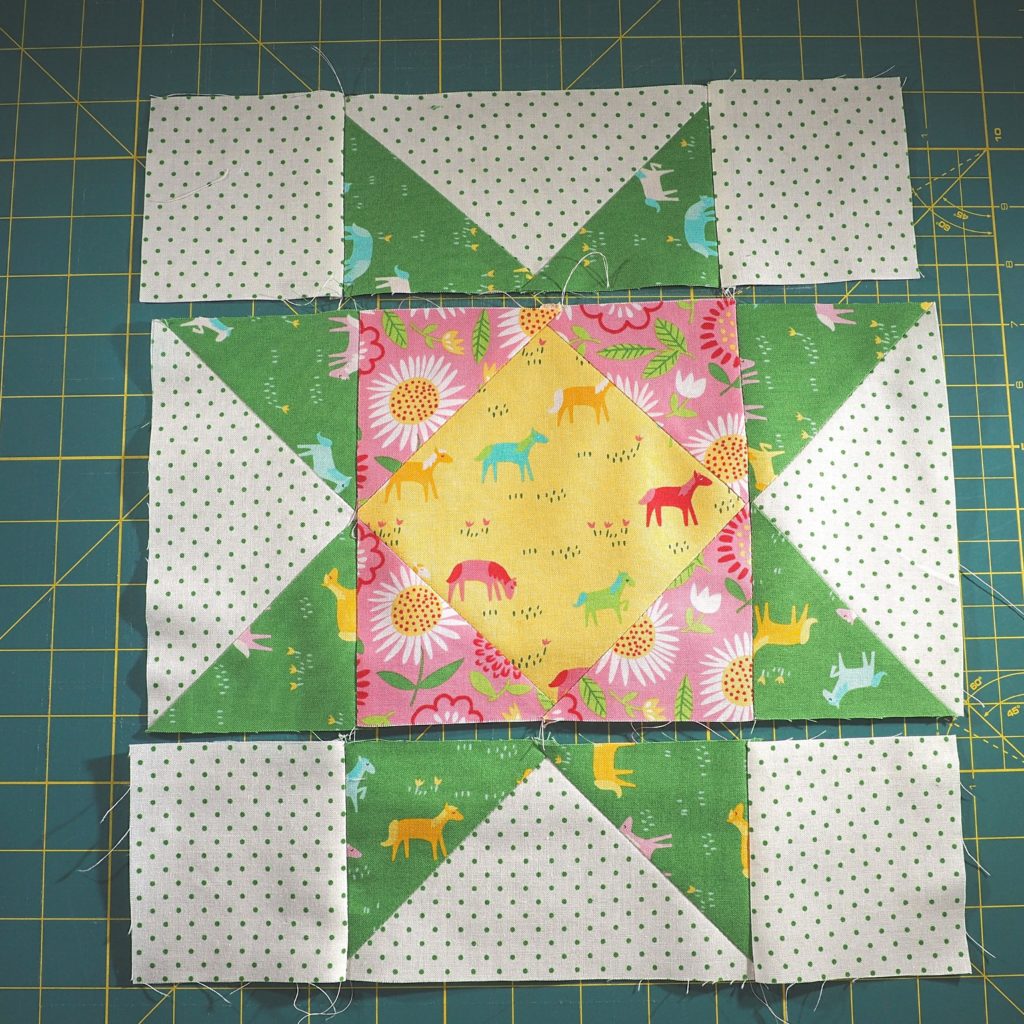
First, sew together the units in row 1. Repeat with rows 2 and 3. Press the top and bottom rows to the outside. Press the center row to the inside.
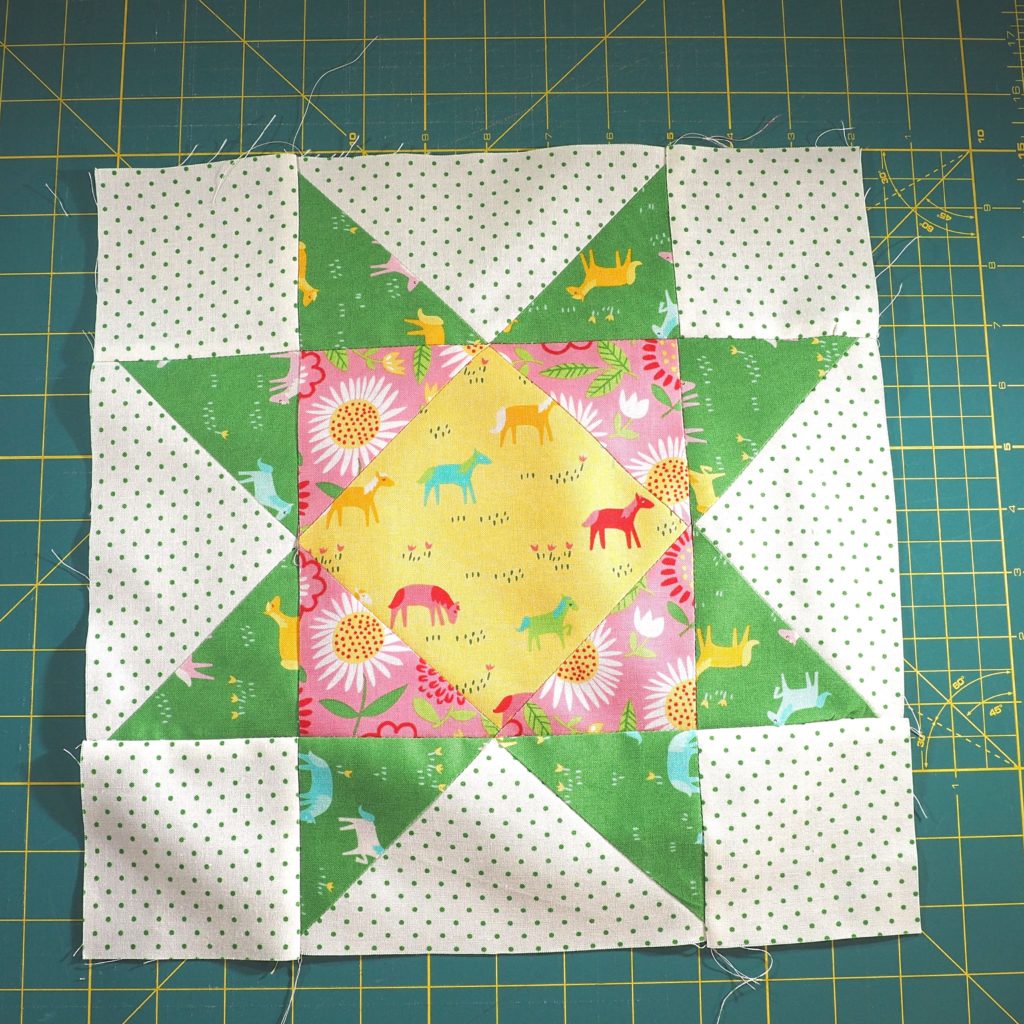
Finally, sew the three rows together to get the final block. It should measure 12 ½ inches by 12 ½ inches.
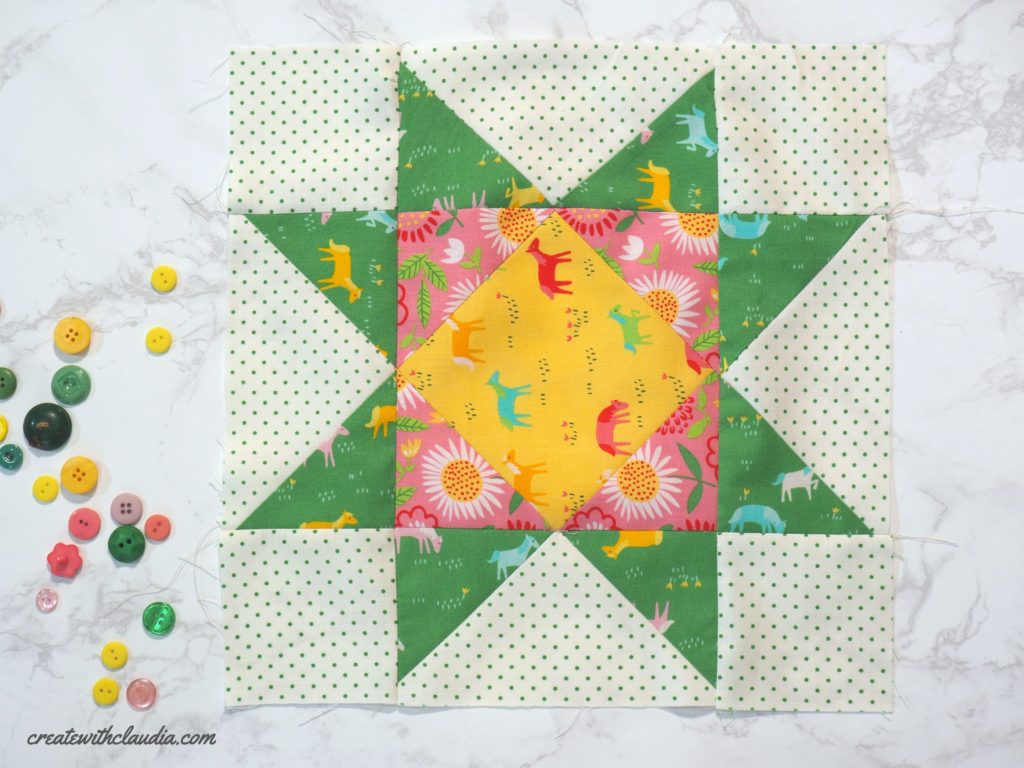
See you next month to put it all together!!!
Feel free to join in the quilt along. You can find all of the details here.
In addition, I have this FB group for people who are participating. It’s a fun place to see what other people are doing for their blocks.
Check out what fun blocks we’ve done so far!
Show off your progress on social media! Make sure to use the hashtag #createwithclaudiaqal if you post any pictures!
*This mystery quilt along is for entertainment purposes only. Therefore, there are no prizes or giveaways.* Best efforts have been made to ensure that the instructions are correct, however sometime errors occur. If you have any questions, please contact us at claudia{at}createwithclaudia{dot}com*


2 Comments
Darlene Easson
January 5, 2021 at 11:57 PMI can’t find December— how to put all the blocks together? (Love the vibrant colors you chose — trying to be less timid on that front!). D
createwithclaudia_7j76hs
January 6, 2021 at 5:23 AMHere is the final pattern. Thanks for joining along! https://www.createwithclaudia.com/2020/12/2020-mystery-quilt-along-pattern/