Free Modern Wall Quilt Pattern
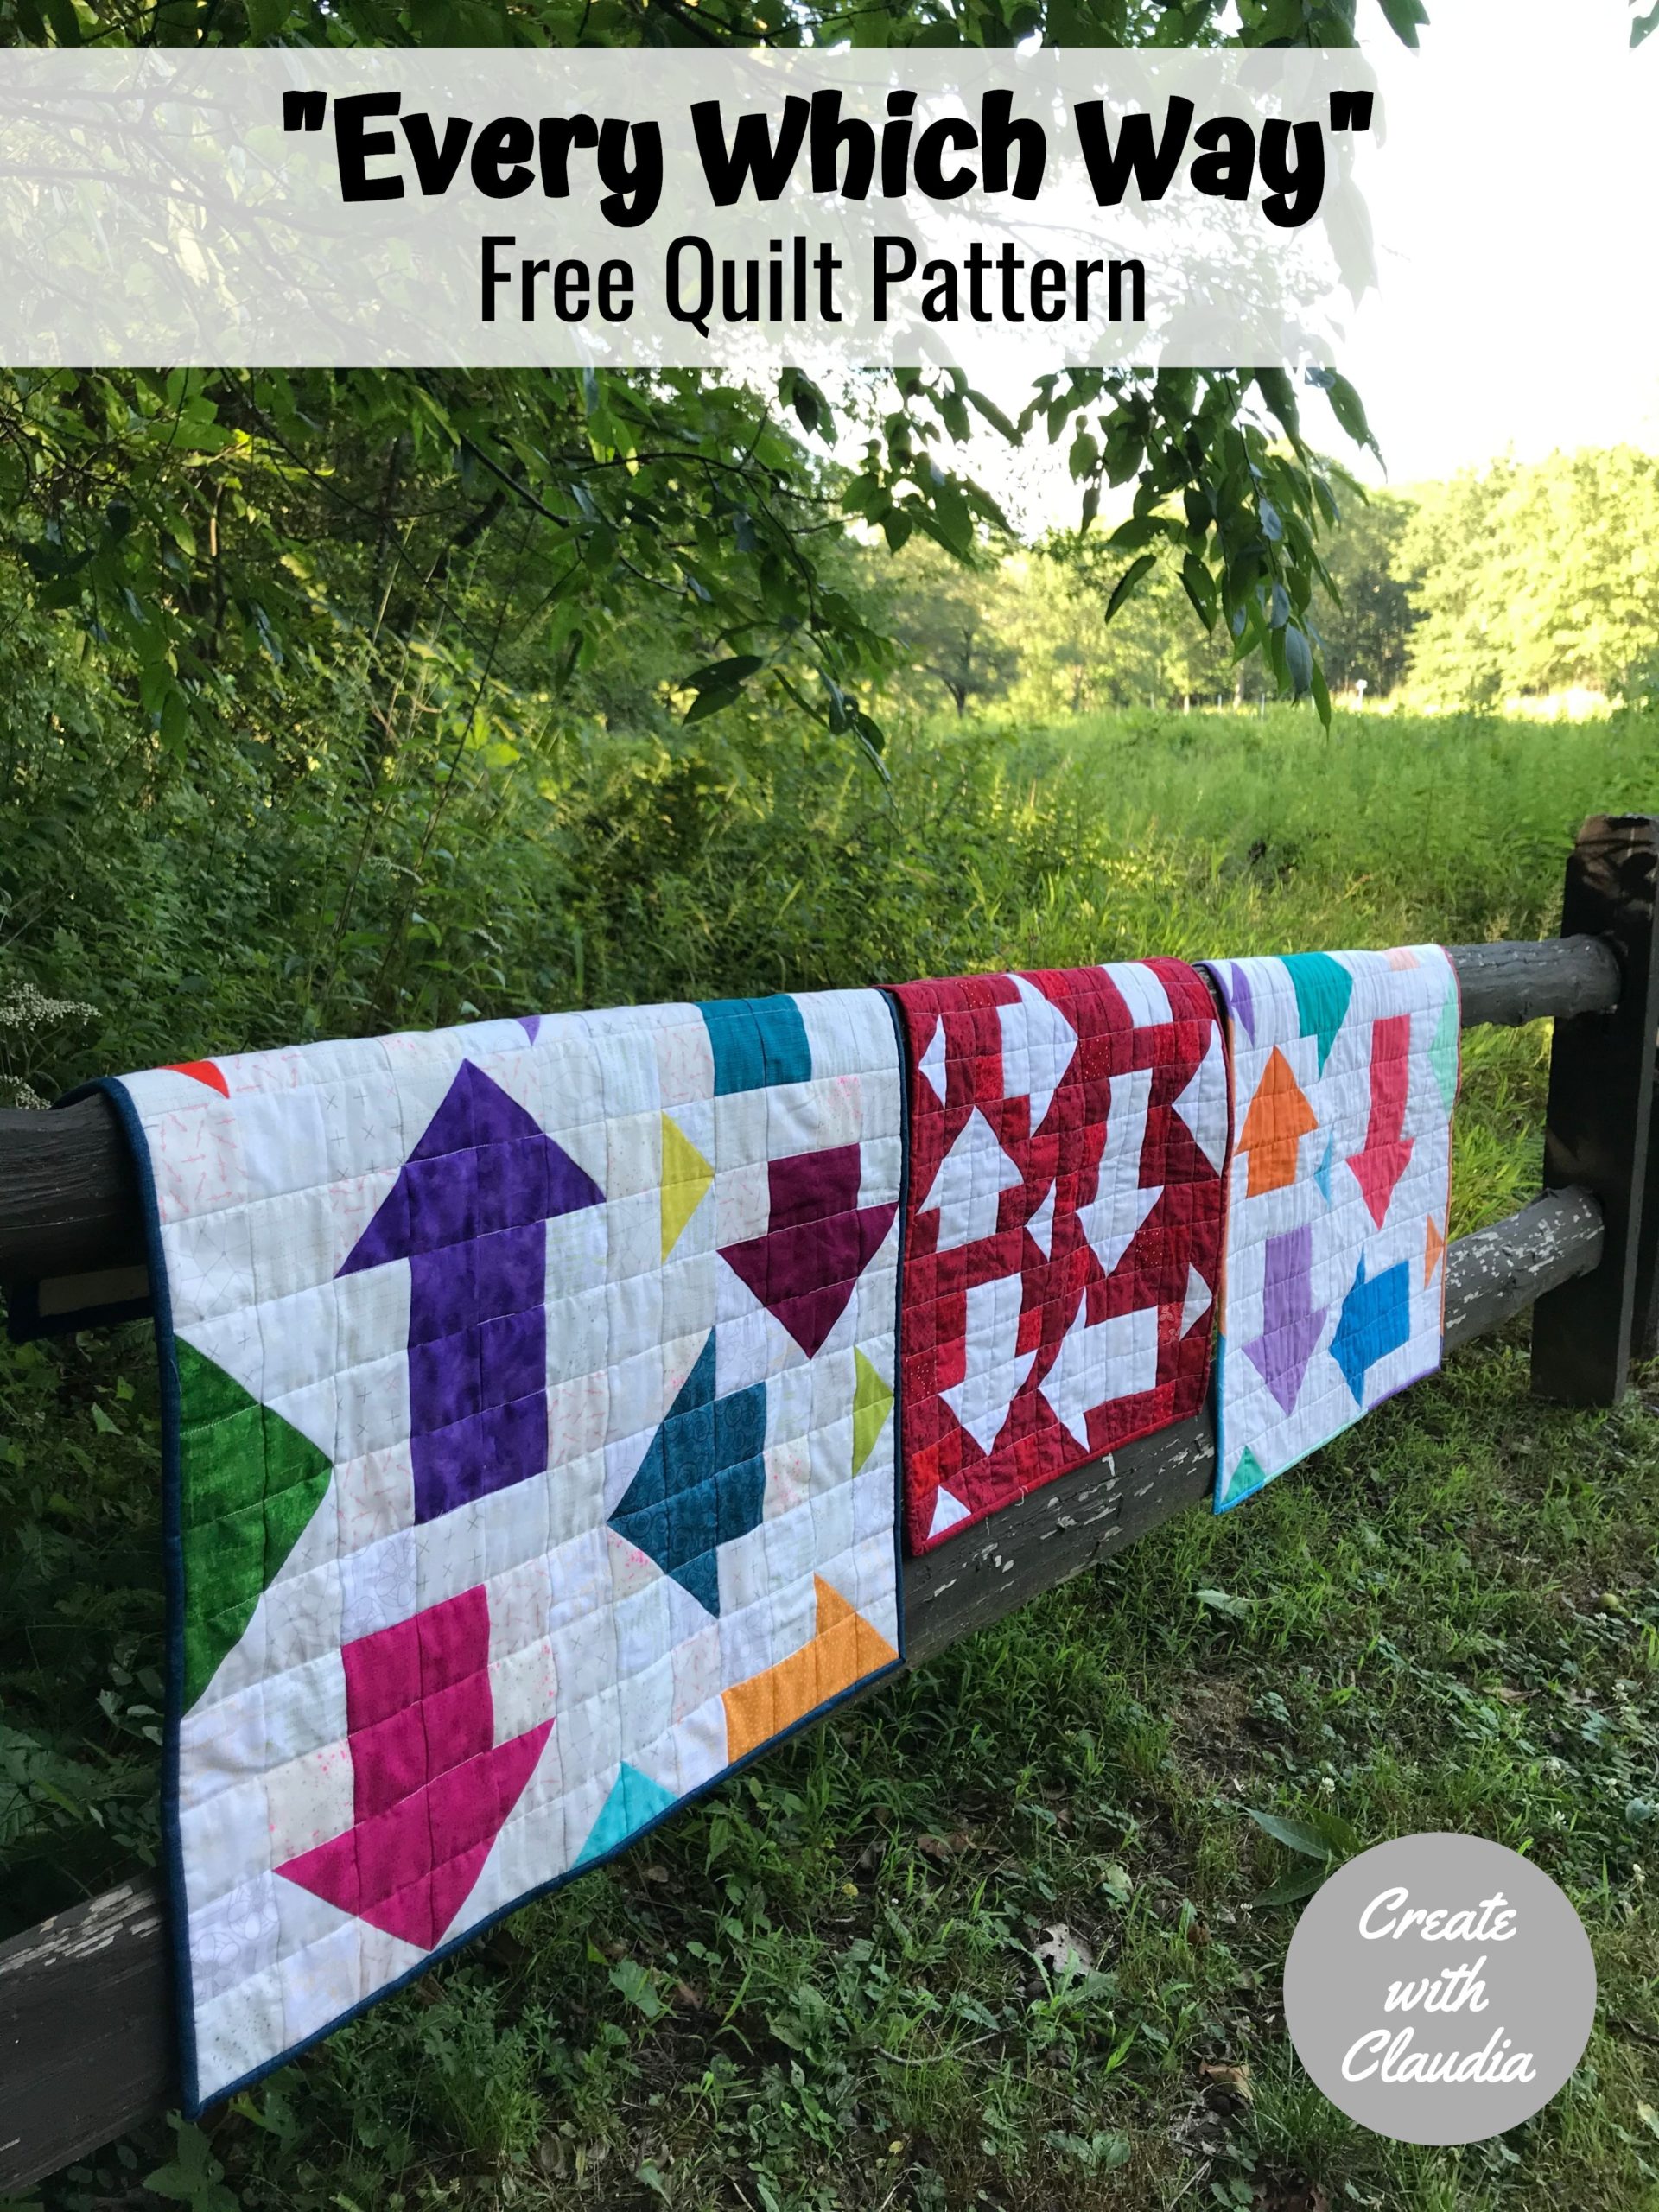
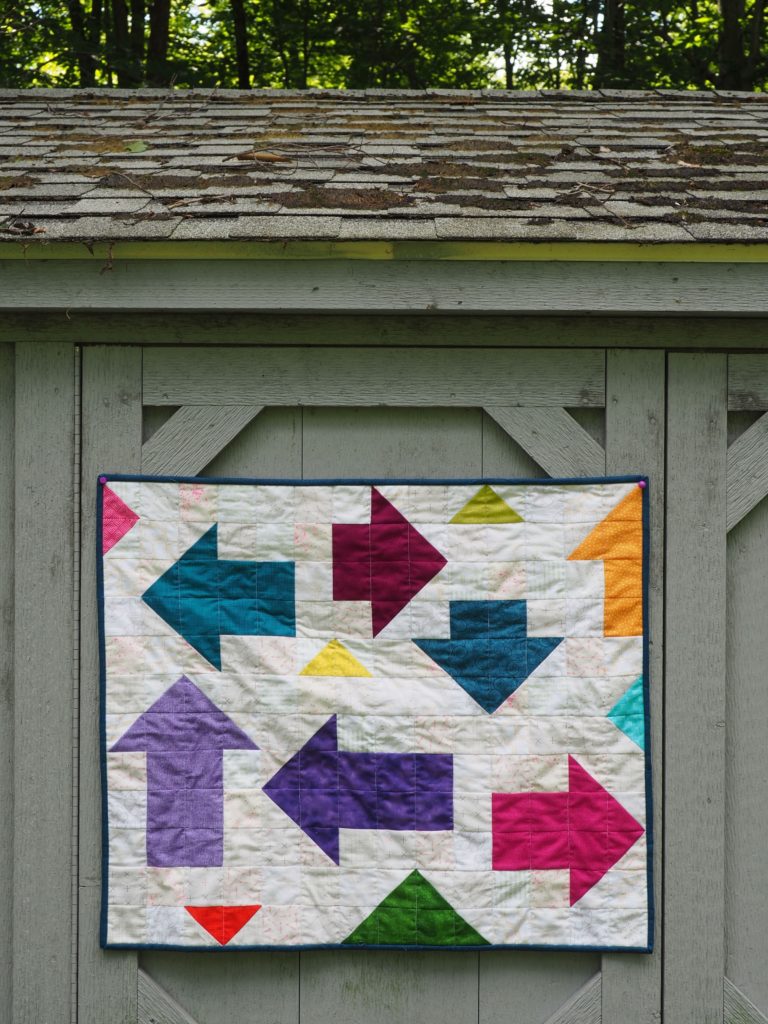
I call this free modern wall quilt pattern “Every Which Way”. This quilt was designed as a celebration for my YouTube channel reaching 10,000 subscribers. It’s my way of saying “Thank You” to everyone for their support.
This is a small wall hanging that is easy to put together. The trick with this pattern is to stay organized. It is fairly simple to sew one of the half square triangles for an arrow in the wrong direction. When I first made this pattern my seam ripper, and I became good friends. Other than that it’s a quick and uncomplicated quilt.
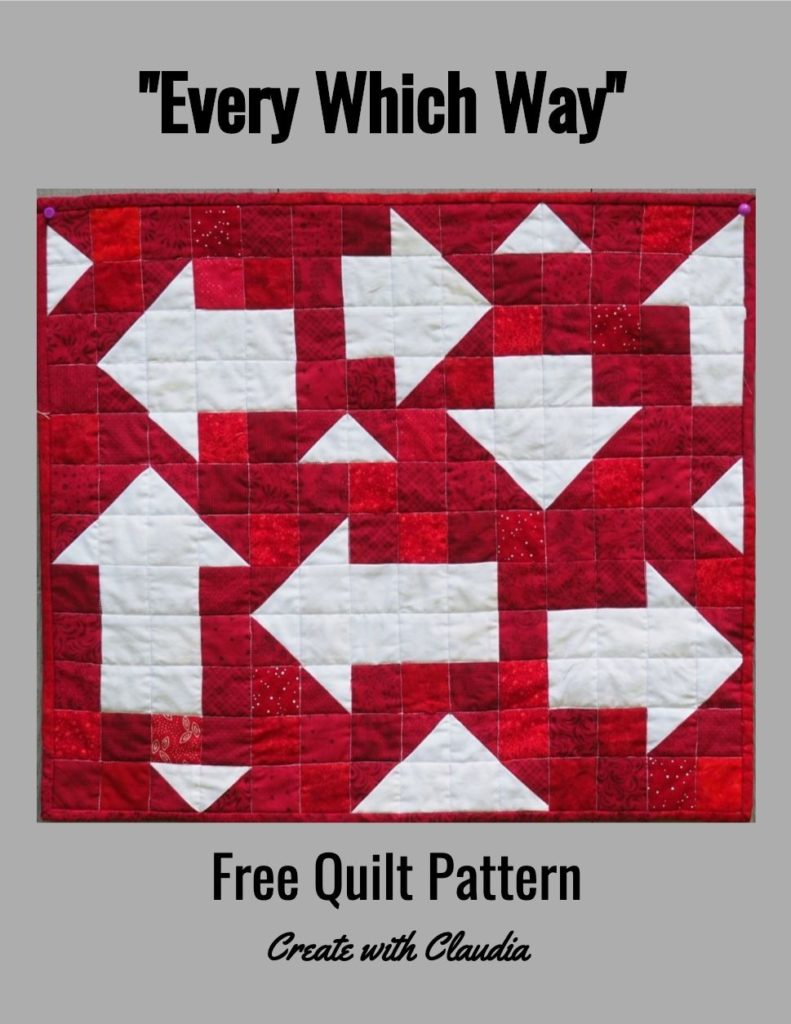
I particularly like the bold graphics of the arrows and enjoyed making it in the three versions for this tutorial. In fact, I think my favorite is the red with white arrows, and that was almost an afterthought. I had a bunch of small red squares left over from another project and decided to try out the pattern with them.
Keep in mind that it makes a great scrap buster. Because of its size, there is not a lot of fabric required. I don’t know about you, but my scrap bins are overflowing, so I didn’t have to look hard for fabrics to make this little gem.
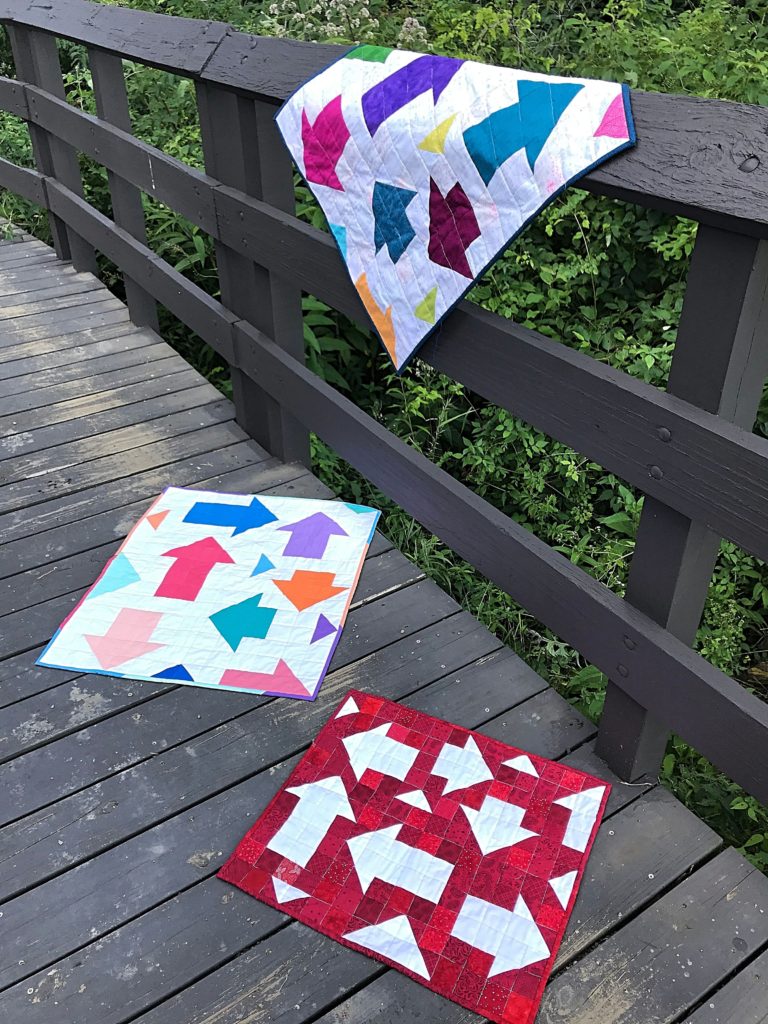
Can you imagine how lovely a pastel version of this quilt would be in a baby’s room? The possibilities are endless. And if you have the fabric on hand, it can be made in an afternoon.
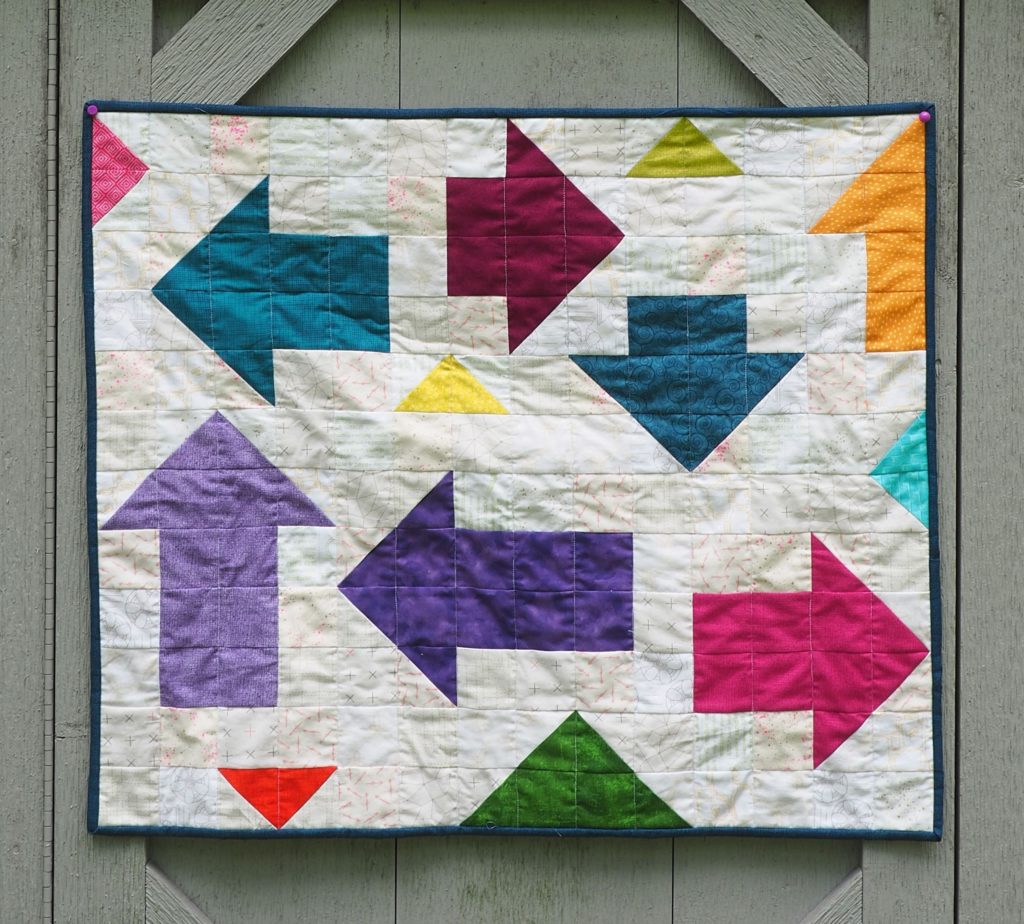
*Download the Free Modern Wall Quilt Pattern PDF “Every Which Way” Here*
I also made a video showing how to make this quilt.
Video Tutorial For The “Every Which Way” Modern Quilt
Quilt Specs
- Quilt Size: 28” x 24”
- ¼ inch seam allowance used
Fabric Requirements
For the background squares:
- ¾ yard
For the arrows:
- If each arrow is a different fabric:
- Scraps totaling about 3/4 yard, about 1/16 to 1/8 yard per arrow (and that is a generous amount for the arrows)
- If all of the arrows are the same color:
- 3/4 yard
Backing:
- 1 yard
Items To Help Make This Quilt
You can find many of the items that I used to make this project in my Amazon Store.
As an Amazon Associate I earn from qualifying purchases.
Cutting Instructions
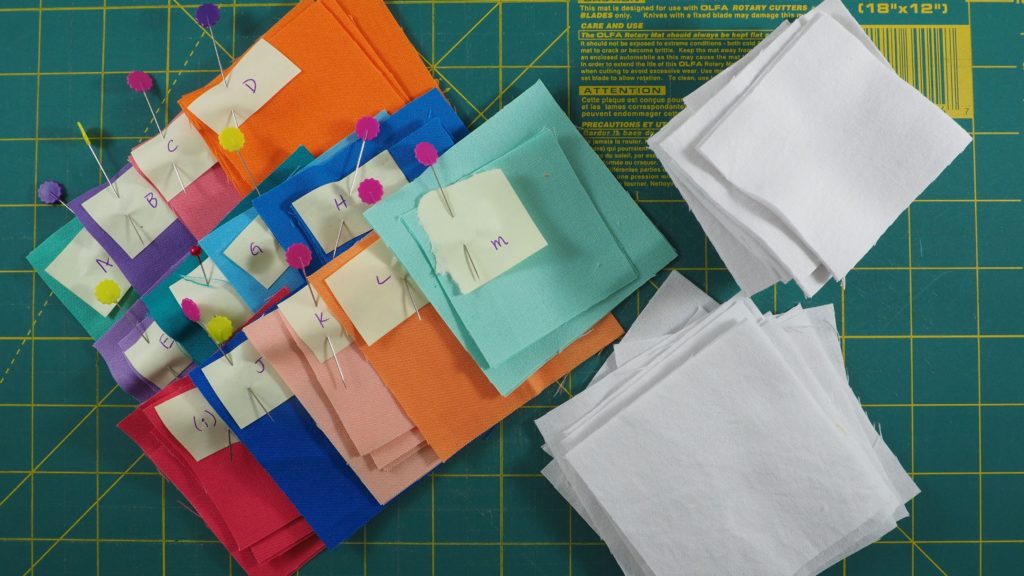
For the background:
- 87 squares cut 2 ½ inches by 2 ½ inches
- 20 squares cut 3 ¼ inches by 3 ¼ inches
For the arrows:
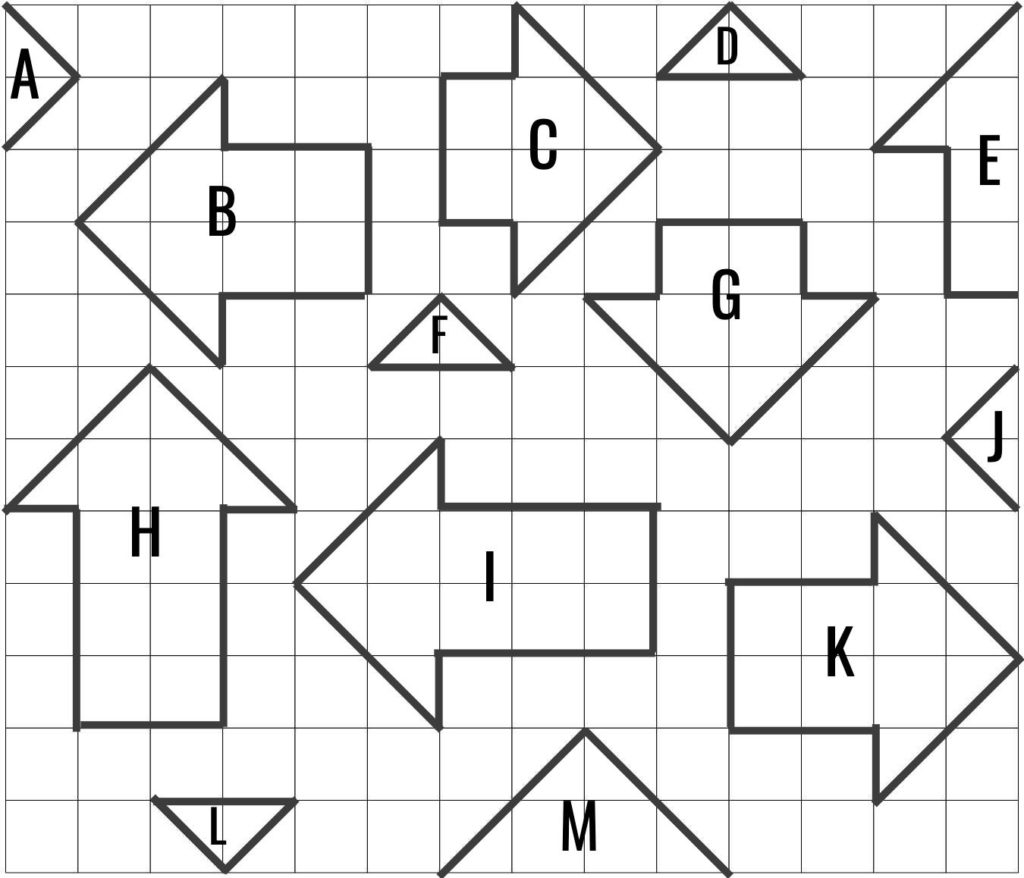
Cutting if every arrow is a different color (letters correspond to letters on pattern layout):
Arrow Letter:
- A – 1 square cut 3 ¼ inches x 3 ¼ inches
- B – 6 squares cut 2 ½ inches by 2 ½ inches & 2 squares cut 3 ¼ inches by 3 ¼ inches
- C – 4 squares cut 2 ½ inches by 2 ½ inches & 2 squares cut 3 ¼ inches by 3 ¼ inches
- D – 1 square cut 3 ¼ inches x 3 ¼ inches
- E – 3 squares cut 2 ½ inches by 2 ½ inches & 1 square cut 3 ¼ inches by 3 ¼ inches
- F – 1 square cut 3 ¼ inches x 3 ¼ inches
- G – 4 squares cut 2 ½ inches by 2 ½ inches & 2 squares cut 3 ¼ inches by 3 ¼ inches
- H – 8 squares cut 2 ½ inches by 2 ½ inches & 2 squares cut 3 ¼ inches by 3 ¼ inches
- I – 8 squares cut 2 ½ inches by 2 ½ inches & 2 squares cut 3 ¼ inches by 3 ¼ inches
- J – 1 square cut 3 ¼ inches x 3 ¼ inches
- K – 6 squares cut 2 ½ inches by 2 ½ inches & 2 squares cut 3 ¼ inches by 3 ¼ inches
- L – 1 square cut 3 ¼ inches x 3 ¼ inches
- M – 2 squares cut 2 ½ inches by 2 ½ inches & 2 squares cut 3 ¼ inches by 3 ¼ inches
Pattern
Cutting if every arrow is the same color:
If you prefer making every arrow the same color (like the red and white quilt pictured), here is what you will need to cut for the arrows.
- 20 squares cut 3 ¼ inches by 3 ¼ inches
- 41 squares cut 2 ½ inches by 2 ½ inches
Making the Half Square Triangles for the Arrows
You will need all of the 3 ¼ inch squares you cut earlier.
To make a half square triangle:
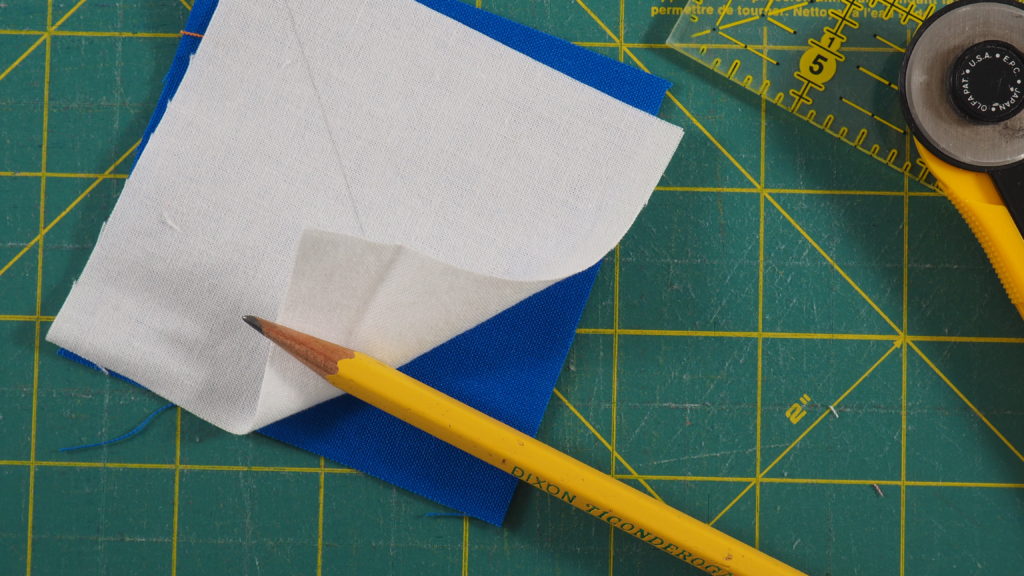
Draw a diagonal line on the back (wrong) side of one of the background fabric 3 ¼ inch squares. This will be your sewing guide.
Line up one of the 3 ¼ inch square arrow fabric squares on top, with front (right) sides facing each other.
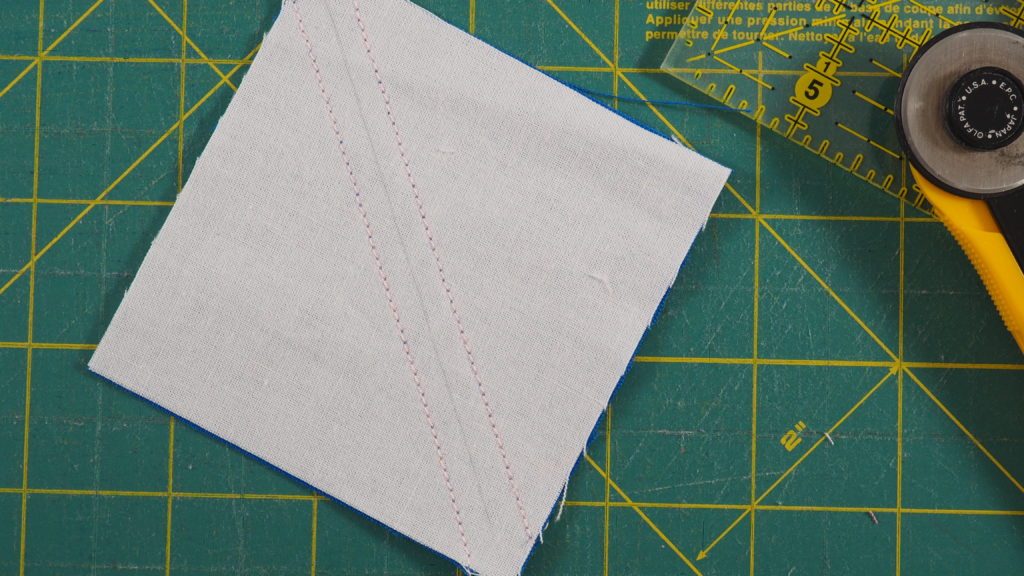
Using a scant ¼ inch seam allowance, sew along both sides of the drawn diagonal line.
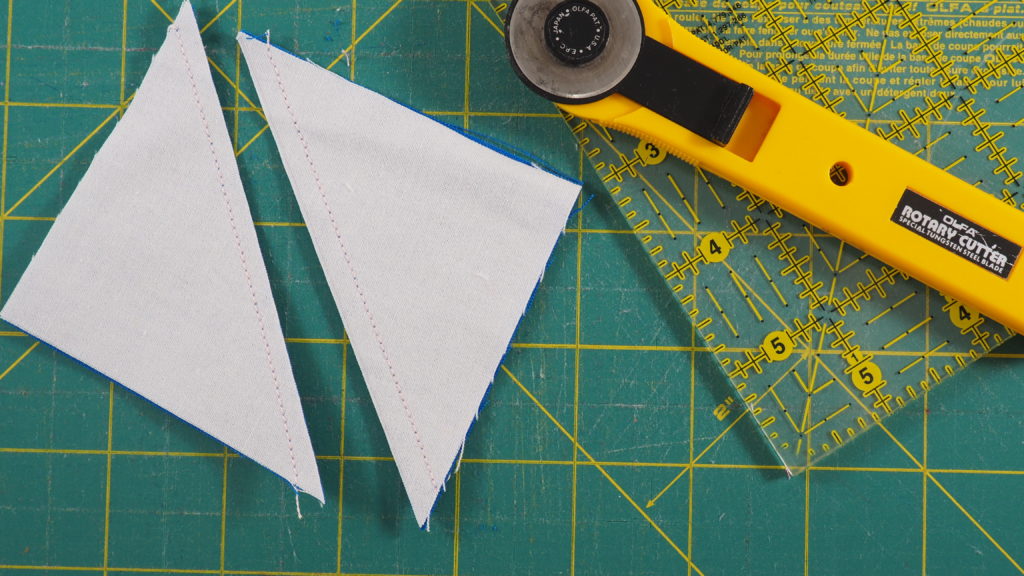
Cut down the center, along the drawn line. You will end up with two blocks that need to be pressed open.
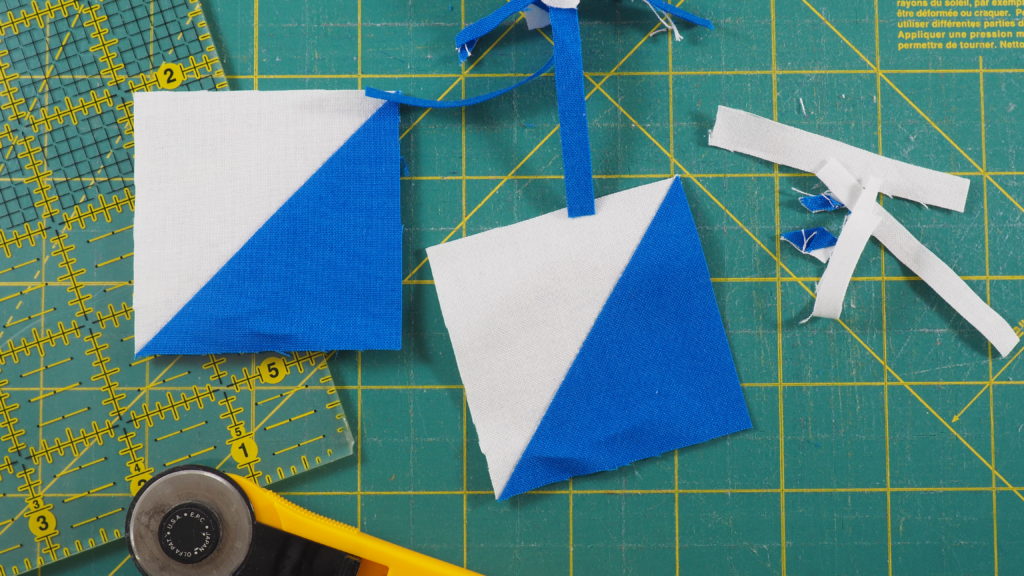
Trim the blocks down so they measure 2 ½ inches by 2 ½ inches.
Repeat with the remaining 3 ¼ inch pairs (1 background square and one arrow square) until you have 40 half square triangles.
Assembly
All of your units should now be 2 ½ inches by 2 ½ inches.
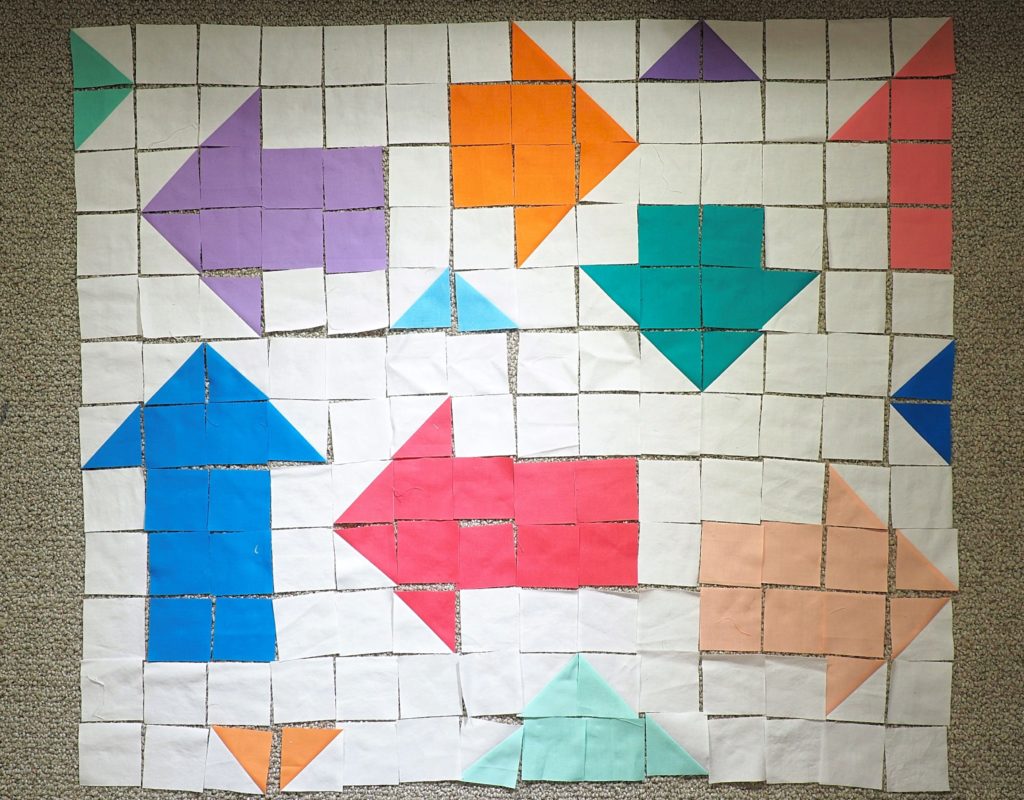
Lay them out as shown in the pattern layout.
Once the squares are laid out, it might help to label your rows.
Sewing the Top
Note: To stay organized I recommend first sewing the top row, then the second row. Then, before continuing with more rows, sew the first two rows together. After that, piece the third row and add that row to the first two rows that are already sewn together.
Check your arrow directions each time you add a row to make sure everything is ok. Proceed with the rest of the rows.
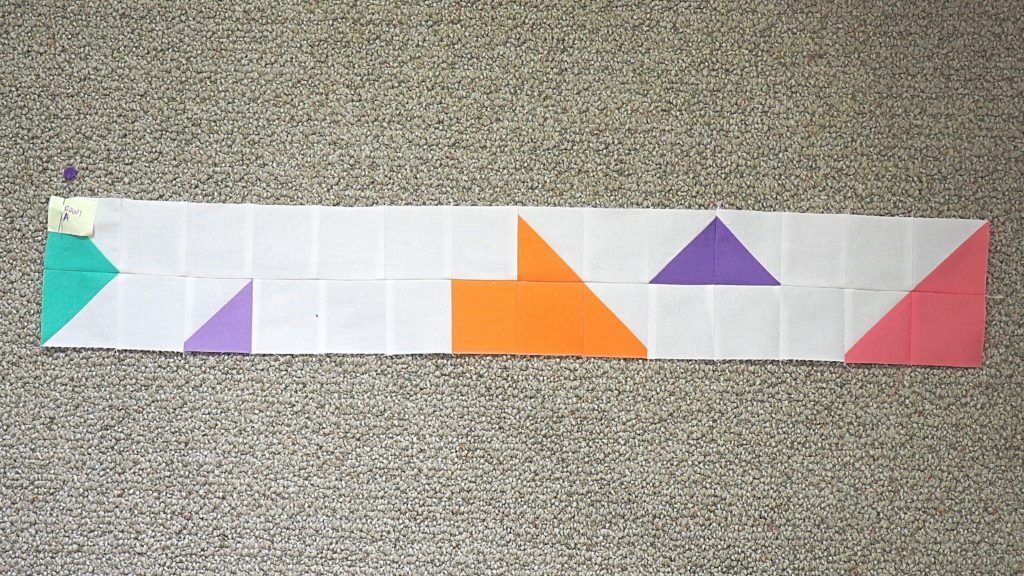
Finish up and then quilt and bind as desired.

Change it up a bit and make the arrows one color and the background scraps like this red and white one.
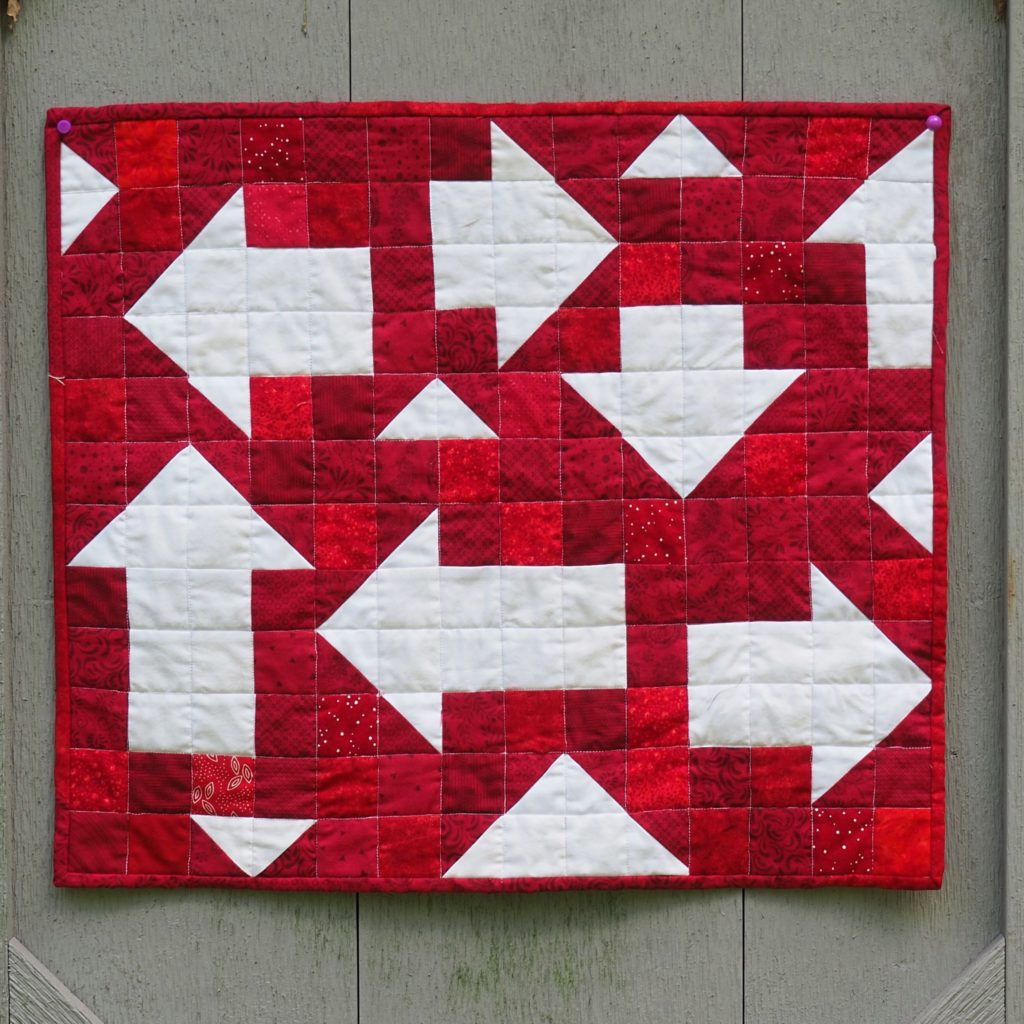
Make it a Mini Modern Wall Quilt Pattern
This pattern is incredibly easy to turn into a mini. Instead of 2 1/2″ squares, try 2″ squares like I did with my red and white quilt. Or make it even smaller by trying it with 1 1/2″ squares.
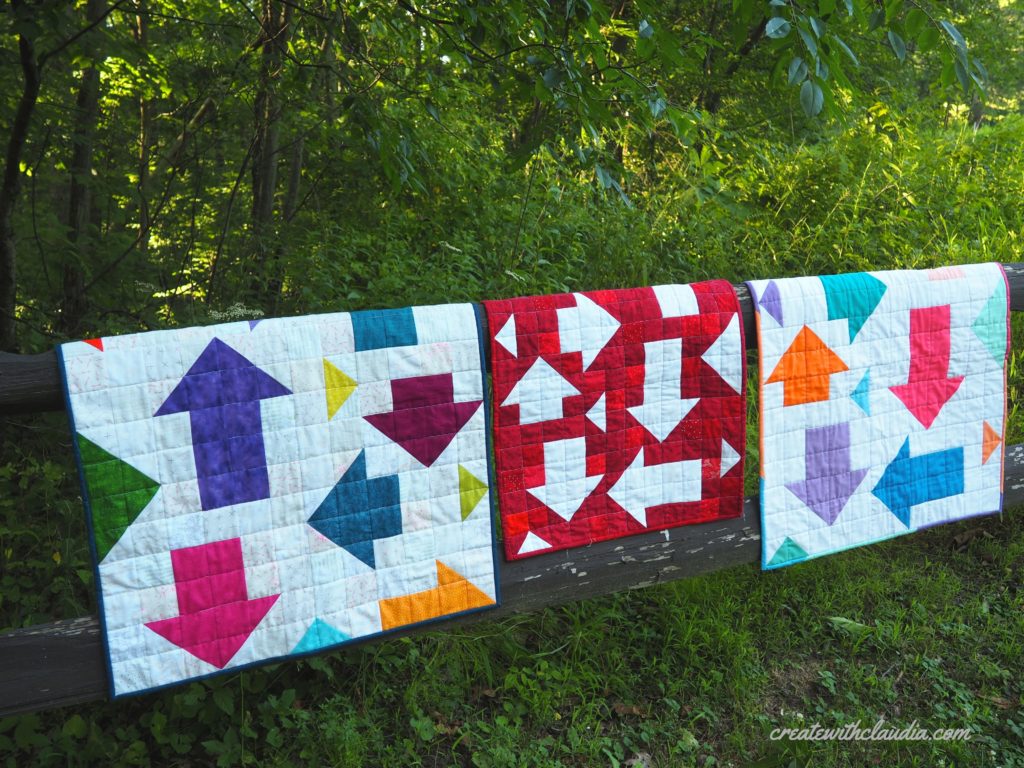
Thank You!
Thank you to everyone who has supported me in my blogging/vlogging journey. Hitting 10,000 subscribers in YouTube was a huge milestone for me, one that I had been working towards for a long time, and I appreciate your support.
I hope you enjoy making this free modern wall quilt pattern as much as I did.
Happy Quilting!


4 Comments
angela hanson muesse
September 23, 2020 at 4:50 PMIf I wanted to make a throw, would I just double the size of each square?
createwithclaudia_7j76hs
September 24, 2020 at 6:53 AMYou could, but it would be a small throw. The nice thing about this pattern is that it is easy to adjust by changing the square size. Thanks for reading!
Rita Reese
January 11, 2021 at 12:04 PMIn the 44 dollar store haul video, what is the quilt pattern shown when showing beads or buttons as embellishments?
createwithclaudia_7j76hs
January 12, 2021 at 5:04 AMHi – There is not a pattern for that one, although I am thinking about writing one up! Thanks for watching!