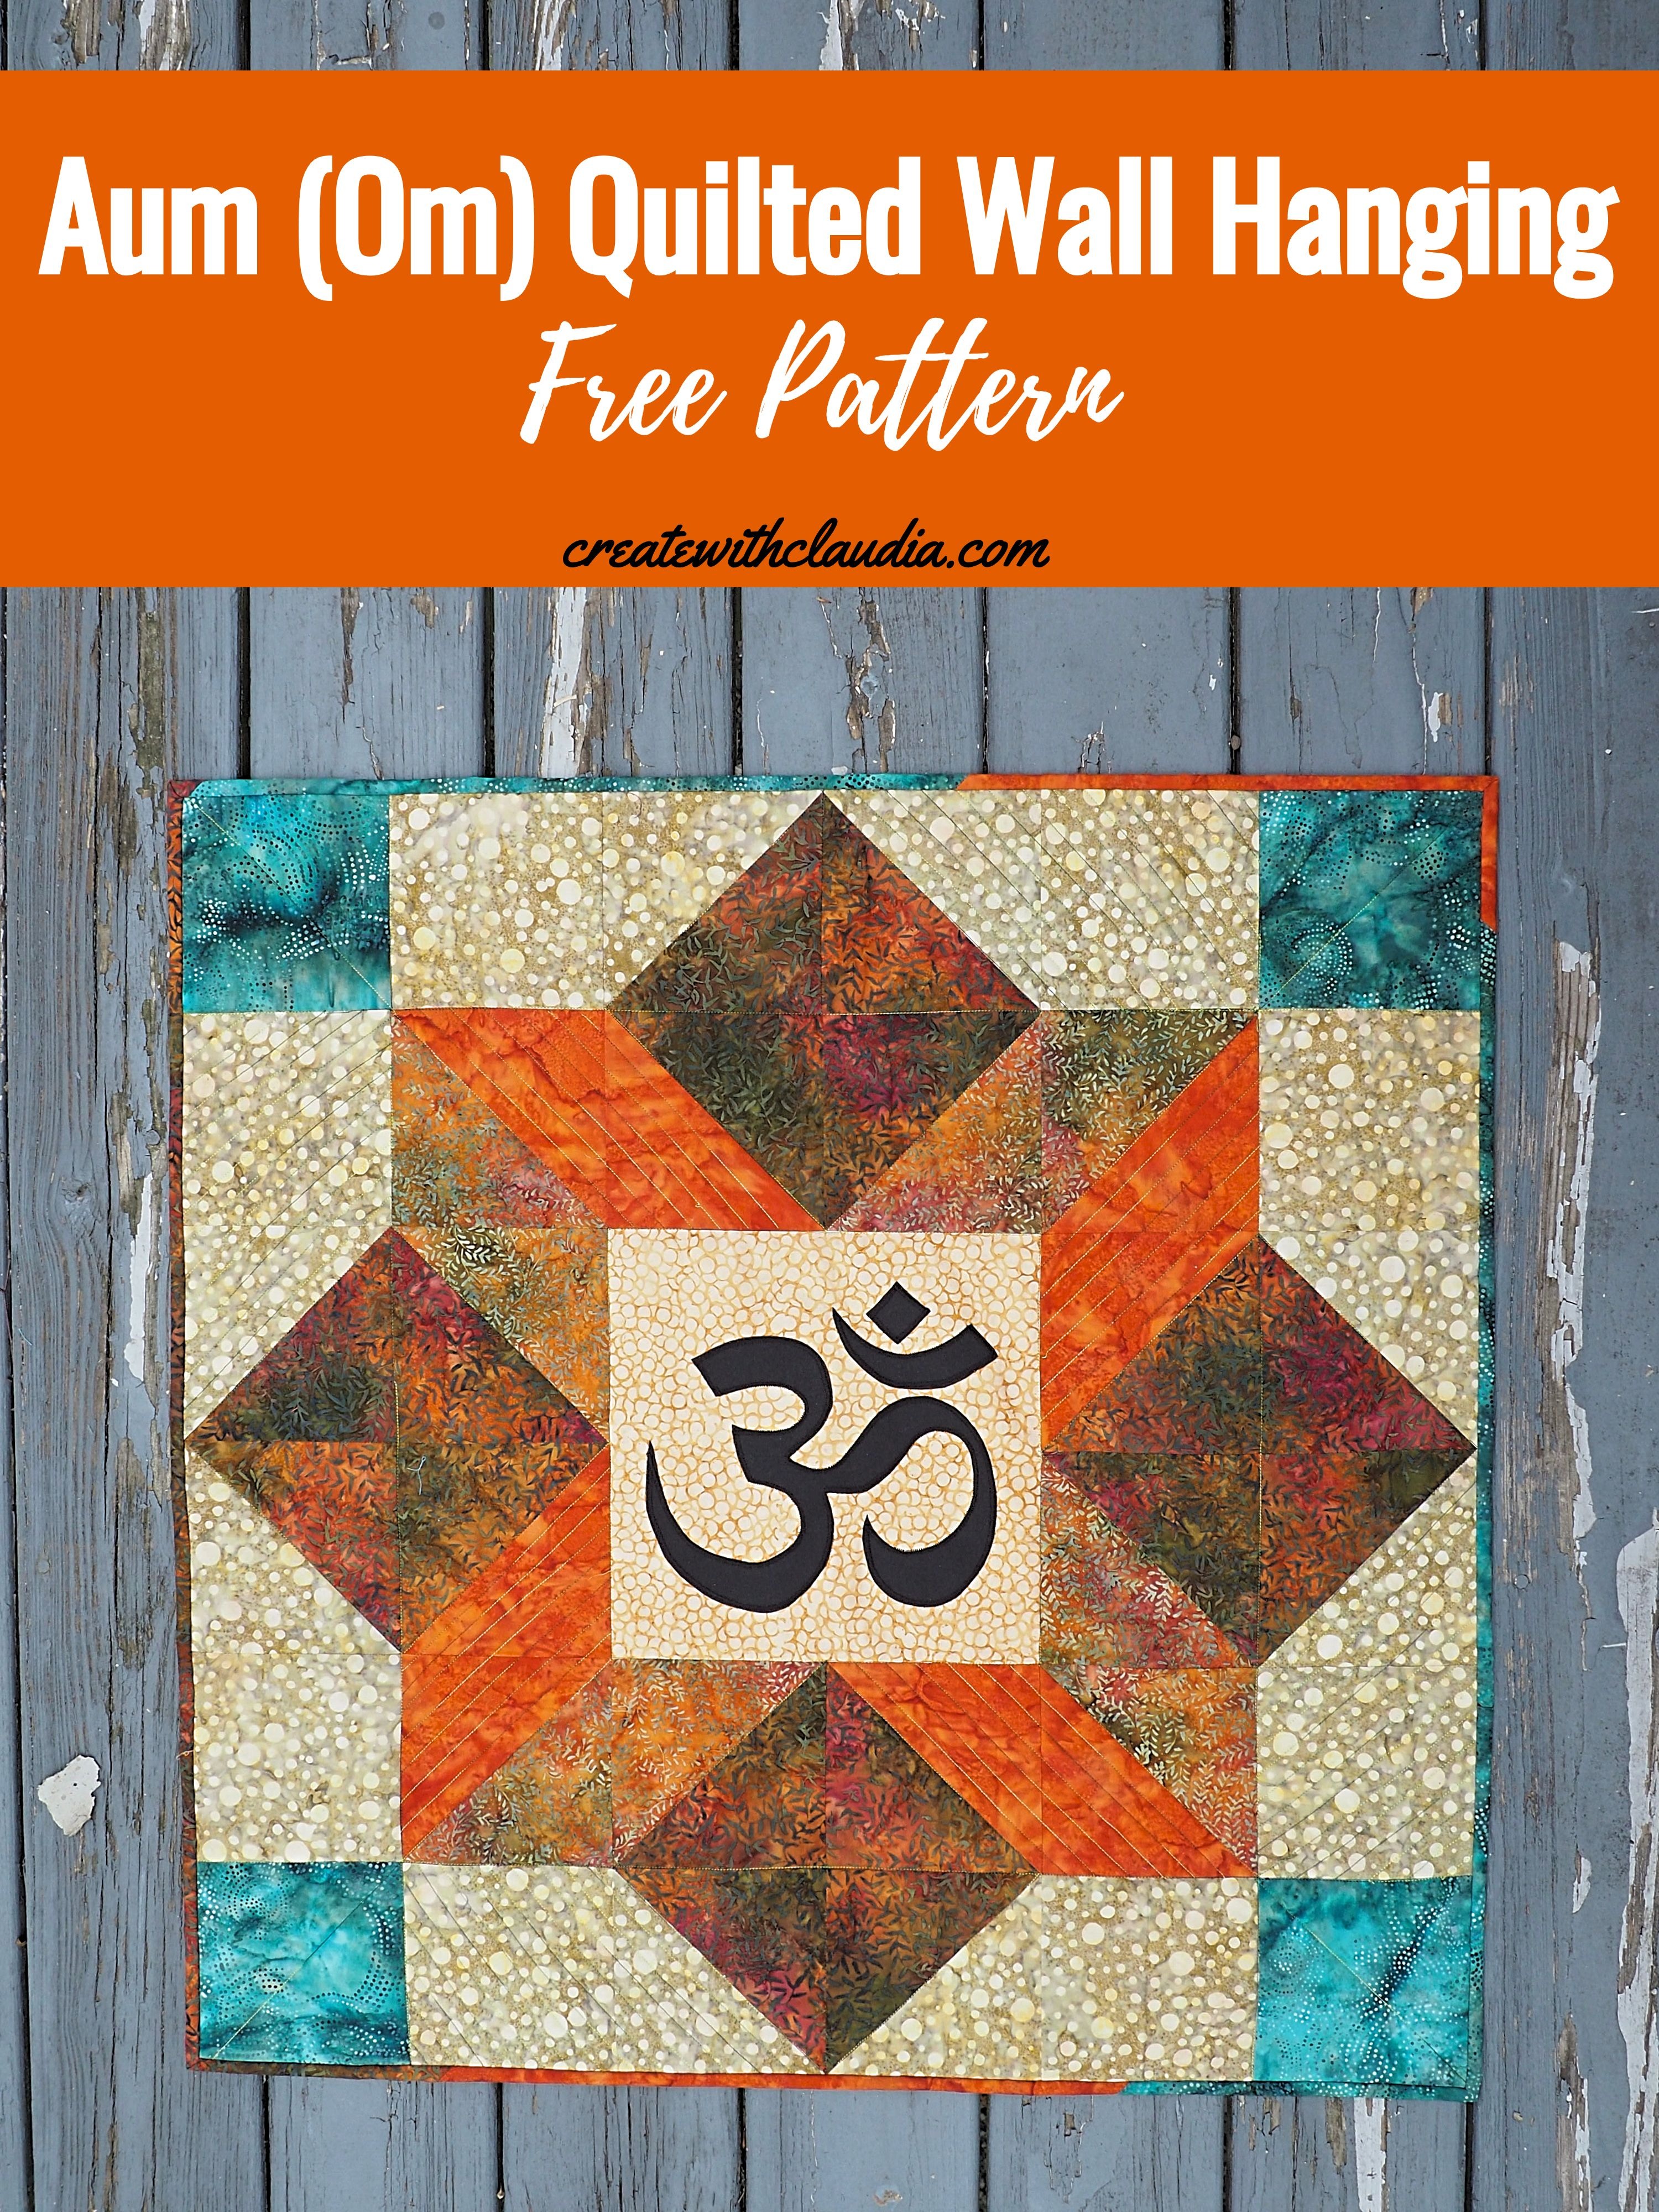
Aum (Om) Quilt Pattern
The Aum (Om) symbol has deep sacred meaning and is also a common emblem found in yoga. In this Aum (Om) quilt pattern, the symbol has been added to a central panel to make a unique wall hanging that looks beautiful in any room in the house.
About the Pattern
During the last year I started to take yoga classes. I wanted to find new ways to take care of my well being. I found the sessions incredibly relaxing and I am grateful that I have been able to continue my yoga practice during the Coronavirus pandemic, a particularly stressful time for so many.
It is not only yoga that has been helping me relax during the lockdown. My quilting and crafting have been helpful as well. Naturally, it made sense to me to combine the two things, and that is how I came up with this pattern.
I hope that you like it.
*Download the Free Aum (Om) Quilt Pattern Here*
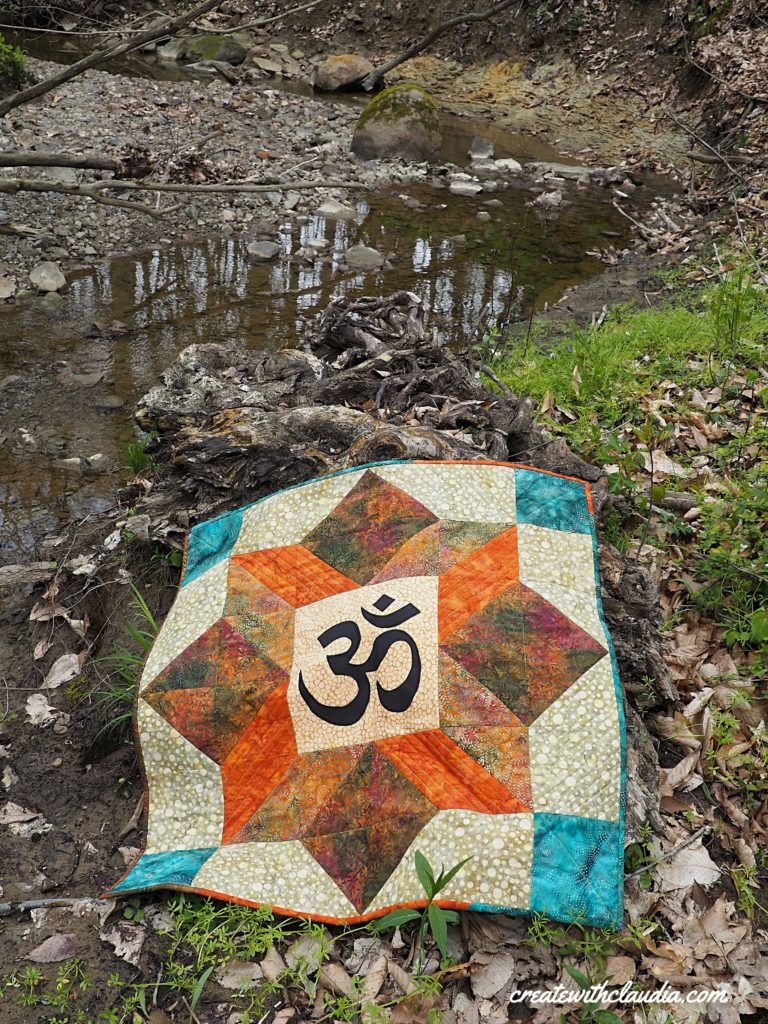
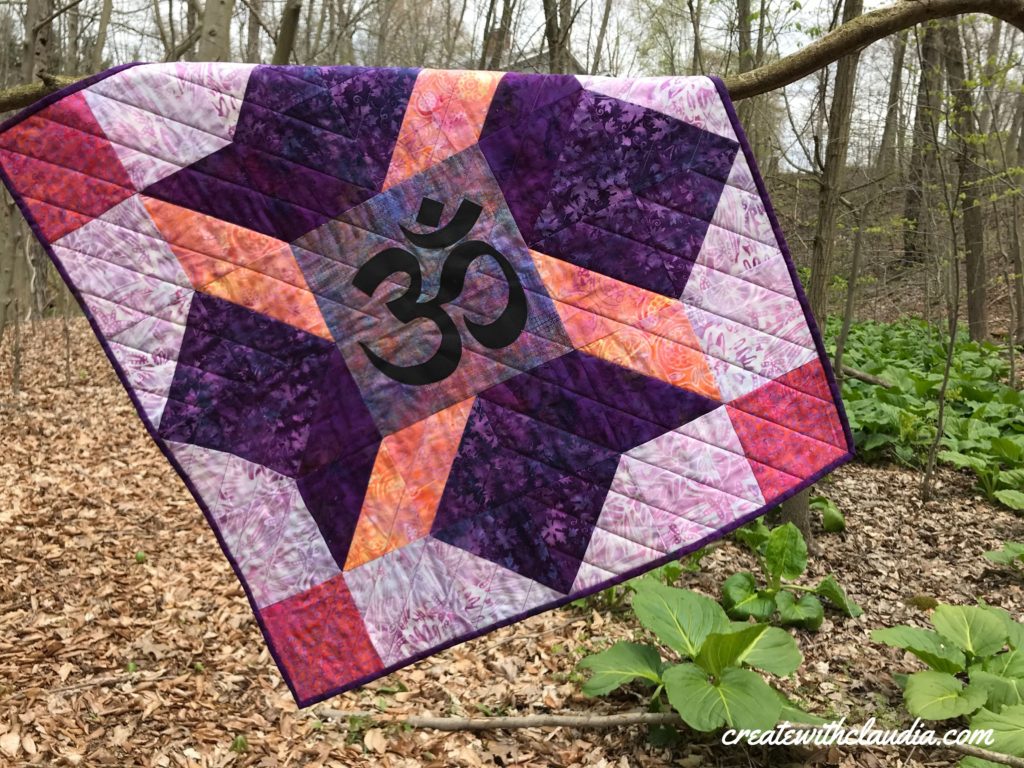
Here is the companion video for this quilt pattern. It shows the process from start to finish.
Pattern Specifications
Finished Quilt Size: 30” x 30”
Use a scant ¼ inch seam allowance
| Fabric Needed | Cutting Instructions |
| Fabric A – Fat Quarter | Fabric A – One 10 ½ inch square |
| Fabric B – Fat Quarter | Fabric B – Four 6 ¼ inch squares |
| Fabric C – Fat Quarter | Fabric C – Four 6 ¼ inch squares |
| Fabric D – 1/2 Yard | Fabric D – Eight 6 ¼ inch squares |
| Fabric E – 1/2 Yard | Fabric E – Eight 5 ½ inch squares |
|
| Fabric E – Four 6 ¼ inch squares |
| Fabric F – Fat Quarter | Fabric F – Four 5 ½ inch squares |
| Fabric G for the Aum (Om) Symbol | Fabric G – 11” square of fabric |
| Backing and Binding: 1 ½ Yards |
|
| Batting: 1 Yard |
|
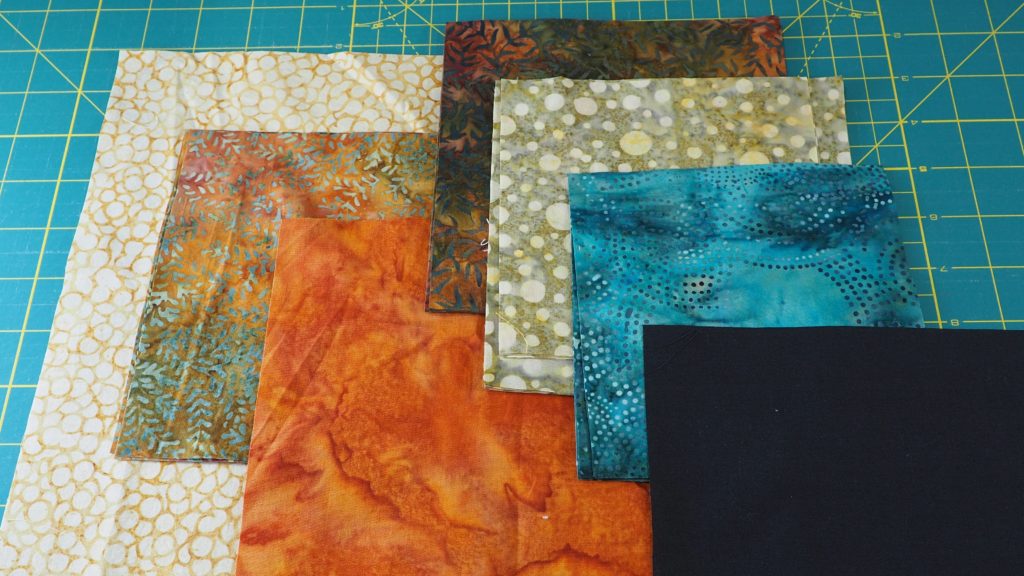
Additional Supplies Needed:
- Fabric
- Paper backed fusible web
- Basic sewing and quilting tools
Items That May Help You Out
You can find many of the items that I used to make this project in my Amazon Store.
As an Amazon Associate I earn from qualifying purchases.
Step 1: Prepare the Appliqué Aum (Om) Symbol
Pattern Note: If preferred, you can leave the symbol off of, or add a different one to, the center panel.
Template Needed
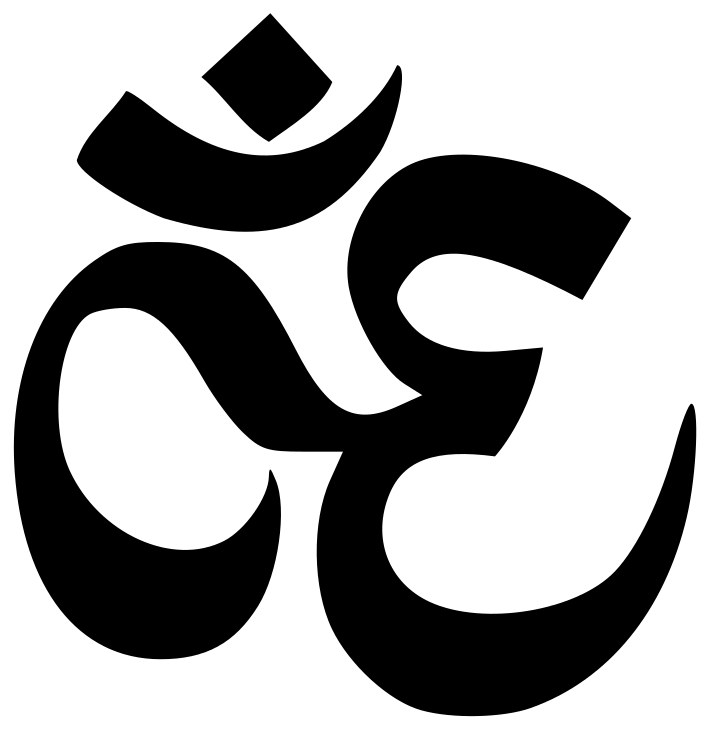
First, print out the Aum (Om) template on letter size paper. Please note that the template is backwards. Once it is applied to the fabric it will be in the correct position. It should measure approximately 8 ½ inches long and wide when printed. You may need to adjust the size a bit.
For your convenience, you can find the backwards Aum (Om) appliqué template in the free pattern which can be downloaded (link at beginning of article).
Cut out a piece of the paper backed fusible web that is large enough to cover the entire appliqué template.
Next, lay the fusible web, with the paper side facing up, on top of the printed template.
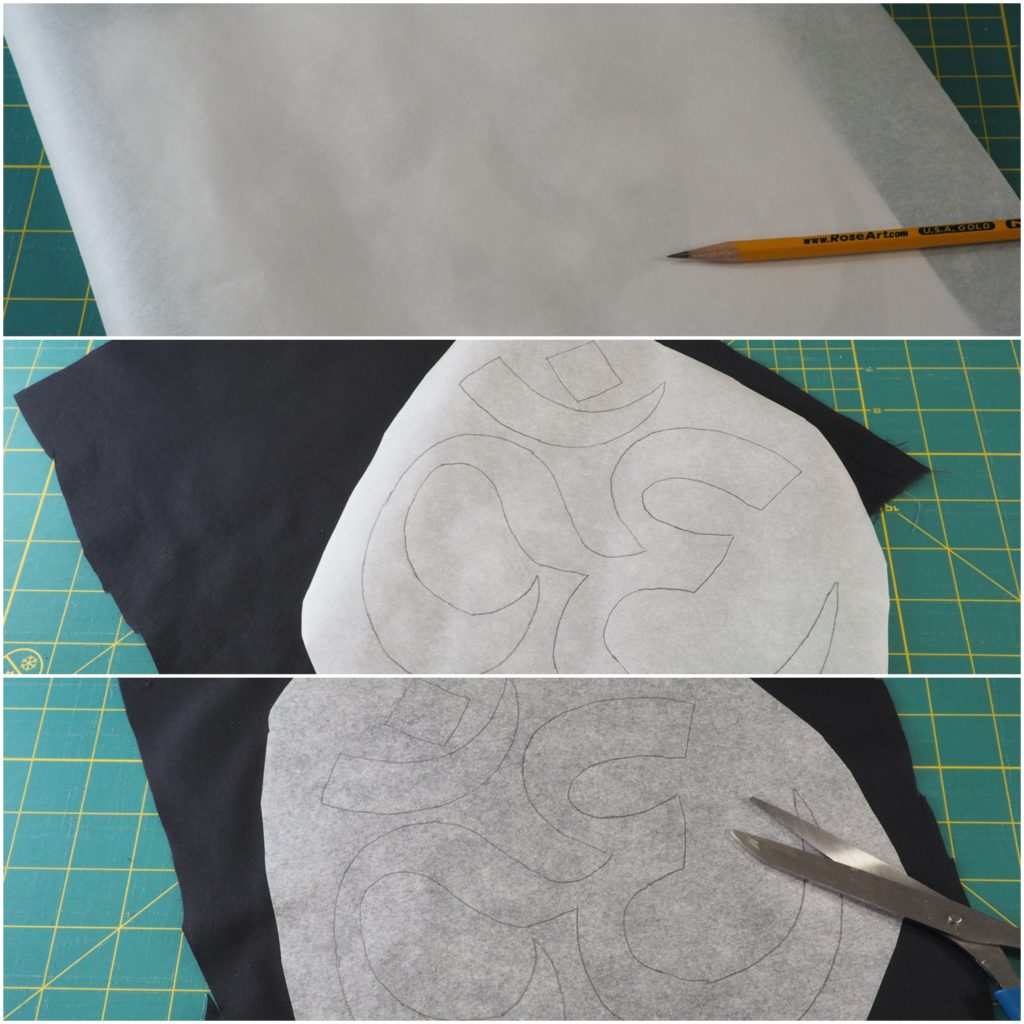
Trace around the entire shape.
Don’t cut out the individual shapes yet. Only cut around the outside of the entire symbol to get rid of all of the excess fusible web.
Lay the square of fabric G on your pressing surface with the wrong (back) side facing up.
Following the manufacturer’s instructions, apply the fusible web tracing to the BACK (WRONG) side of Fabric G.
Allow to cool. Cut out the shapes.
Step 2: Add the Aum (Om) Sign to the Center Fabric Square
Remove the paper backing on the Aum (Om) symbol shapes. There will be a slightly sticky and rubbery residue left on the fabric. That is the adhesive.
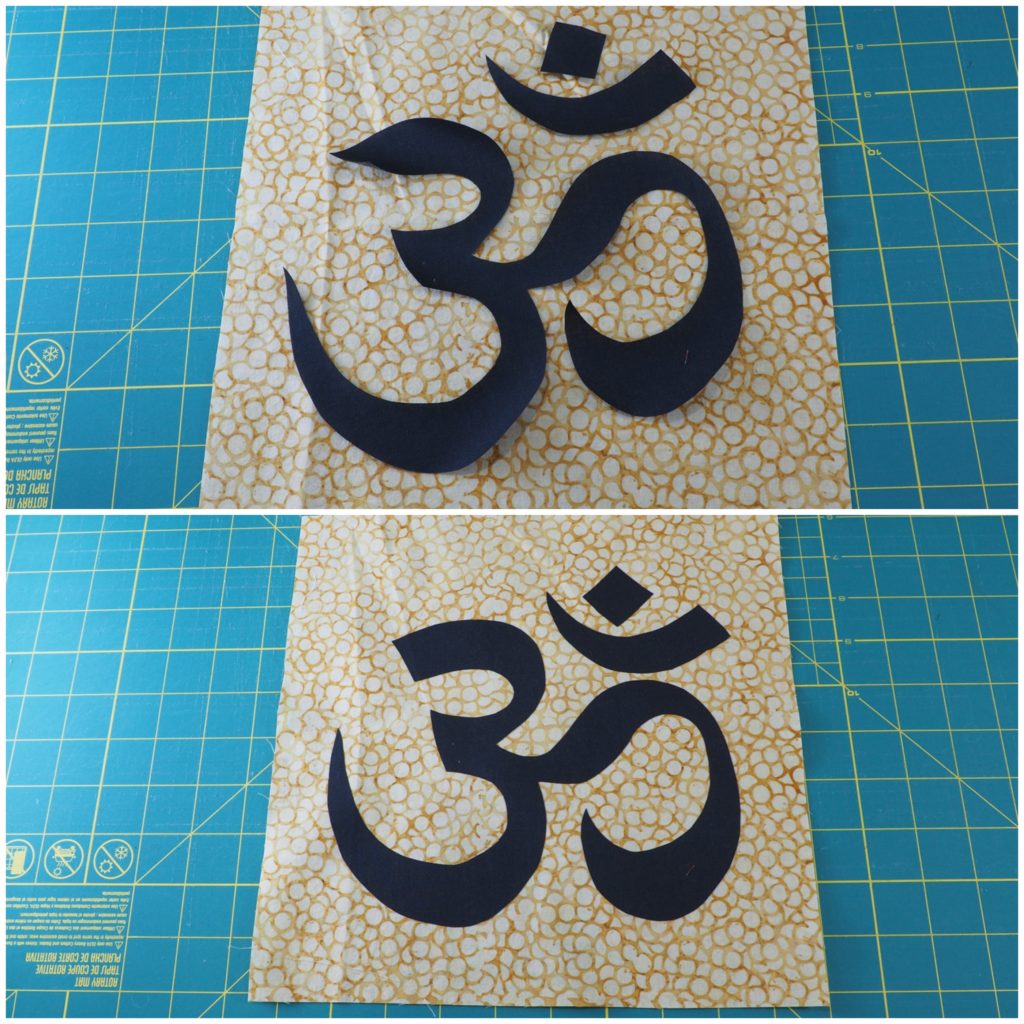
Place the shapes onto the fabric A square, with the adhesive side of the shape facing down, against the right side of fabric A. Center them and flatten them out.
Before pressing them into place, make sure they are just where you want them.
Press, according to the fusible web manufacturer’s instructions. Set aside to cool.
If desired, use a decorative stitch around the outside of the appliqué shape at this stage. I used a tight zig zag stitch around my symbol.
Step 3: Make the Half Square Triangles
To make the half square triangles you will need all of the 6 ¼ inch squares and they should be matched up as follows:
- Fabric B with Fabric C – 2 squares of each to make 2 pairs
- Fabric C with Fabric D – 2 squares of each to make 2 pairs
- Fabric B with Fabric D – 2 squares of each to make 2 pairs
- Fabric D with Fabric E – 4 squares of each to make 4 pairs
Half Square Triangle Directions
Take one square of fabric B and one square of fabric C. Draw a diagonal line on the back of the lighter fabric.
Using a pencil or water soluble quilt marker, draw a diagonal line on the back (wrong) side of the lighter square. This will be your sewing guide.
Line up one square of fabric B on fabric C with front (right) sides facing each other.
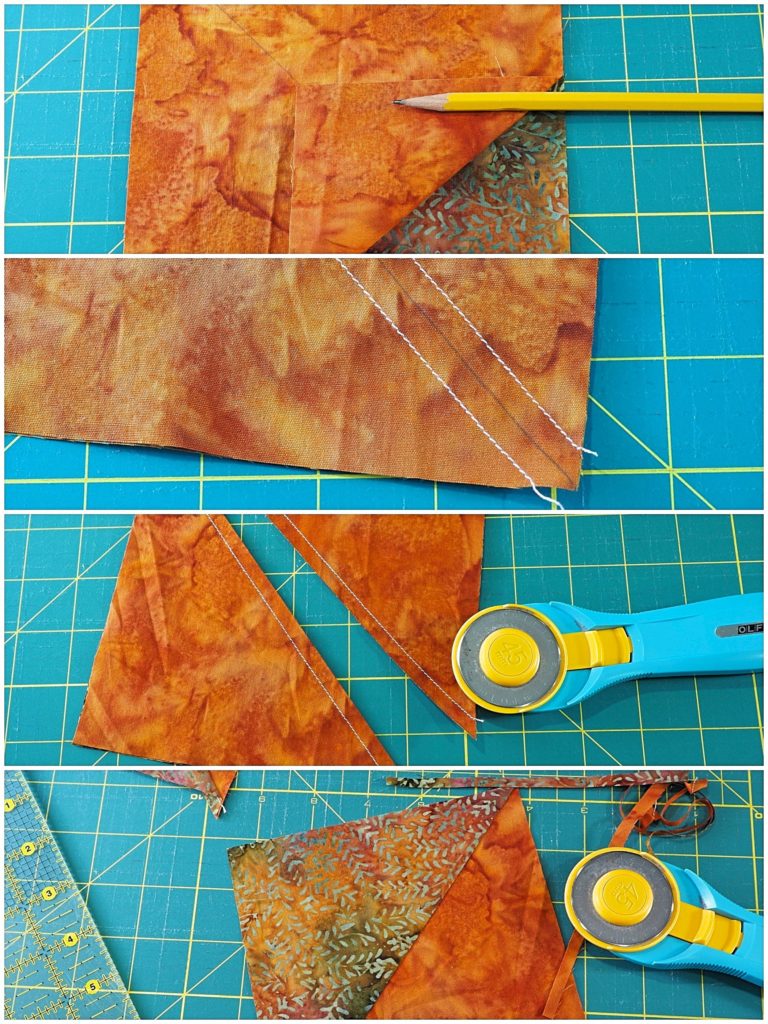
Using a scant ¼ inch seam allowance, sew along both sides of the diagonal line drawn earlier.
With a quilt ruler and rotary cutter, cut down the center, on the line that was drawn earlier. You will have two blocks that now need to be pressed open.
Lastly, trim all of the half square triangles down so they measure 5 ½ inches by 5 ½ inches.
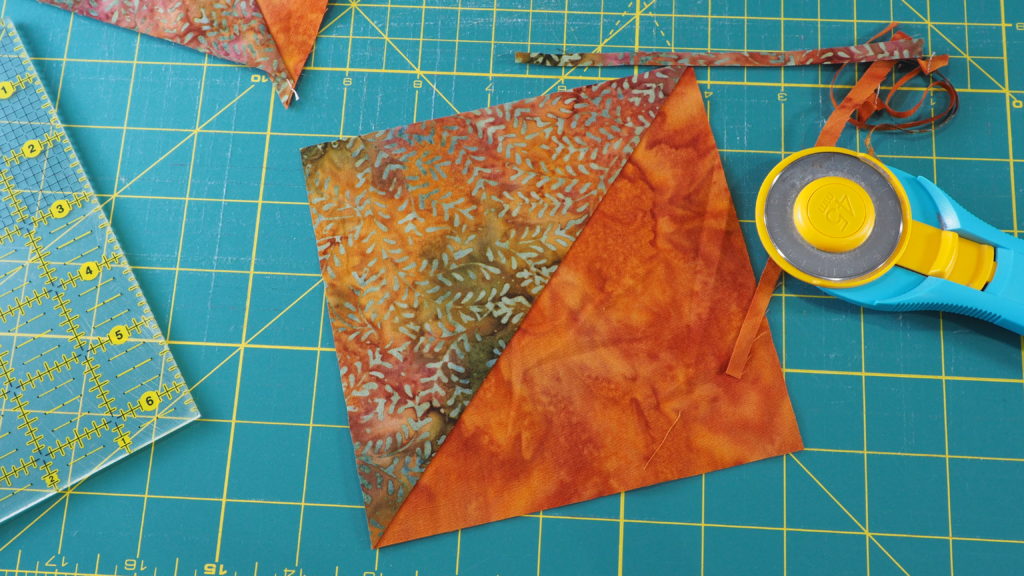
Repeat with the remaining pairs. When finished you will have the following:
- 4 half square triangles made up of fabrics B and C
- 4 half square triangles made up of fabrics C and D
- 4 half square triangles made up of fabrics B and D
- 8 half square triangles made up of fabrics D and E
Step 4: Piece the Quilt Top
Quilt Layout:
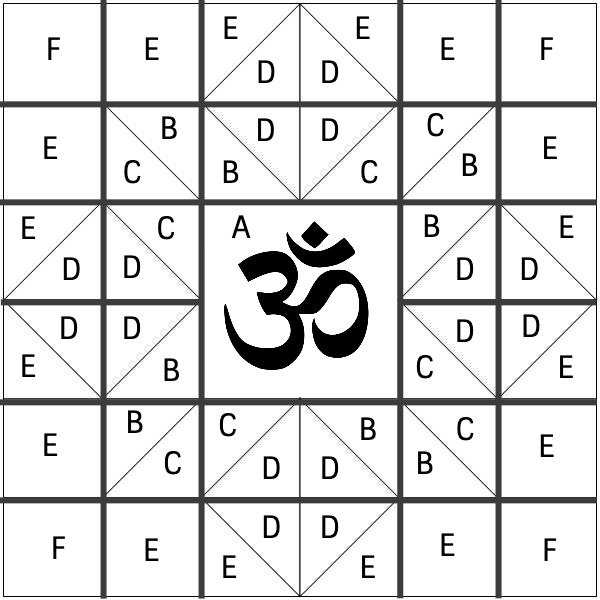
Lay out the 36 blocks as shown. (Letters indicate fabric)
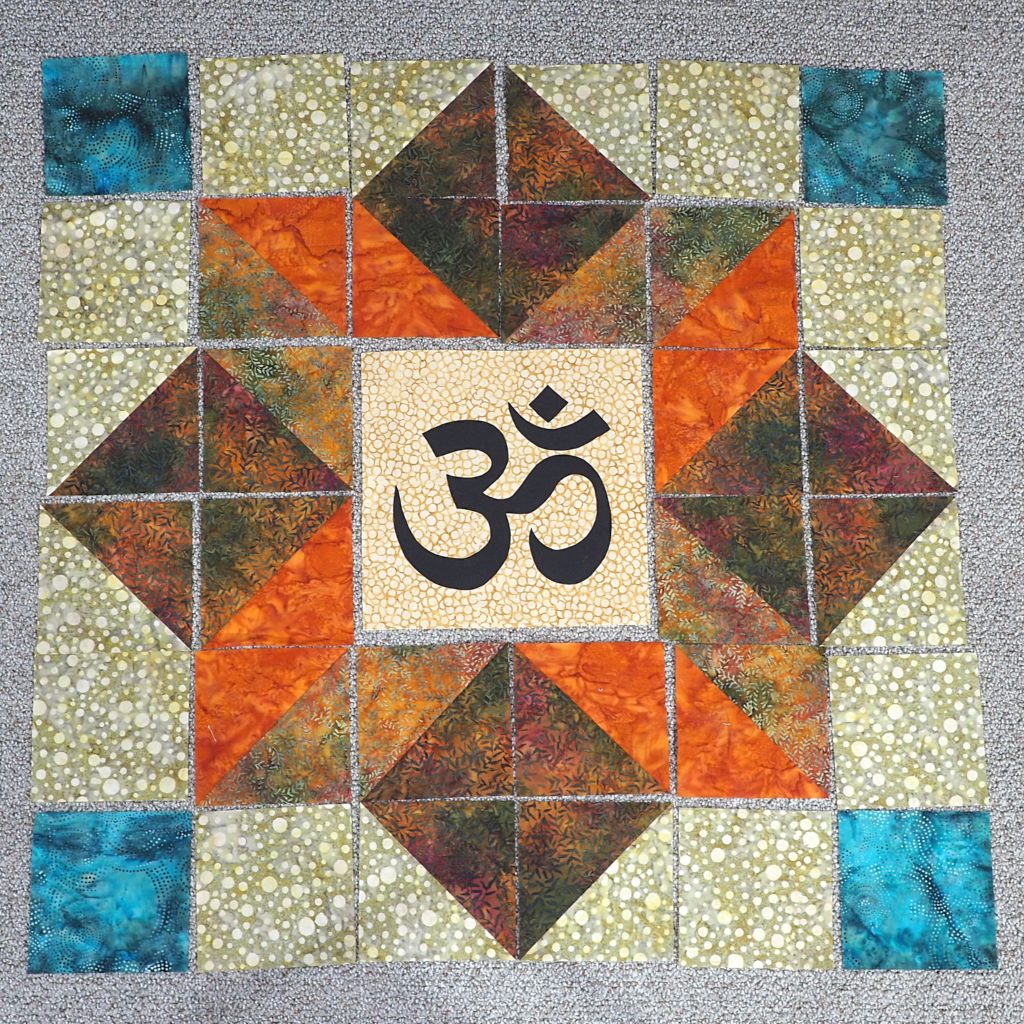
Sew together the individual blocks in each row first. When sewing the row that contains the larger center, sew the squares on the left and right of the center together first. Then add them to the larger center.
Once the rows are pieced, sew each row together in order.
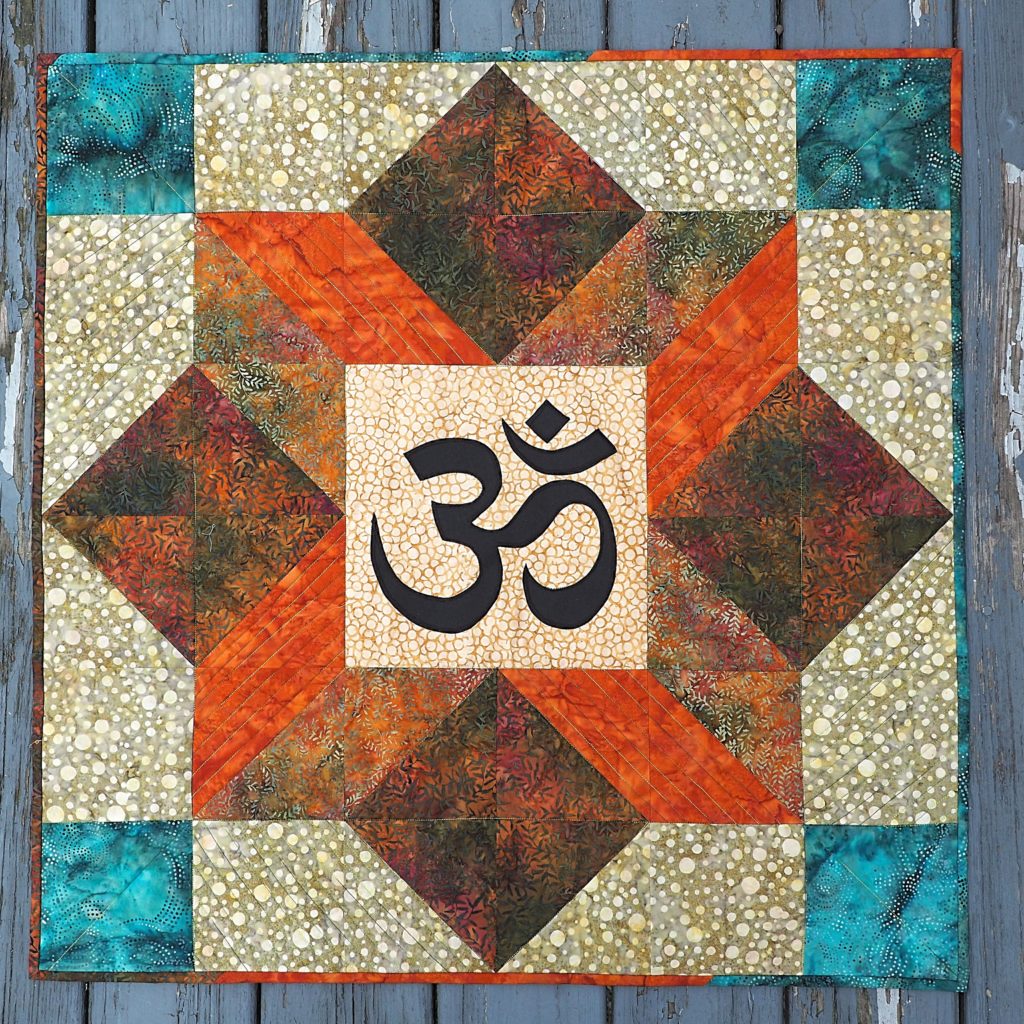
Press. Add batting and backing. Quilt and bind as desired.
The Finished Quilt
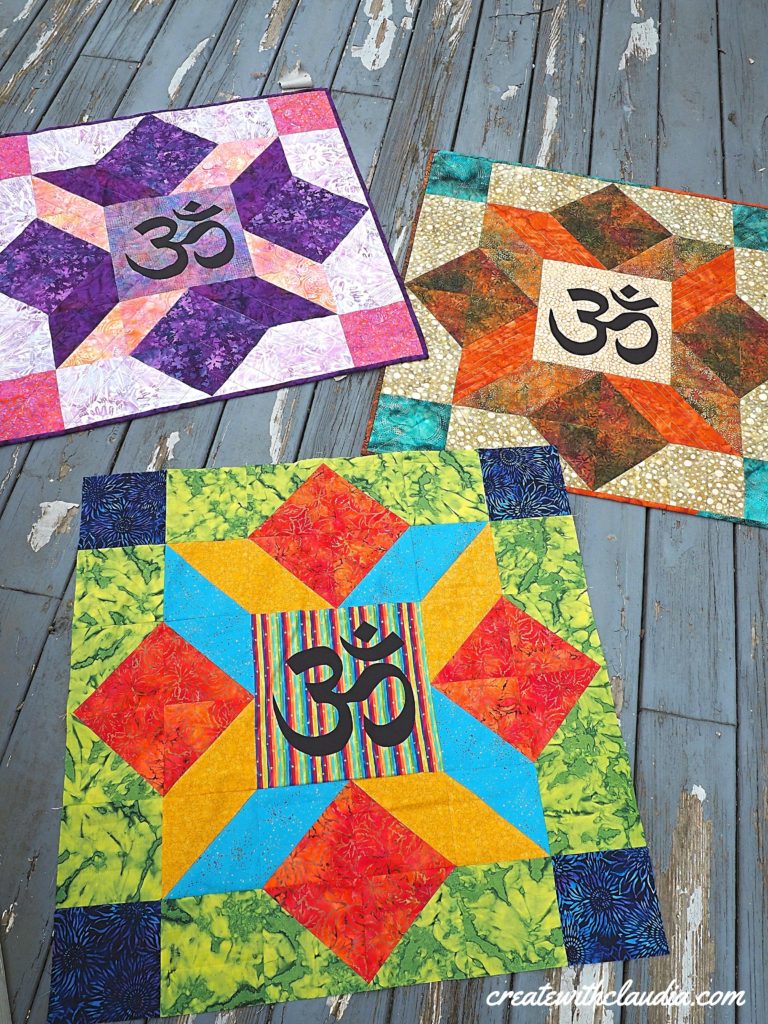
Hung on a wall, this distinctive quilt looks lovely. Depending on the size of a table, it would look good as a topper as well. And if you have a dedicated spot in your home where you practice yoga, it would perfect.
They make great gifts too. I have a friend who is a yoga instructor, so one of these will be going to her. I just can’t decide which one I want to part with.
Three Different Color Waves
Happy Quilting!


13 Comments
MarySmiles
May 15, 2020 at 5:35 PMYour quilt blocks are beautiful. I’ve downloaded the pattern and hope to try your beautiful pattern someday soon. Thank you so much for sharing your inspiration with us.
createwithclaudia_7j76hs
May 16, 2020 at 5:50 AMThanks so much. I’m glad you enjoyed the pattern.
Miki Charlton
May 16, 2020 at 2:56 PMwhy do I have to download a zip system for a pdf of the pattern? I really like the pattern and have two friends who are yoga instructors and would like to make the quilt for each.
but then the download wants me to sign up at only $5 a month and
help
createwithclaudia_7j76hs
May 17, 2020 at 6:28 AMI’m glad you like the pattern. You should not have to download any zip system for this pattern. I checked with a couple people and they did not have any problems pulling it up. The pdf link to the pattern is right above the picture of the brown/gold version of the quilt laying on the ground next to a stream. Here it is too. I hope this works for you. https://www.createwithclaudia.com/wp-content/uploads/2020/05/Aum-Quilt.pdf
Kathy Swenson
June 8, 2020 at 9:09 PMLove this pattern. Thank you so much for sharing. Want to make a quilt. Don’t know If I should up size and make one huge one.,or down size and make several ..
createwithclaudia_7j76hs
June 10, 2020 at 5:07 AMI’m glad you like it. I hope you enjoy making it. Let me know what size you end up making.
Pam
September 16, 2020 at 4:55 PMI love the orange colors. What are the names. I would love to get that fabric
createwithclaudia_7j76hs
September 17, 2020 at 6:40 AMThanks so much. I wish I knew them the names of the fabrics. These were all made from various pieces (batiks in the cover picture) that I have had for a while. Sorry I can’t help out.
Kathrin Herrmann
February 8, 2021 at 2:12 PMThanks for the pattern! 🙂 I have been looking for an Aum symbol to applique to a self-made yoga bolster and am very happy that I found it here in your blog. Lovely quilt though, maybe I will come back for that one day.
Namaste & best wishes from Germany!
Kathrin
createwithclaudia_7j76hs
February 9, 2021 at 5:12 AMGlad you like the pattern.
Carolyn
February 28, 2021 at 8:34 PMHi Claudia, Thanks for this idea! I made it four times with completely different colours in each one, and they turned out great! I actually had some fabric with the aum symbol on it, so I used that for the centre piece, and adjusted the size of everything else to match. It finished at about 16inches square.
createwithclaudia_7j76hs
March 1, 2021 at 8:28 AMThat’s awesome! I’m so glad you like it. If you are on Instagram and post a pic, make sure to tag me (#createwithclaudia) so I can see your work. Thanks for letting me know.
Sandy Morrow
December 2, 2023 at 11:19 PMThank you for the wonderful pattern. I made this for my sister, who recently opened a yoga studio. I know she will love it!