Scrap Busting Quilt Block Tutorial
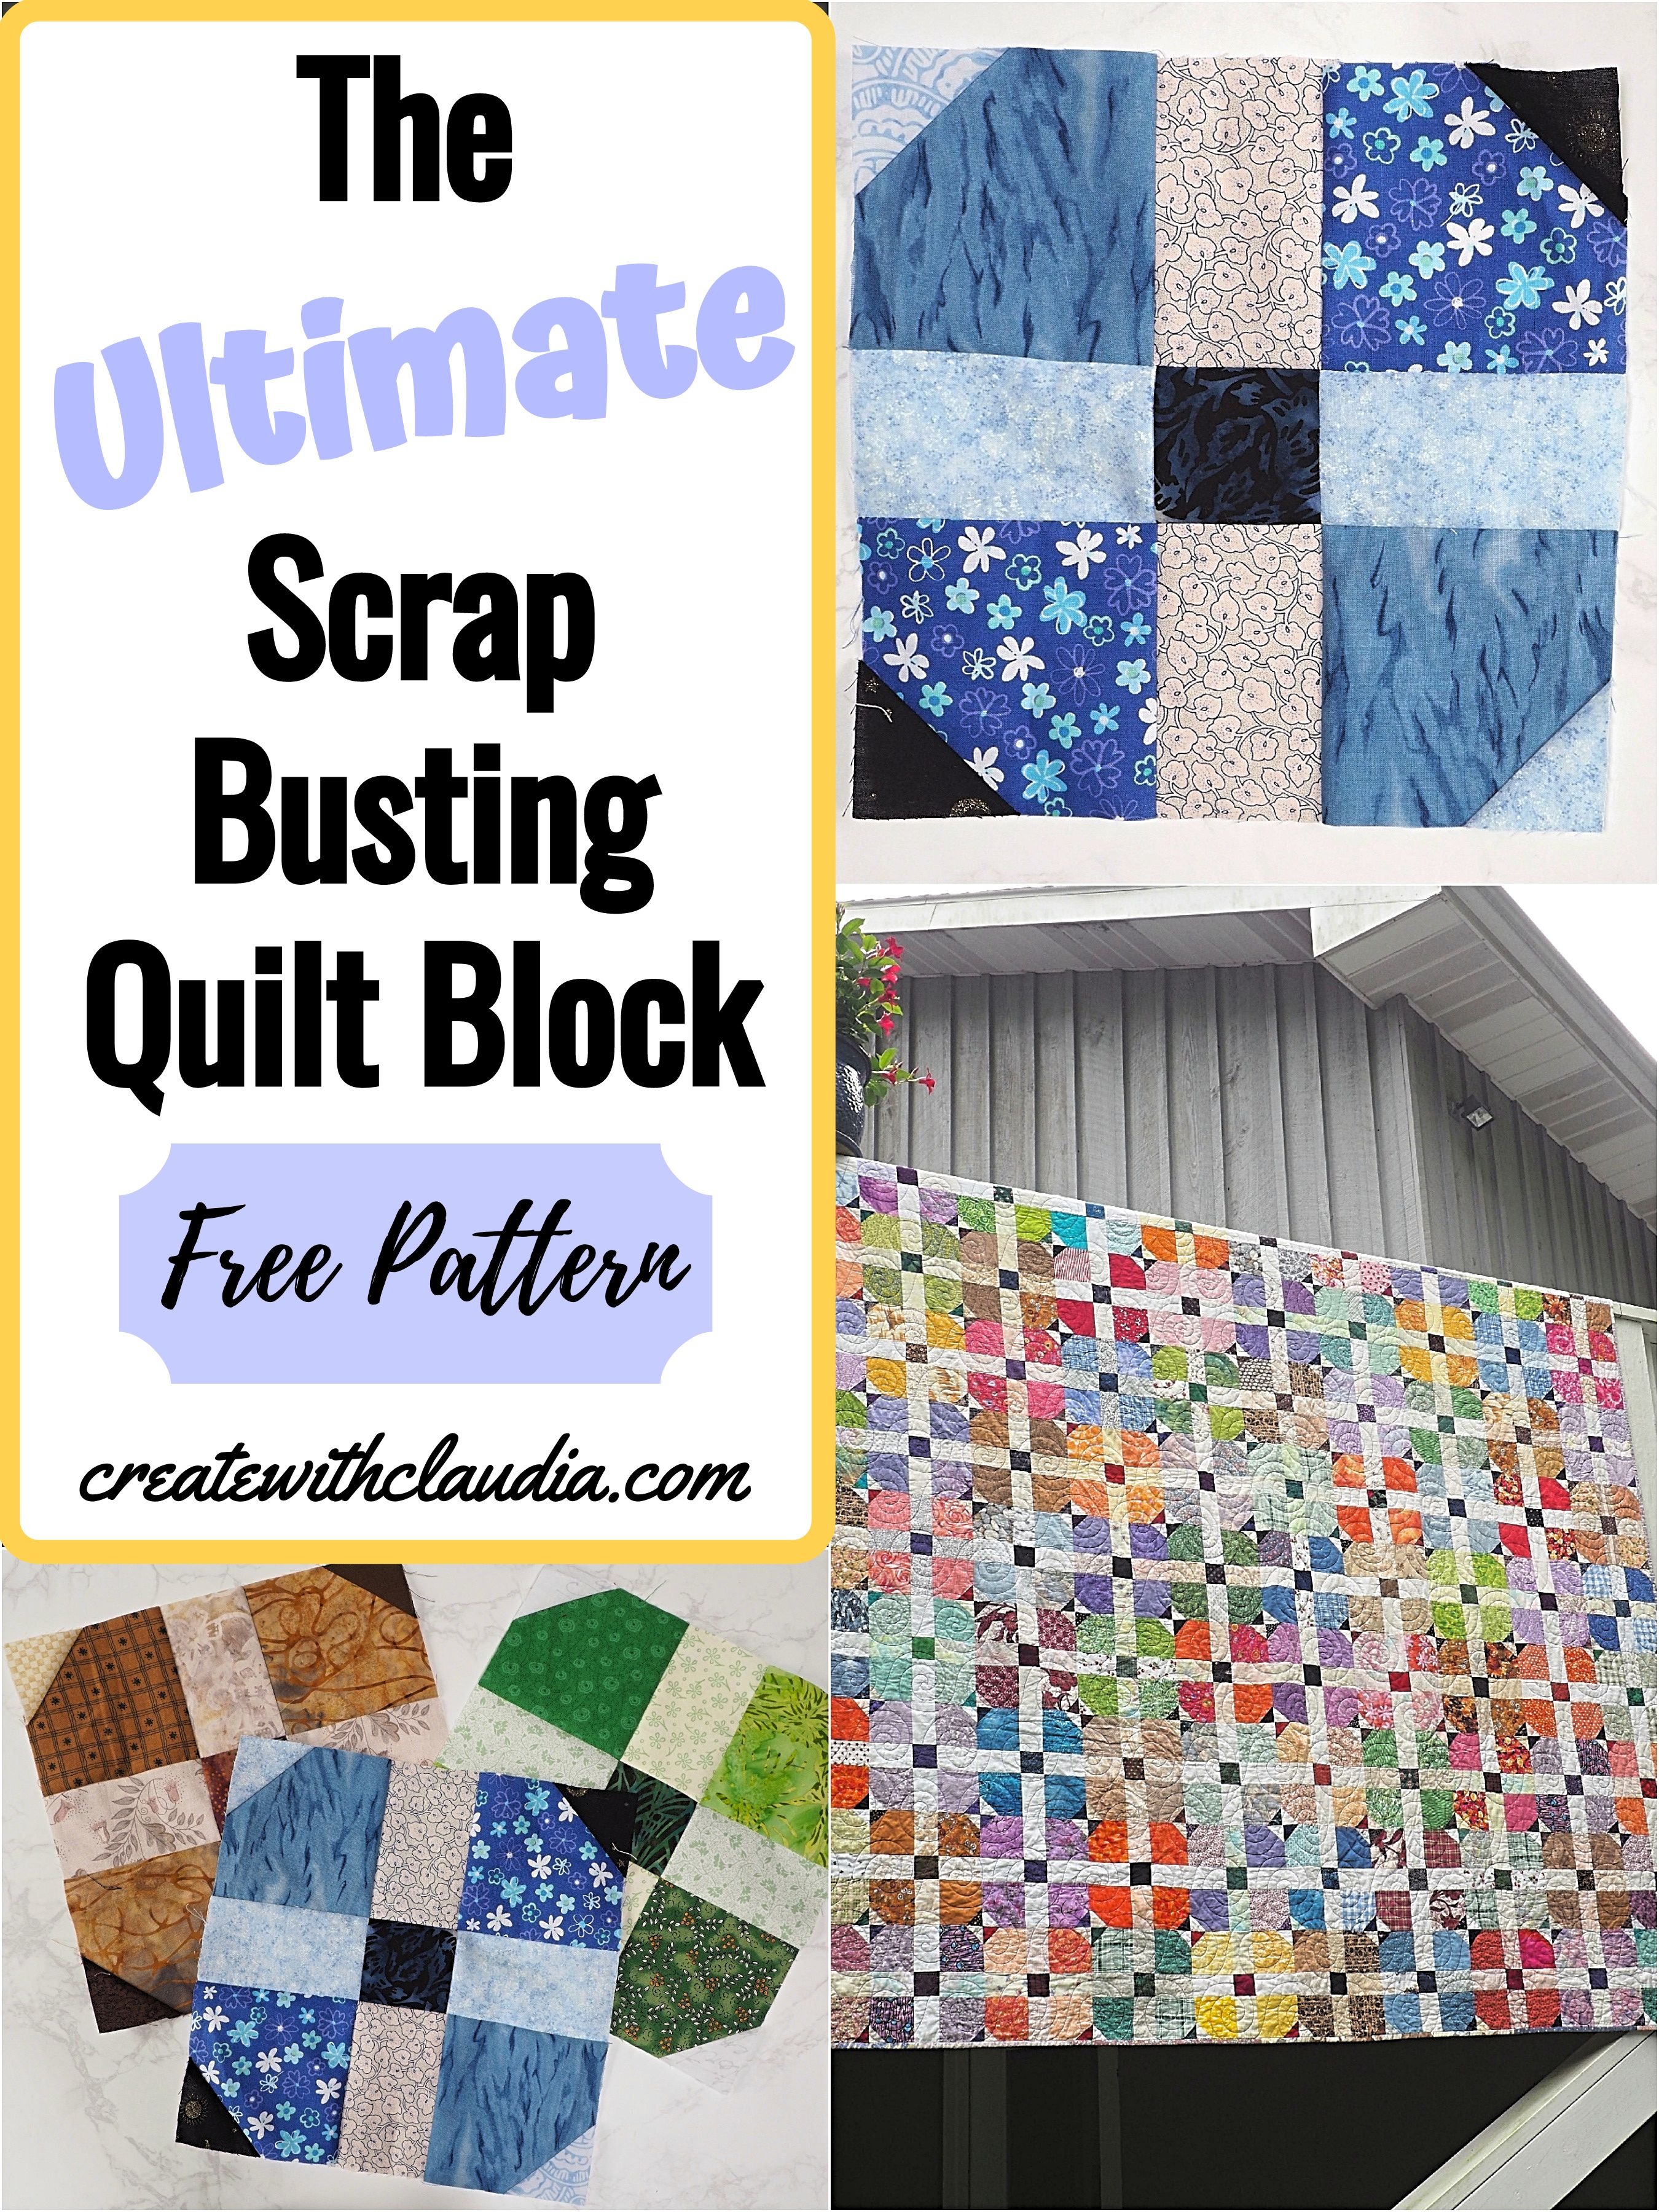
If you are a quilter, and you have lots of scraps, then you ought to give this ultimate scrap busting quilt block a try. It’s easy, fast to sew together, and a gorgeous way to make your fabric bin a little bit lighter.
If you follow my blog, you know that I’ve never met a scrap I didn’t like, and after 30 plus years of quilting, I have collected a bunch of them. This block was a great way to show them off, and they made a nice looking quilt.
About 12 years ago I made a king size quilt using it, and it is almost always on display in our guest bedroom. When I made it, I gave myself the following challenges.
- I only allowed myself to use fabrics that were in my scrap bins, nothing from my shelves.
- No colors were off limits and I tried to stay away from multicolored patterns that were too busy.
- I tried to keep the light, medium and dark values from the same color waves. For example, my blue blocks only had fabrics with different values of blue in them.
The first and second rules were fairly easy, but the third one got a little tough. I have a tendency to buy medium values more than lights and darks, so I did not always have a lot to choose from in a particular color wave. I ended up using quite a few black fabrics and white on white fabrics. It all worked out in the end, and this remains one of my favorite quilts.
If you are ready to bust some scraps then let’s go!
Block Specs
- Finished block measures 9 1/2” square
- Use a scant 1/4” seam allowance when sewing
- All scraps used were 100% cotton quilting fabric
Cutting Instructions
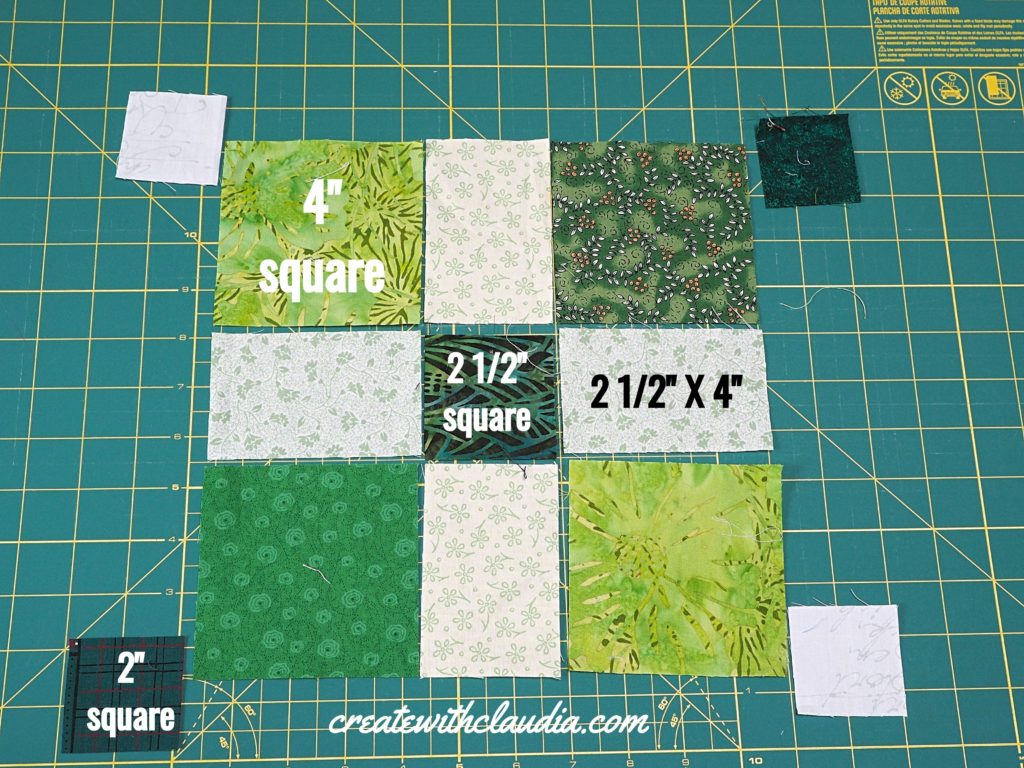
For one block that measures 9 1/2” square you will need to cut the following items.
Dark Fabric
- One 2 1/2” square
- Two 2” squares
Light Fabric
- Four rectangles – 2 1/2” X 4”
- Two 2” squares
Medium Fabric
- Four 4” squares
Items You Can Use To Make This Project
You can find many of the items that I used to make this project in my Amazon Store.
As an Amazon Associate I earn from qualifying purchases.
Piecing Instructions
The first thing you want to do is add the corner triangles.
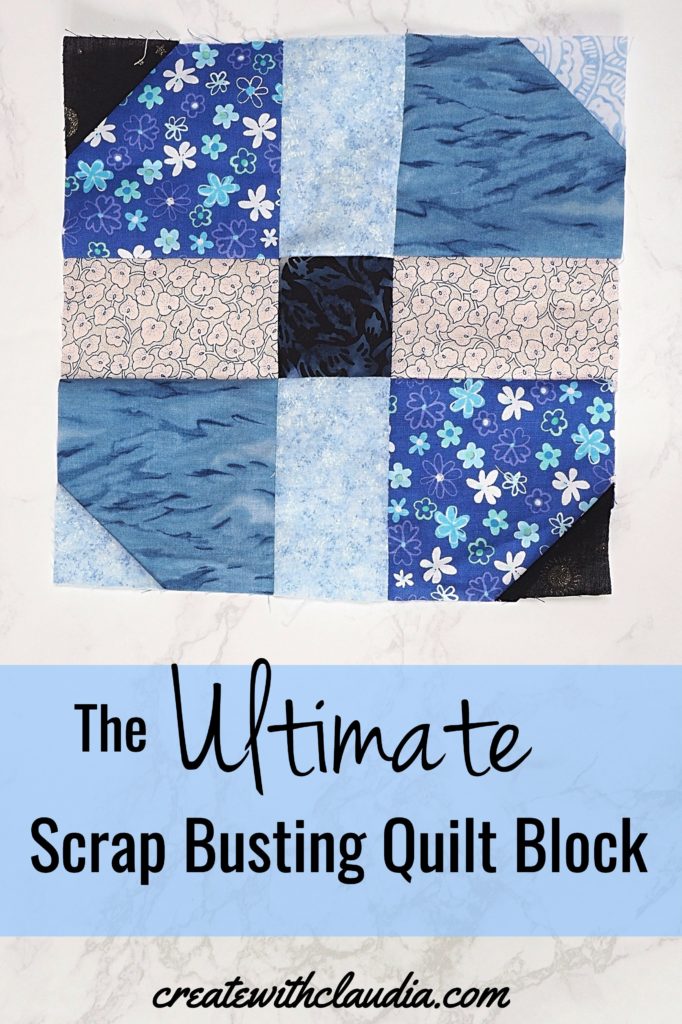
Lay out the pieces of the block in the way you want them. The 2” squares are for the corner triangles and the light ones should go in the top left and bottom right locations. The dark ones go in the top right and bottom left.
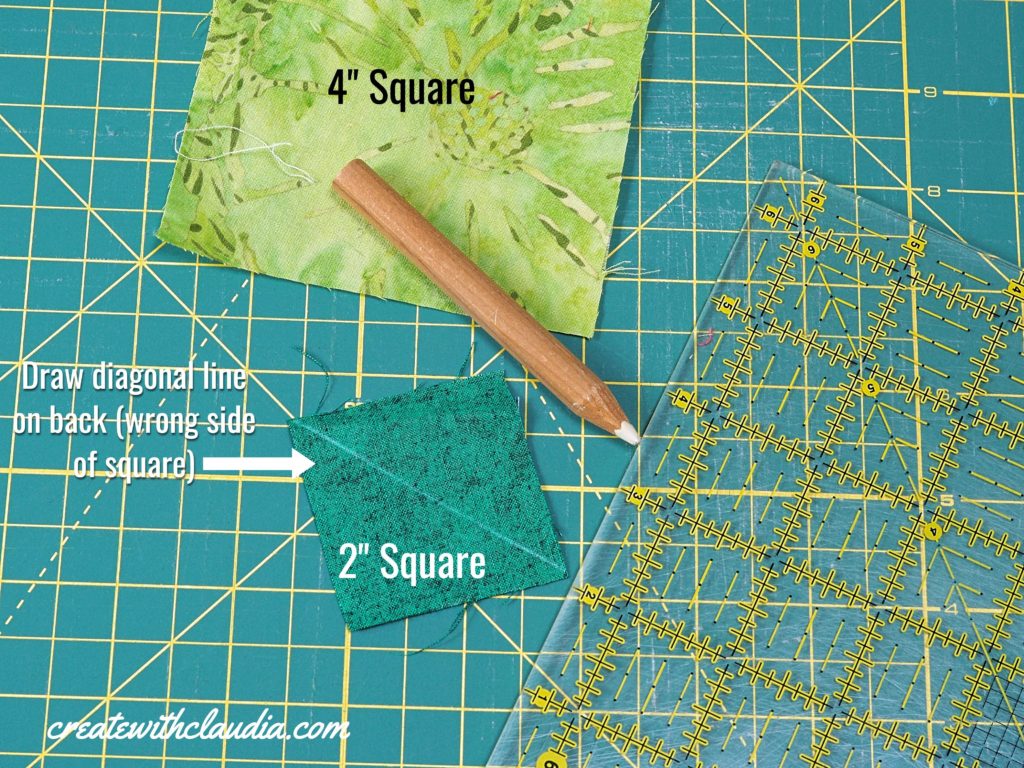
On the wrong (back) side of the 2” square, draw a diagonal line down the center, from corner to corner. This will be the line you sew on.
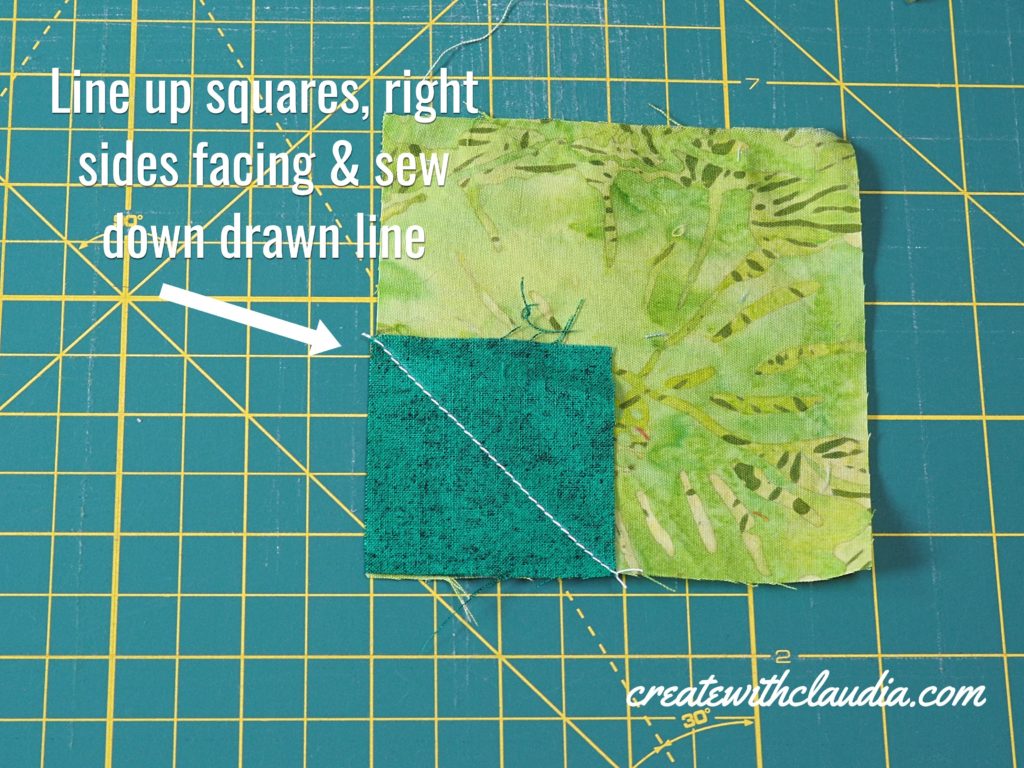
With right sides facing each other, line up the 2” square in one of the corners of the 4” medium square. Sew along the drawn line.
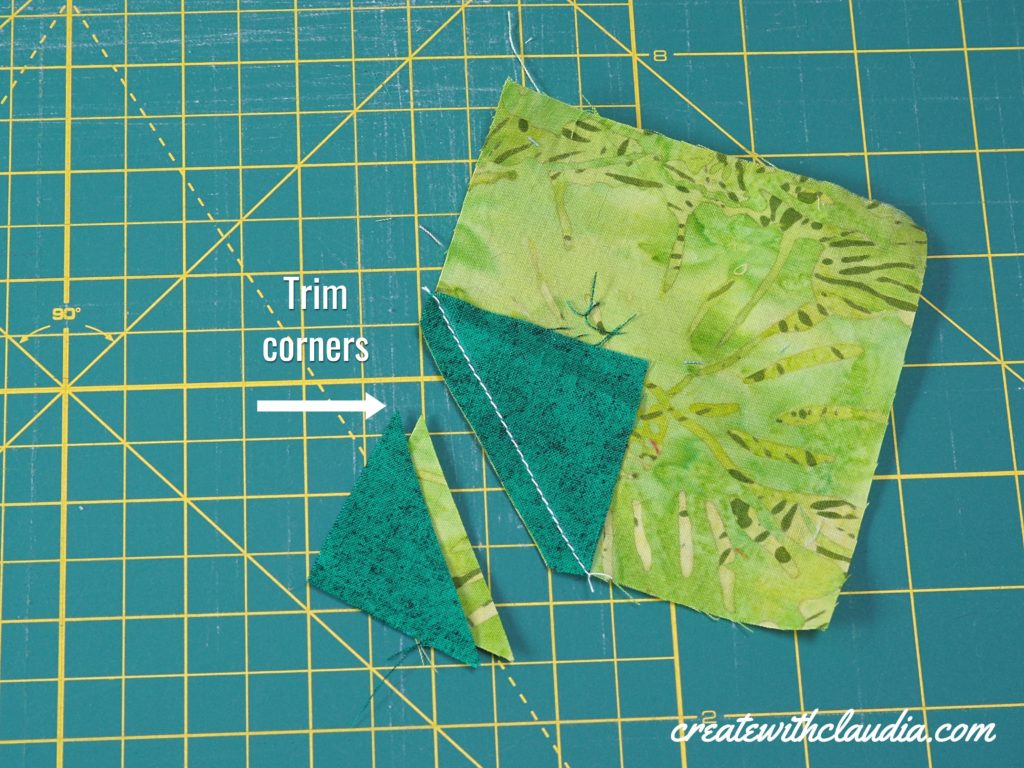
Once you make sure that the square was correctly added, cut away the excess fabric to reduce bulk.
Press the triangles in place. You now have the corner squares for your block.
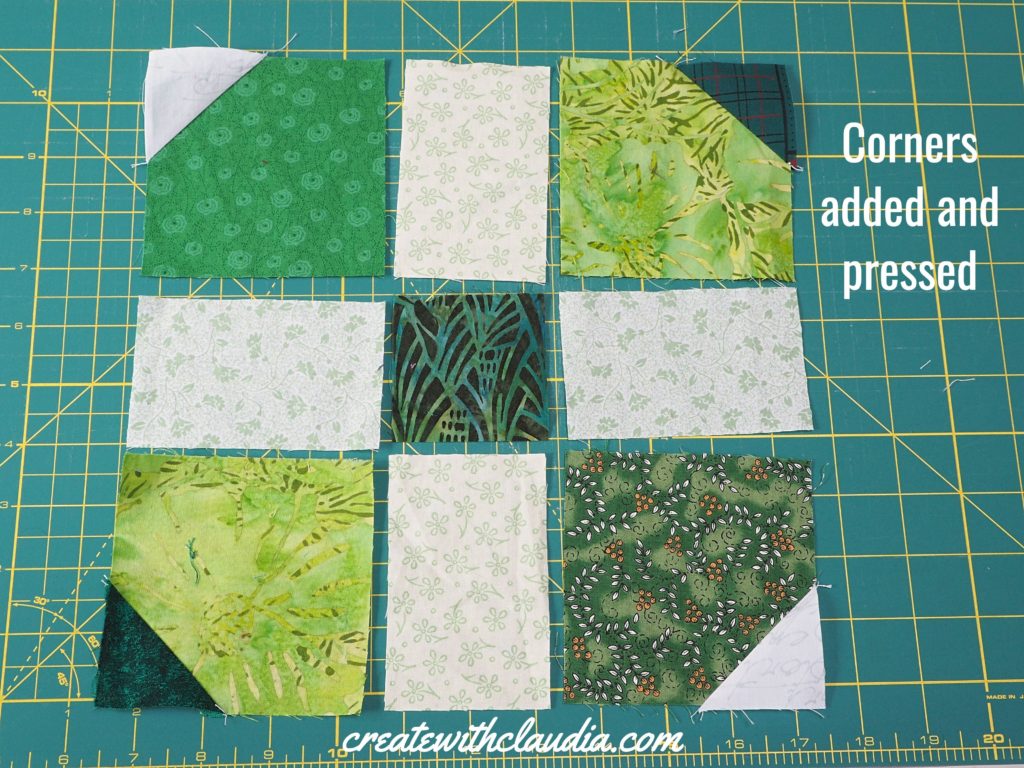
Working in rows, sew together the rest of the block.
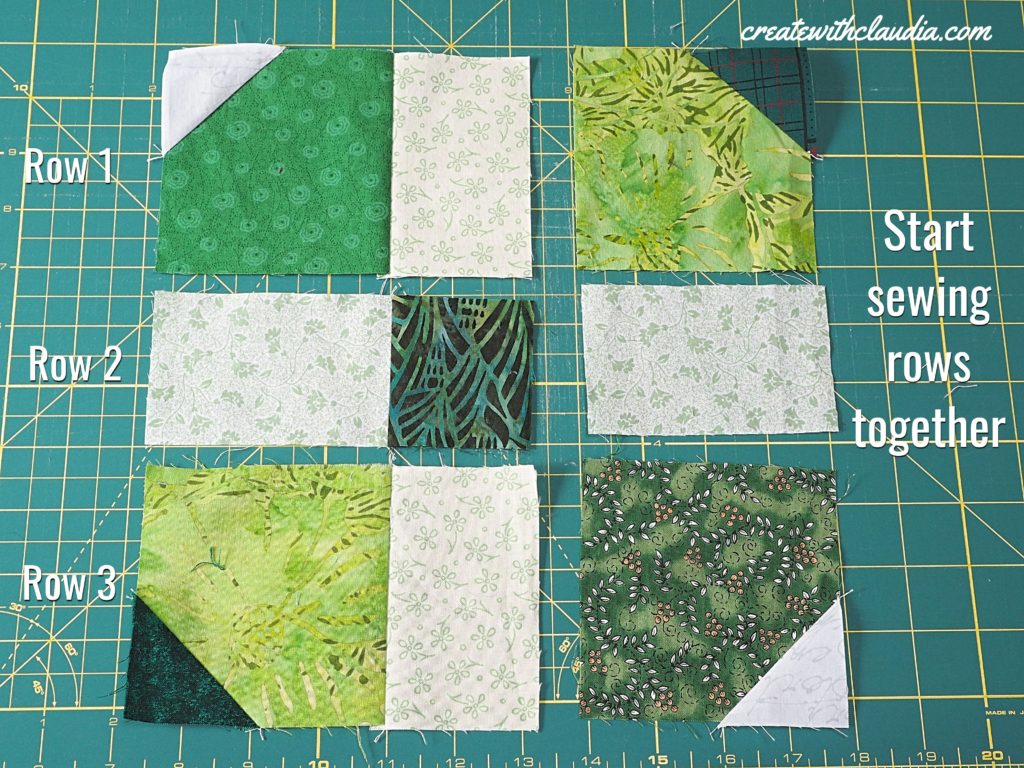
Hint: To help with block assembly, press towards the dark fabric on all of the rows. This way the seams will nest easily and the rows will go together well.
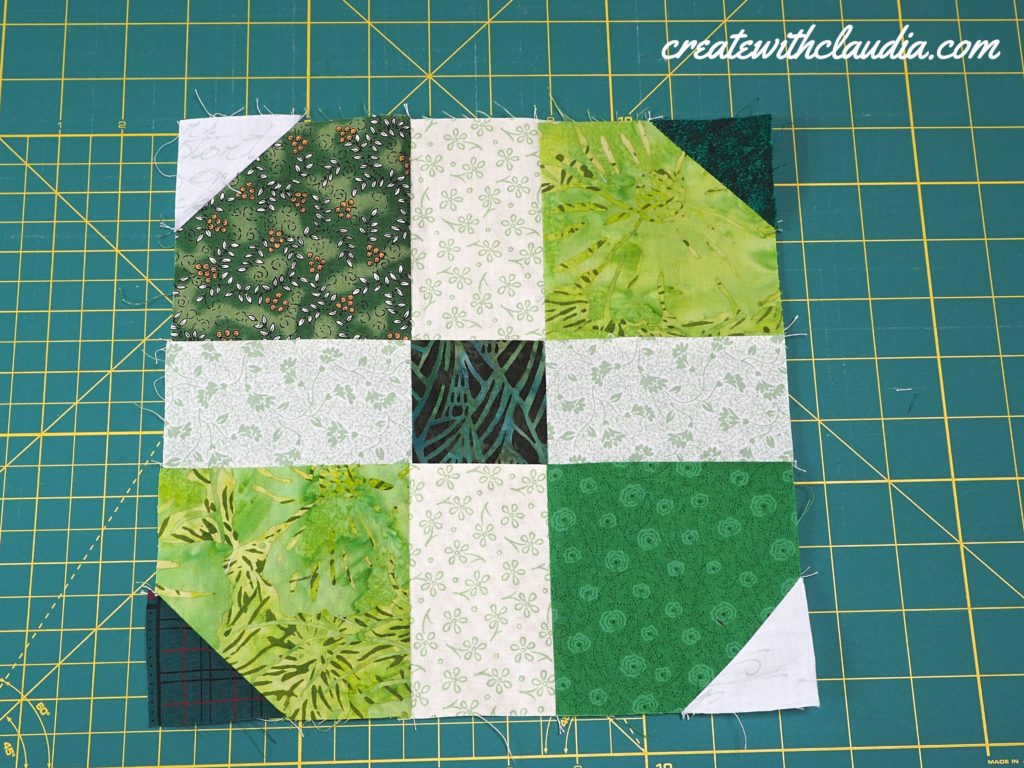
Finishing the Ultimate Scrap Busting Quilt Block
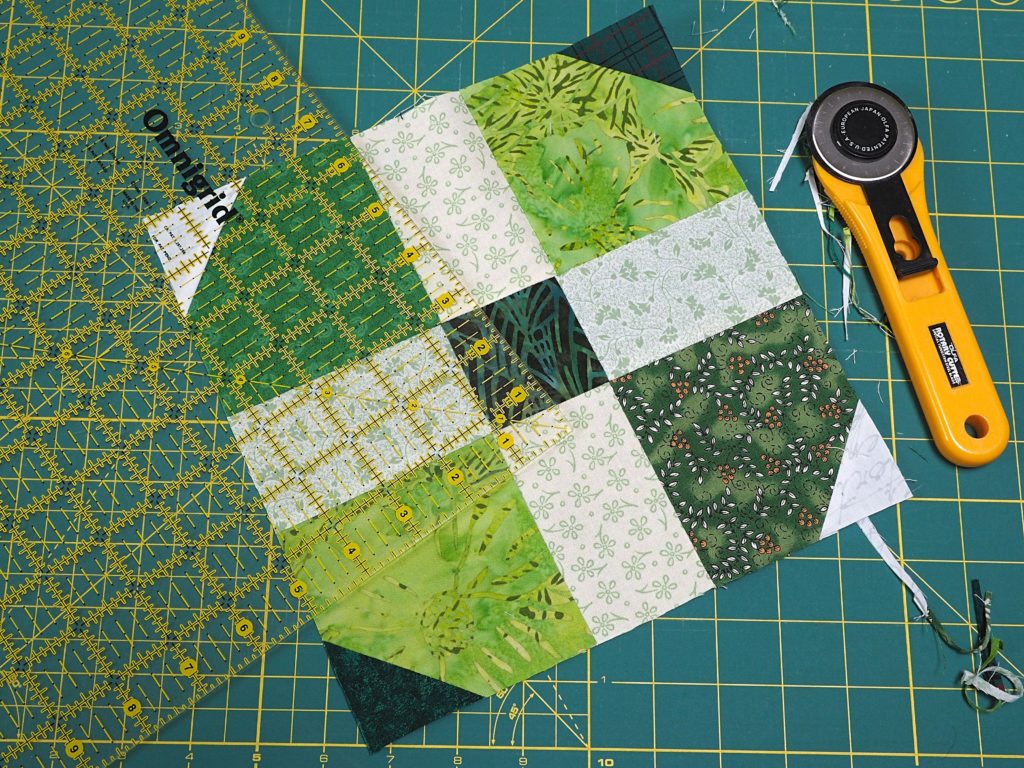
Press the block and then square it off to make sure it measures 9 1/2” square. I find that using a 15” square ruler that has a diagonal line is the best tool for this. If you do not have that, use your cutting mat and other quilt rulers to help you.
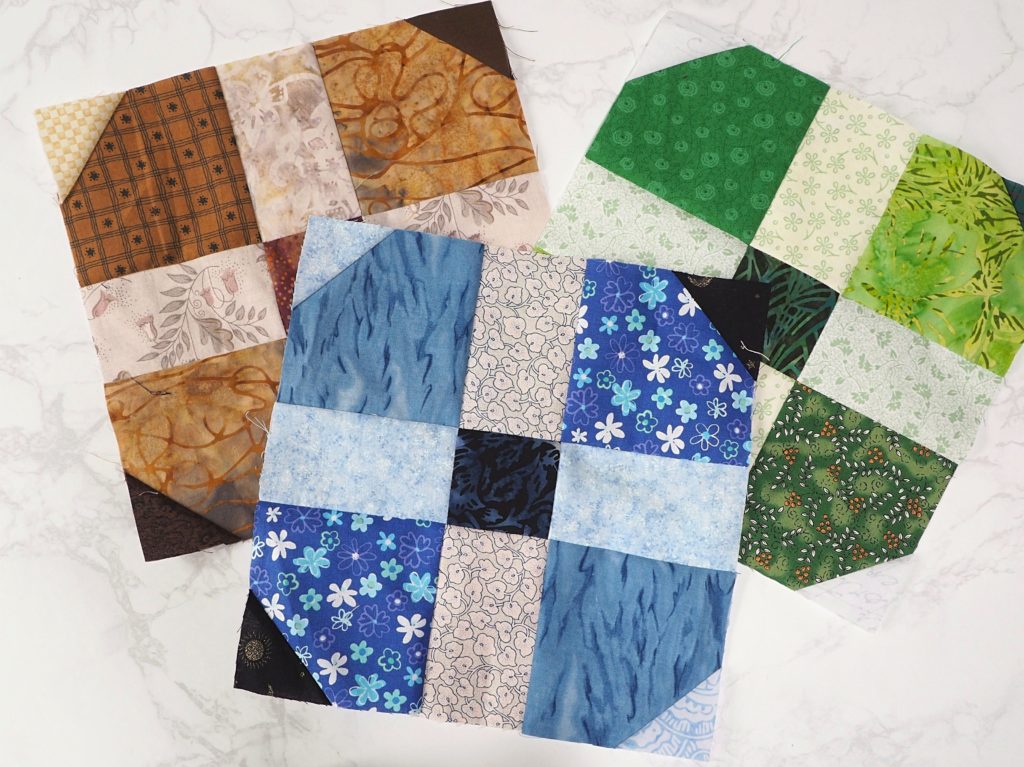
Making a Quilt With This Block
The beauty of this block is that it looks good in any color wave.
Here is my king size quilt that I made with this block. I love the way the light rectangular pieces fit together to make it look like the quilt has sashing. I also think that the triangular corners, when the light and dark fabrics are placed next to each other, add a little twinkle to the quilt.
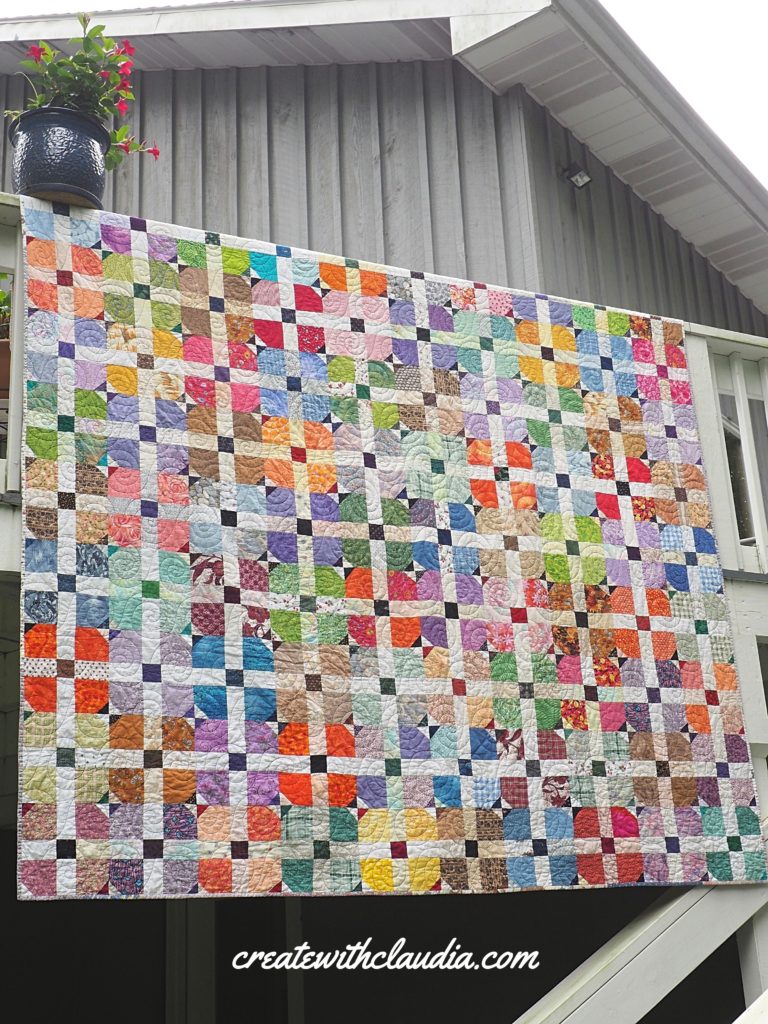
This monster quilt was made up of 10 blocks across by 11 blocks down, using a total of 110 blocks…phew!
So start digging through all of fabric pieces you don’t know what to do with and make your very own ultimate scrap busting quilt block.
If you do make it, I’d love to see it. Just post a picture on Instagram using the hashtag #createwithclaudia.
Happy Quilting!


7 Comments
Uta Hill
September 8, 2019 at 4:39 PMGreat! I bought some squares at Ebay and put 4 fitting ones together. I’ll start soon – after finishing 5 other quilts…
createwithclaudia_7j76hs
September 9, 2019 at 10:19 AMHave fun with your quilting.
Eva Saffert
September 9, 2019 at 9:23 AMI love this quilt!!
How do I get the pattern?
Thanks
createwithclaudia_7j76hs
September 9, 2019 at 10:21 AMThanks so much! There really isn’t a set pattern for the quilt. I just made a lot of these blocks and pieced them together – 10 blocks across by 11 blocks down for a total of 110 blocks. Then I backed it with large scraps and it was machine quilted.
Uta Hill
September 10, 2019 at 2:52 PMI assorted the squares and made two test blocks: easy, funny, cute – even of ugly fabrics.
createwithclaudia_7j76hs
September 11, 2019 at 6:28 AMThanks! And I agree, I used up lots of fabrics that weren’t my favorites in these blocks.
Bonnie in Va
October 12, 2021 at 12:08 PMFound you through a blogger and came over to see what’s going on. I love the idea of this quilt. Scraps are overflowing in my studio. I’m thinking of using this block for next year’s Rainbow Scrap Challenge. But why not start making some this year? Yes, I think I will. Thanks for sharing this one.