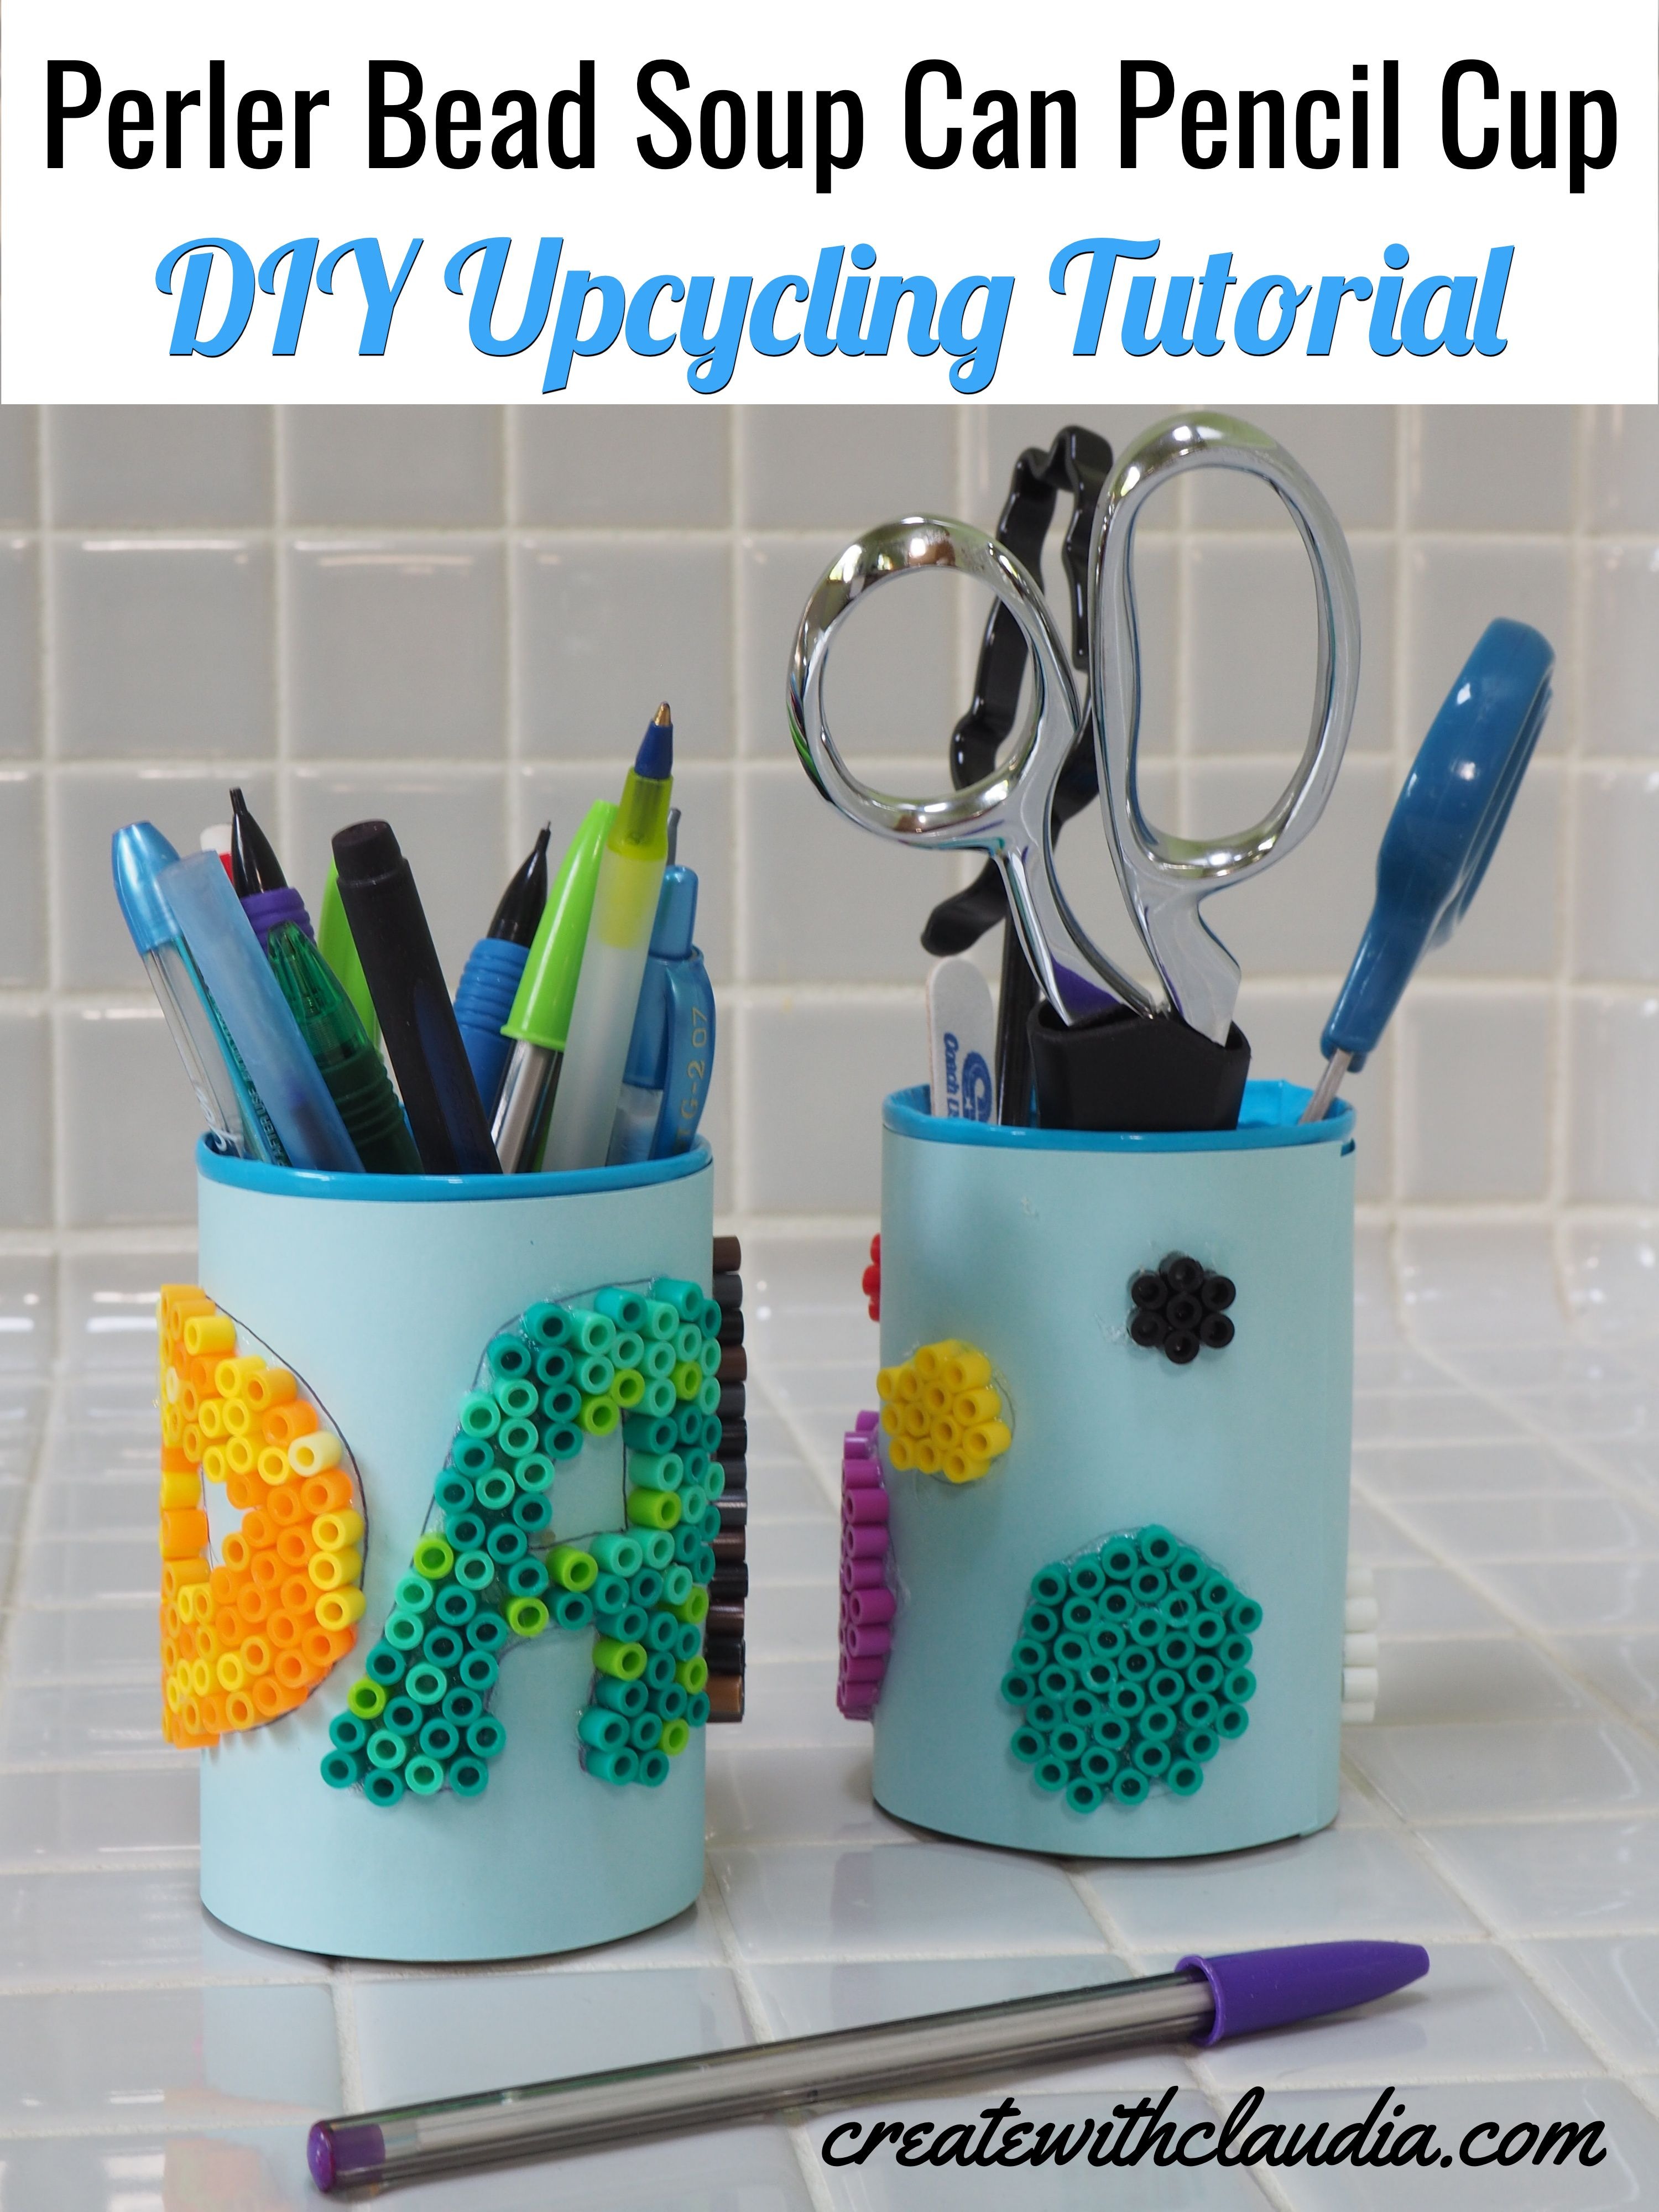
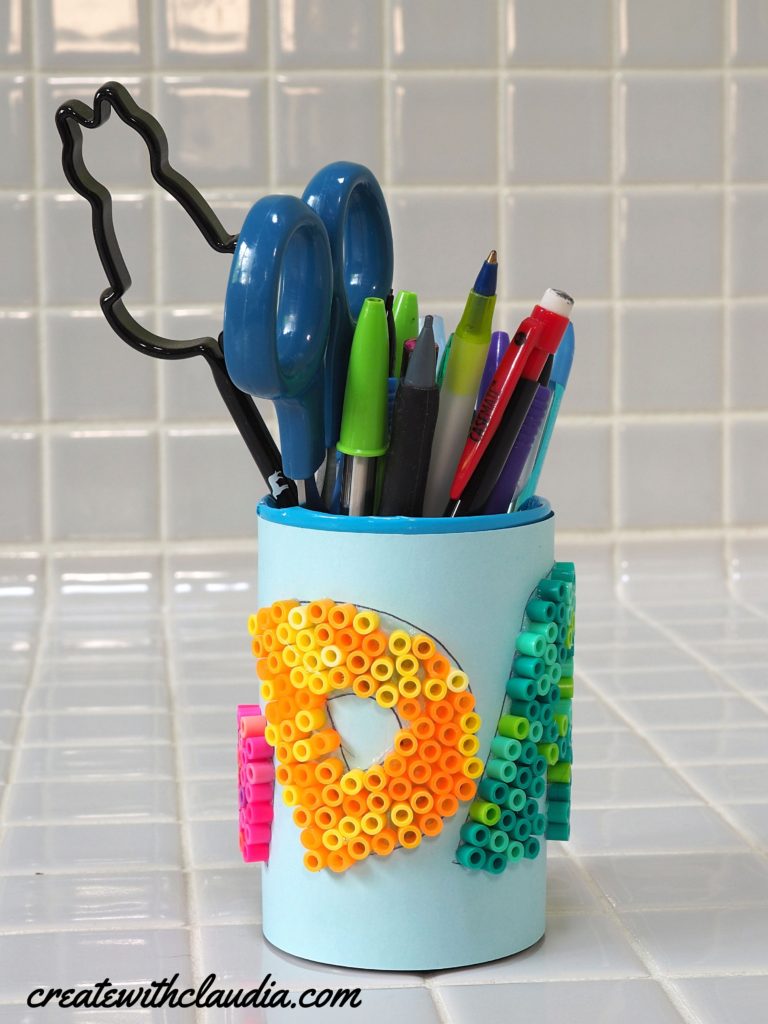
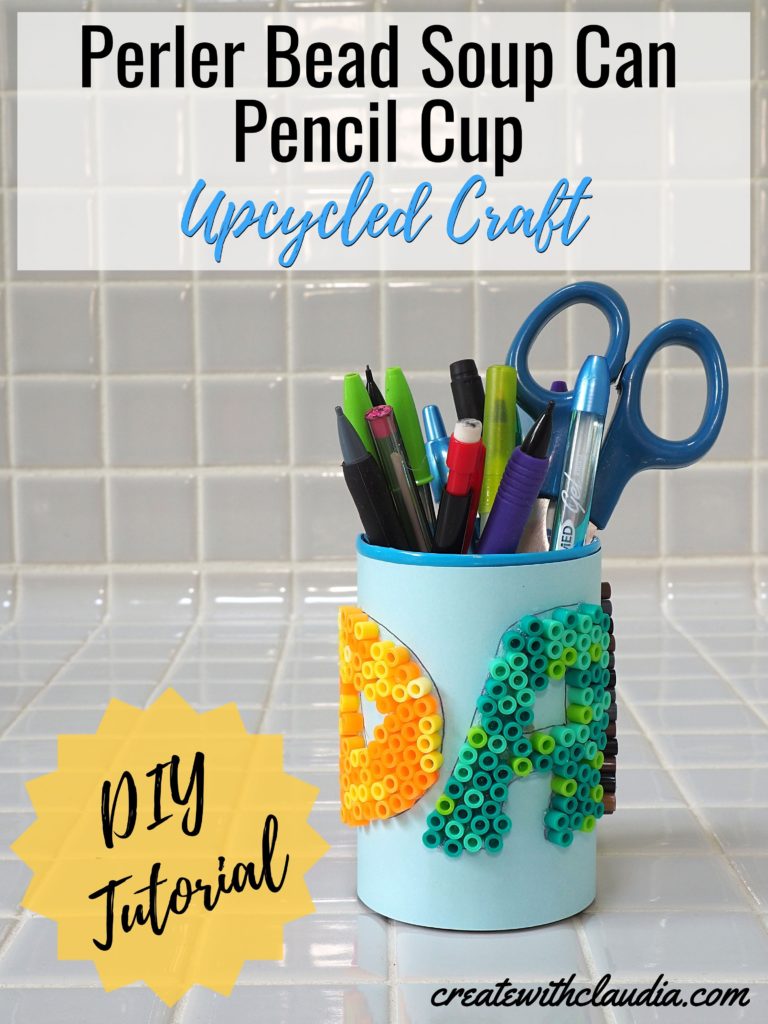
Perler Bead Soup Can Pencil Cup
I’m trying to be better about recycling things around the house. Since the majority of my work is with fabric, it’s easy. I just use what fabrics I have on hand. However, it’s not always that simple for other things. So when I used a soup can the other day, I got the idea for this perler bead soup can pencil cup and I just had to make it.
Not only is this project a great way to keep a can out of the trash, it uses up some of the thousands of perler beads that I have from the days when my daughter played with them. It’s been a long time since she used them, and I never got around to throwing them out, so I’m trying to use them in some of my craft projects.
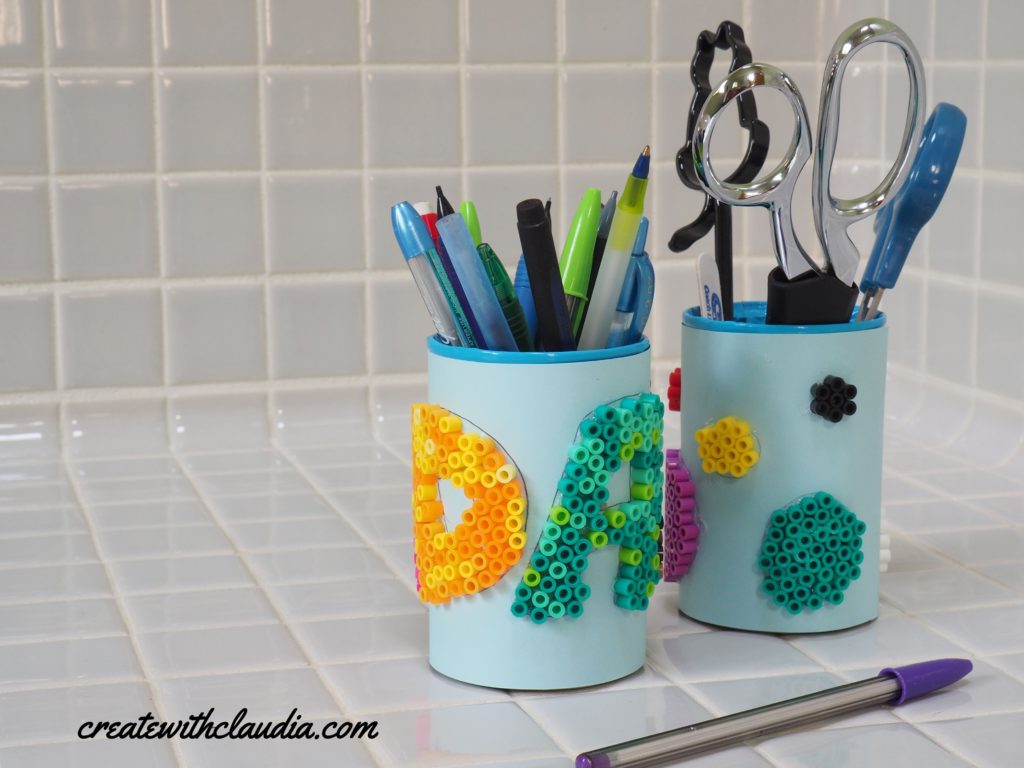
Each pencil cup is completely unique, and they make terrific gifts. I could easily see one of them sitting on my desk. Kids can help make them by doing the artwork and, depending on their age, some of the gluing.
Here’s What You Need To Get Started

- One Soup Can – 10 ½ ounces – label removed and cleaned
- Pliers (if needed)
- Duct Tape – 1 piece, cut 8 ½ inches long
- Card Stock – 1 piece cut 8 ½ inches by 3 13/16 inches
- Perler Beads
- Tweezers
- Fabric Glue or Fabric Mod Podge
- Glue Gun (optional)
Items You Can Use To Make This Project
You can find many of the items that I used to make this project in my Amazon Store.
As an Amazon Associate I earn from qualifying purchases.
Prepare the Soup Can
I like to use the tab top soup cans, and they work well for this project because they leave a fairly smooth rim. However, you can use a can that is opened with an opener as well.
Tear off the label and wash the can. Don’t worry if there is a little glue left on the can. It gets covered by the card stock.
Smooth Rim of Can
You may have a sharp spot on the inside rim of the can. There are two ways to fix that.
With Pliers
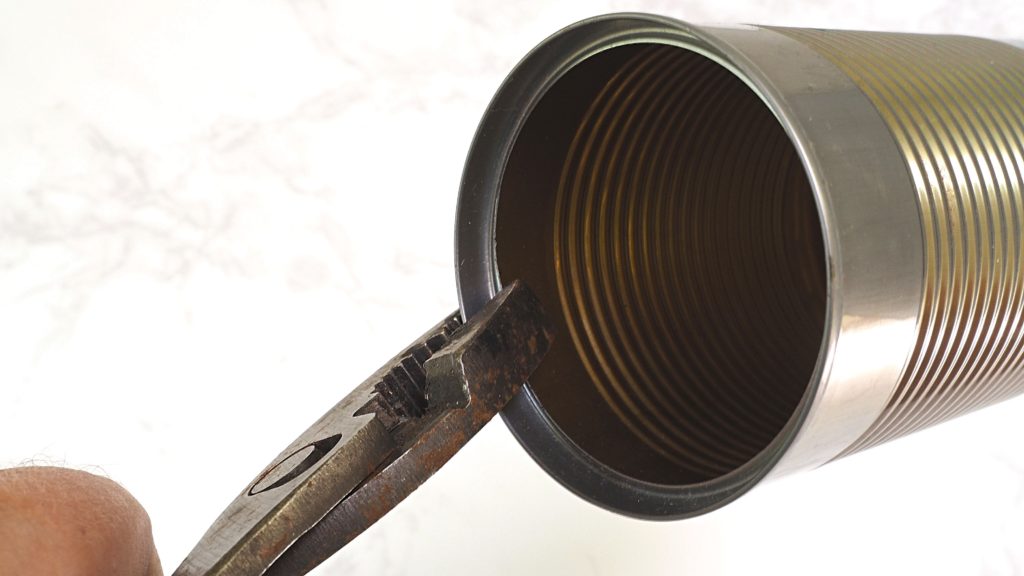
Carefully check around the rim and, if there is a rough or sharp spot, use the pliers to pinch it down.
With Duct Tape
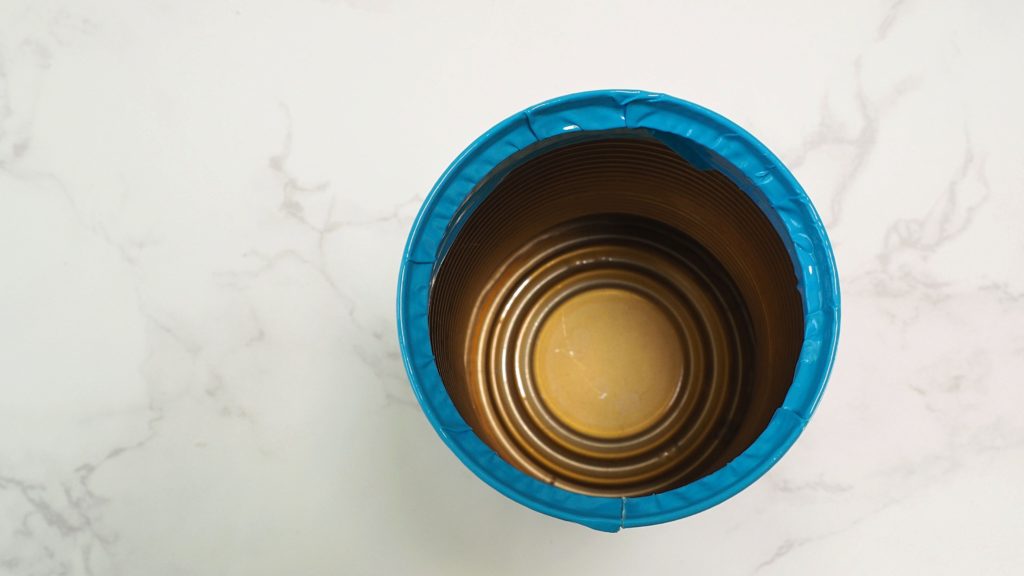
Take a piece of duct tape, about 8 ¾ inches long and wrap it around top of the can. Place it so that the center of the length of the tape hits the top of the can. There will be about 1 inch of tape on the inside and the outside of the can.
Next, carefully fold the duct tape over the rim and smooth it out around the inside of the can. Try to get out as many air bubbles and folds as you can.
Set the can aside.
Make the Design
First, cut a piece of card stock to 8 ½ inches by 3 and 13/16 inches.
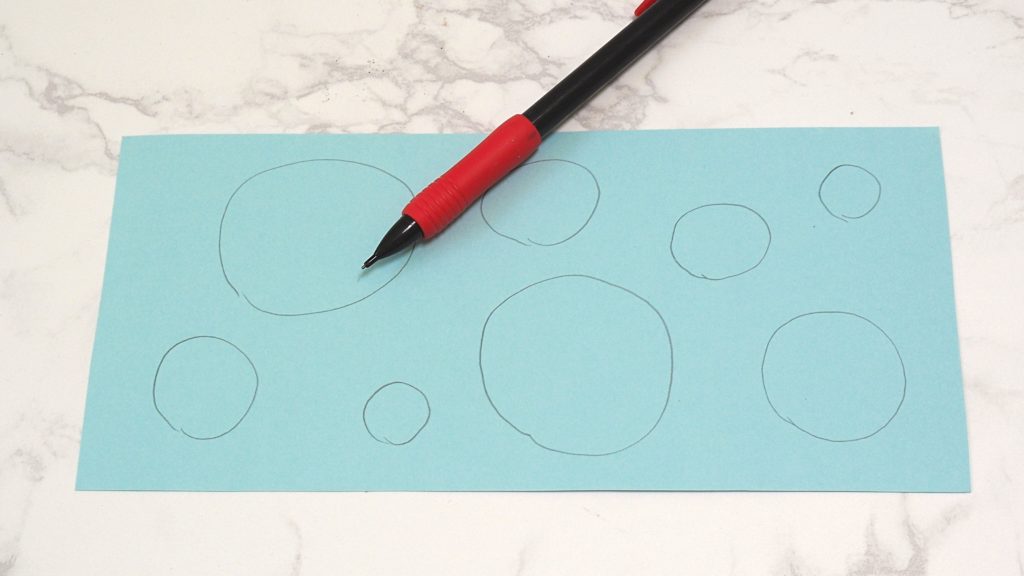
Then, using a pencil, in case you need to erase something, sketch out your design. I suggest not making it too small or intricate because the perler beads aren’t tiny, and may not work in the design.
Leave about a 1/4″ on each end blank to allow for the edges to overlap a bit when glued to the can.
With the exception of the edges, you can use the entire surface of the card stock, or just parts of it. I like to use parts of it because it adds some fun dimension to the pencil holder. Also, it takes a while to add the beads and you will probably get tired of doing it if you have to cover the entire surface.
Add the Perler Beads
Once the design is completed, it is time to add the beads. You will need a lot of them.
DO NOT use the glue gun to add the beads. You will burn your fingers.
Perler Bead Tip: If I was thinking when I got the beads, I would have kept them separated by color. Unfortunately, I wasn’t, and I now just have a big container of them mixed together. If you buy them by color, keep them separated. It pays off in the long run.
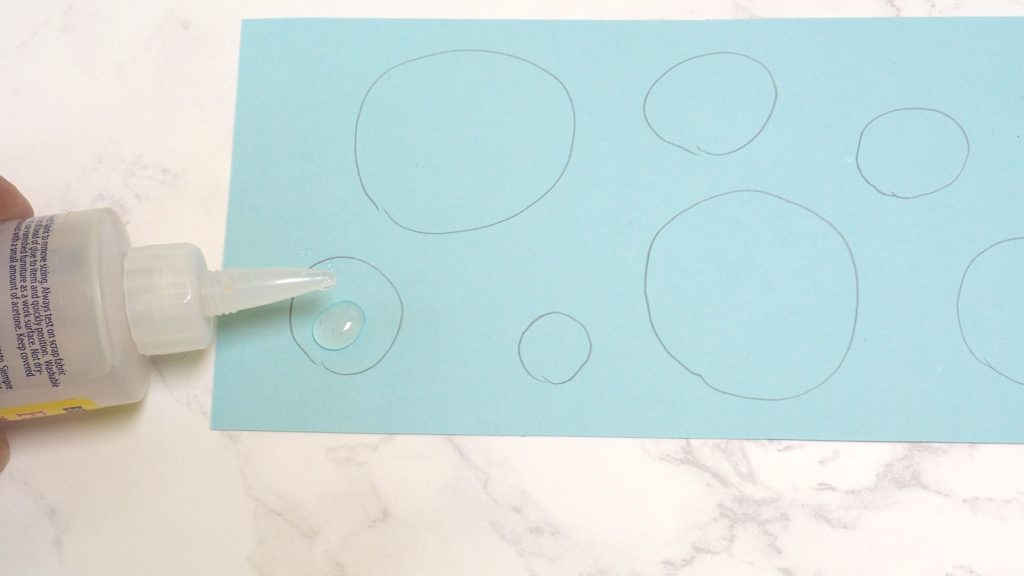
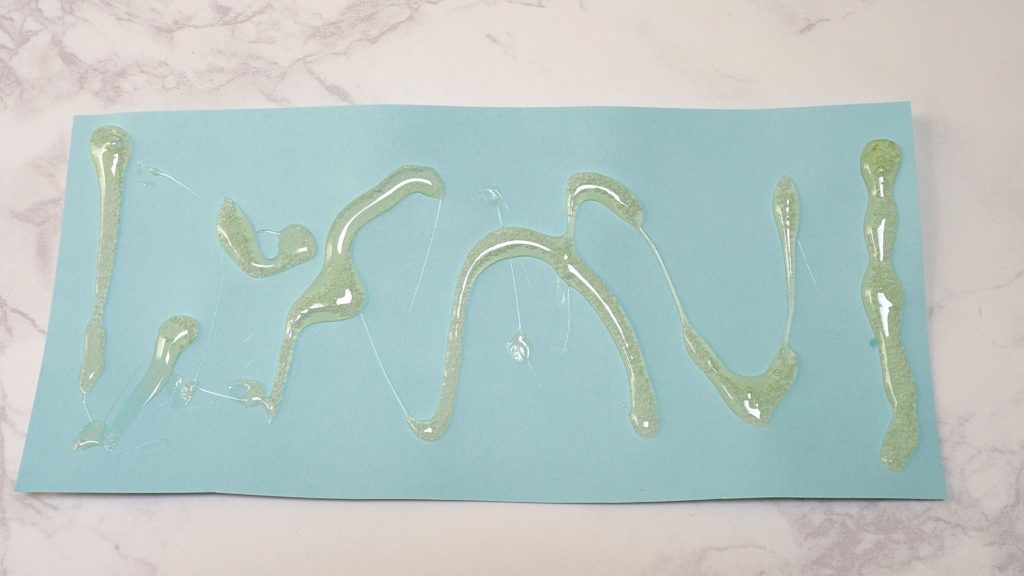
Working in small sections, apply a generous amount of glue to the area where you want to start.
Notes on Glue: Use fabric glue or fabric mod podge for this perler bead soup can pencil cup. I found that using craft glue did not work too well, as it was stiff when it dried and the beads popped off when I wrapped the design around the can. Your fingers may make contact with the glue so, just make sure to follow the manufacturer’s directions on the glue about handling.
Using the tweezers, add the beads, one at a time. The holes should be facing up.
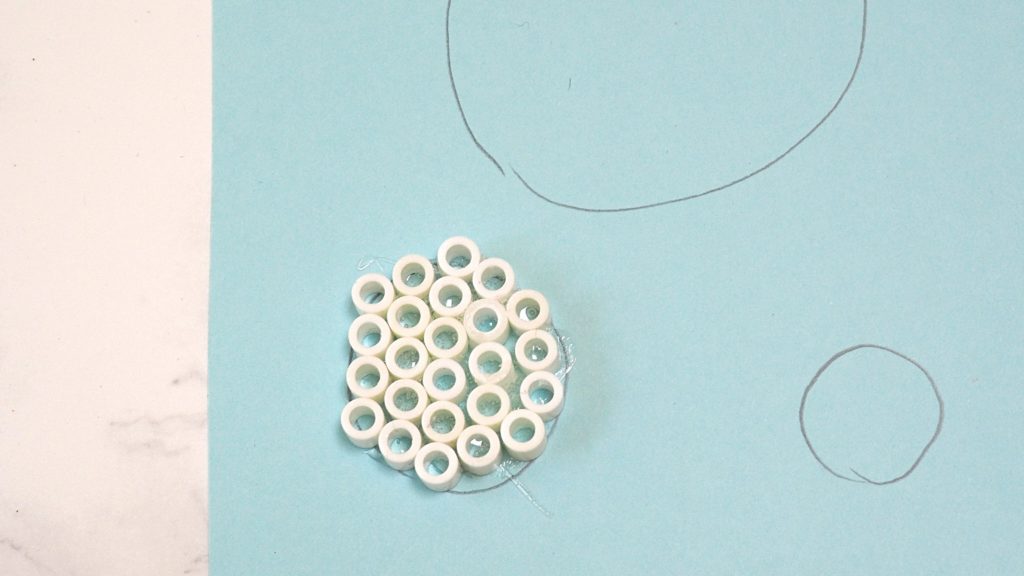
Move on to the next section and continue the process.
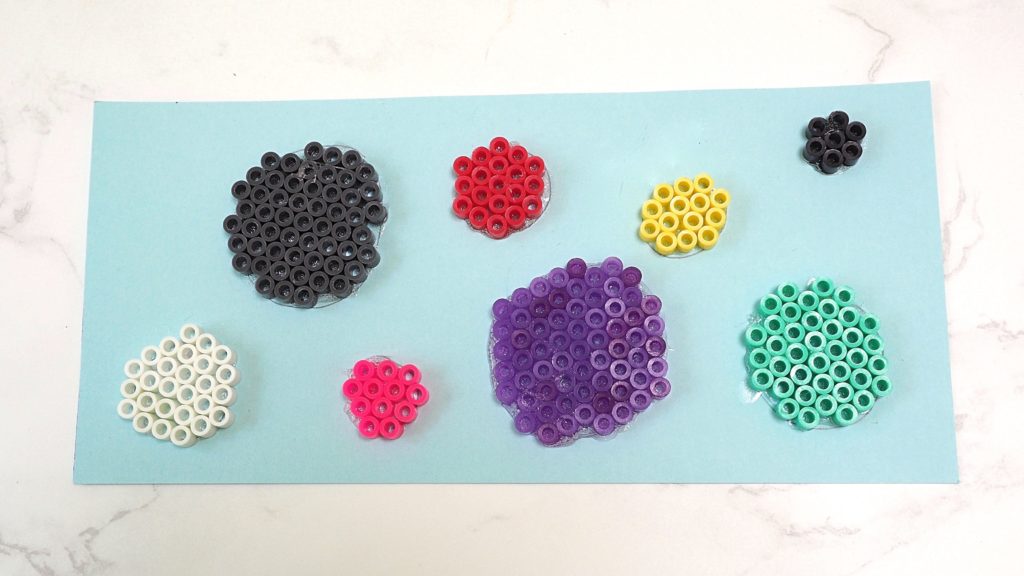
Once finished, set the design aside to dry overnight.
Apply Finished Design to Can
After the glue has completely dried, it’s time to apply the card stock to the can.
Heat up your glue gun and flip the card stock over, so the beads are laying against the table surface.
Apply a strip of glue to both short ends of the card stock, and some in the middle.
Note: You do not have to use a glue gun, but it makes it much easier. If you don’t, you will have to figure out a way to hold the card stock in place while the glue dries.
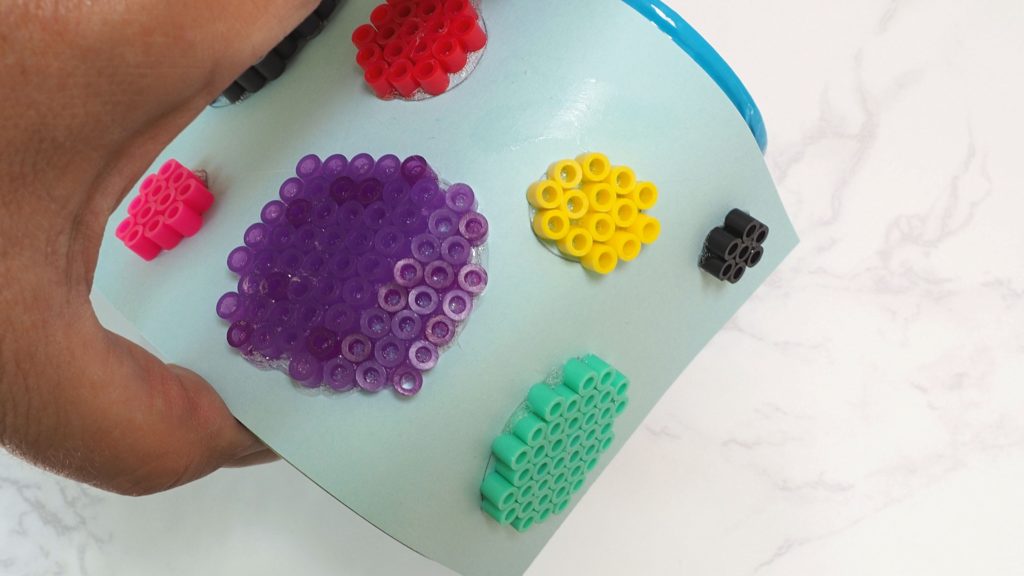
Working fairly quickly, adhere the design to the can and carefully smooth down. Use caution when smoothing the card stock down. The can gets extremely hot from the glue gun.
Set aside to dry
Once it’s dry, it’s ready to use.
Design Ideas
If you aren’t sure what you want to put on your pencil cup, here are a few ideas for you.
- “DAD” – Perfect for Father’s Day
- “MOM” – Perfect for Mother’s Day
- Hearts
- Colorful flowers
- Stripes
- Big dots
- Cross
- Emojis
- Children’s art
Don’t forget to consider the card stock color too. It is is part of the design if it doesn’t get completely covered with beads.
For a fun, useful, and entirely distinctive gift, try making a perler bead soup can pencil cup. Not only will you get a useful item, you will also be helping out the environment by keeping something out of a landfill.
Happy Crafting!
If you love working with perler beads then check out this cute earring making tutorial.